Every girl dreams of a luxurious manicure. Today this is not a problem. In any nearby beauty salon, masters will create a unique manicure design. If desired, you can create beautiful nail decor at home using gel polish and the necessary tools, which are offered in specialized stores. But in addition to the necessary materials, you must have the skills to use helium varnishes. For example, if varnish accidentally gets on the cuticle and skin, how can you remove it without disturbing the beauty of the manicure?
Removing polish residue from cuticles
Special products based on rubber and polymers
There are special products on sale that are based on rubber and polymers.
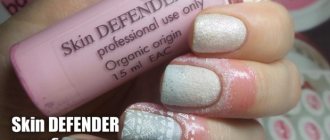
They are applied in a thin layer, and after drying they are easily removed from the skin. One of them is Skin Defender. In addition to Skin Defender, there are many other products for protecting cuticles from nail polish. How to use special cuticle protection products:
- Almost all products are sold in bottles with brushes and are easy to apply.
- Moisten the brush in the product and work on the side rollers and cuticles.
- Try to put a lot of product on the brush so that it does not tear after removal.
- When the liquid dries completely, it will turn into a film.
- After this, calmly paint your nails and let the polish dry.
- Remove the product with one continuous film.
Any young lady can get a neat manicure, even if you decide to apply shellac at home. The main thing here is endurance, perseverance, accuracy, and strict adherence to technology. Then there will be no problems with decorative nail design!
What is liquid tape for manicure used for?
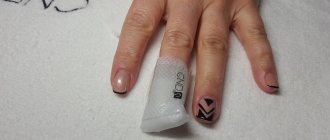
Manicure film is needed to protect the cuticle and side rollers from paint coatings during the design process. The rough component found in any polymer can cause damage to delicate and sensitive skin. Use it when performing the next technique, which involves getting material on your fingers. It is better to cover the areas close to the plate with a protective film, thereby protecting the delicate epidermis and making it easier to remove excess dye from the skin.
The tape serves as an auxiliary material for design in the following directions:
- gradient;
- marble pattern;
- any airbrush work;
- a technique that involves direct contact of the skin with varnish.
Fat cream
The most popular and used way to protect cuticles from unnecessary damage from nail polish is to use a rich cream. Thanks to the density that is inherent in it, a film that is already familiar and so necessary for protection is formed. Like Vaseline, carefully and carefully apply the cream to the surface of the skin and cuticle using a brush, removing it with a cotton swab at the end.
Keep in mind that this method will not work if you are doing an ombre manicure. It involves painting not only the nail, but also the skin nearby. In this case, you need to use special means.
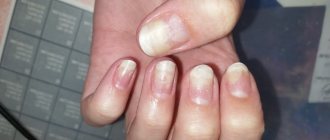
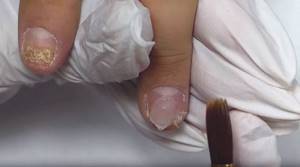
Symptoms and treatment
It is not always possible to detect a nail burn immediately. The clinical picture develops during the first three hours after exposure to nails. The victim often complains of symptoms such as:
- burning pain;
- intense itching;
- overheating of the nail;
- change in normal skin color;
- on the burned area, rashes appear in the form of small bubbles filled with exudate - an inflammatory clear liquid;
- swelling of the soft tissues around the injury.
If qualified medical assistance is not provided in time, the nail plate becomes deformed, becomes dirty yellow, and peels off from the nail bed. In advanced cases, purulent discharge appears, which can spread to nearby soft tissues.
How to treat a chemical burn to the nails
You can begin treating a burn only after consulting a specialist. Only a doctor can determine the list of drugs for drug therapy. They are aimed at eliminating the inflammatory process, eliminating the sensation of burning and itching.
They use local and systemic medications, but less often use alternative medicine. The doctor prescribes several groups of drugs to the patient at once:
- The wound is washed and disinfected with antiseptics
- Antibacterials suppress the development of pathogenic microflora (Tetracycline, Erythromycin, Levomycetin);
- Wound healing agents accelerate the process of regeneration of skin cells, eliminate itching and inflammation (Panthenol, Dexpanthenol, Olazol-gel);
- Antihistamines relieve swelling, relieve itching and burning (Suprastin, Fenistil).
However, if a purulent infection develops or if the lesion is deep, surgical intervention is required.
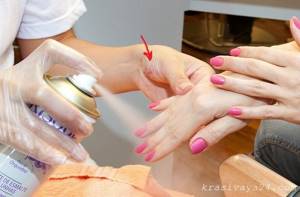
Treatment of a burn from a nail extension lamp
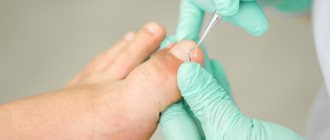
If you have already suffered and received a burn during a manicure after a procedure in a UV or LED lamp for drying nails, then you need to begin procedures to restore your health as quickly as possible. Treatment of a burn to the nail plate is carried out strictly according to the following scheme:
- Treatment and washing of the injured area in an antiseptic solution (chlorhexidine, miramistin).
- Applying a medicinal wound-healing ointment to the surface to start the process of skin cell regeneration. The most effective is Solcoseryl, which is recommended to be used at least 2 times a day.
- Antihistamines relieve itching and burning pain. The drug can be used in the form of tablets (Suprastin) or gel (Fenistil), which are also used twice a day.
A burn to the nail plate may be accompanied by detachment of the nail from the nail bed. This disease is called onycholysis and requires qualified treatment. Depending on the severity of the disease, the patient may be offered nail removal or partial filing of the exfoliated part with subsequent restoration.
Attention! Self-removal of the nail is prohibited due to the risk of complications.
During the upcoming long treatment period (on average 3-4 months), the patient needs to regularly clean the wound and prevent it from getting dirty.
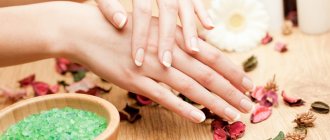
Nail restoration after manicure
To preserve the beauty and health of your hands and nails for a long time, cosmetologists recommend doing regular procedures and not applying decorative coatings. The recovery period lasts several weeks and in order to spend them with maximum benefit, you need to reconsider your diet.
Food must contain the required amount of vitamins, macro- and microelements, and minerals. In addition to fatty fish, eggs, cheese, cottage cheese and kefir, a special vitamin complex enriched with iron, zinc and calcium should be included in the daily diet.
If the nail plate is weak and brittle, then it is shortened at the root, and the surface is polished to remove any remaining varnish and seal the cracks. It is allowed to apply products to strengthen the plate, moisturizing oils to increase the elasticity of the cuticle, and it is better to refrain from using aggressive household chemicals or work with rubber gloves.
Use of traditional medicine
Recipes for alternative medicine are experience acquired over many centuries and proven to be effective. Although it is impossible to cure the injury in this way, the victim can significantly improve the condition.
The most popular methods are:
- Gelatin bath based on edible gelatin. The microelements included in the composition strengthen the nail and prevent its fragility and delamination. The hand is placed in a container with the solution for half an hour.
- Baths prepared with medicinal herbal decoctions serve as an antiseptic and prevent the spread of pathogenic microflora. The most effective are chamomile, sage, oak bark, string, calendula, and nettle.
- Wrapping in paraffin will help strengthen the plate and solder the tips of the nail, preventing delamination. You can use special cosmetic paraffin or a regular candle. They are melted to a liquid state, and after cooling to a comfortable temperature, they are dipped into the fingers.
- Sea buckthorn is used as a wound healing agent. In this case, you can use both fresh berries and ready-made syrup.
What is the name of the manicure around the nail?
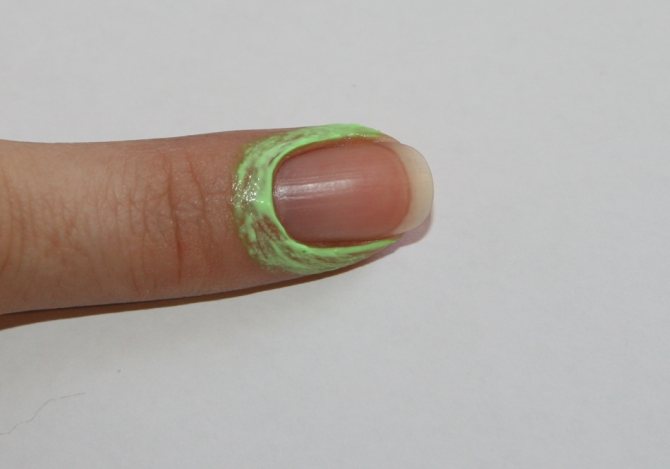
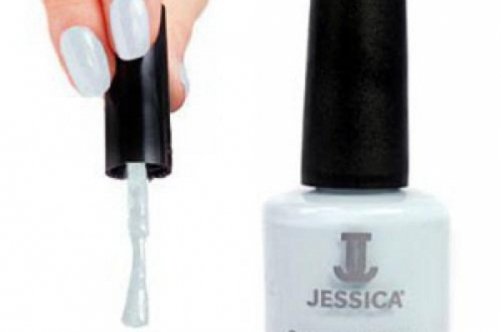
Nowadays, cosmetic companies produce many interesting products to improve the work of nail technicians. One of the breakthroughs can be considered Skin Defender. This is a rubber based liquid. It is natural and dries quickly. After drying, a thin film remains on the nail, which comes off with the remaining varnish.
We suggest you familiarize yourself with How you can eliminate the smell of urine
Instructions for using Skin Defender:
- Prepare the nail plate for painting
- Apply the product to the nail using a brush. It is necessary that the liquid does not get on the nail
- After the first layer has dried, apply the second. Paint your nails with your base color. Using a sponge, apply transitions from one color to another
- After drying, coat your nails with a sealer.
- Remove the film from the nail
What is applied around the nail before painting?
There are several options for protecting your skin from staining with varnishes and paints. Some girls cover the side rollers with tape, but this is ineffective in the summer heat and when performing a water manicure. When exposed to moisture, the tape comes off.
Skin protection options:
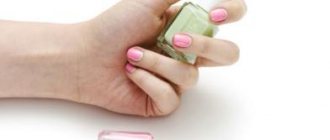
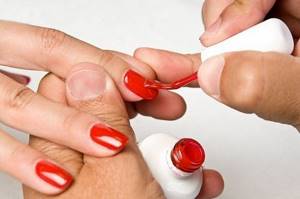
- PVA glue. This is the simplest and most inexpensive option for protecting leather from varnish. It is necessary to apply a small amount of the product to the side rollers and cuticles and allow to dry. You must be careful not to let the glue get on the nail plate. After drying and painting the nail, the dried glue is easily removed in the form of a film. The disadvantage of glue is that it is liquid and the film breaks when it is torn off.
- Fat cream. Simply apply the product with a cotton swab to the areas that need to be protected from varnish. After a manicure, you must wash your hands with soap. The remaining varnish will be washed off along with the cream. The cream is useless when dyeing in the ombre style, since a lot of varnish can get on the skin, which is difficult to remove
- Petrolatum. It works like a rich cream. It covers the skin with a film that is easily removed from the nails. Must be applied in a thick layer. Maybe the varnish got on the skin when painting the gradient
- Special products based on rubber and polymers. They are applied in a thin layer, and after drying they are easily removed from the skin.
What to apply around the nail before painting
How to use a cuticle protector for shellac, water-based, gradient and ombre manicures?
In addition to Skin Defender, there are many other products for protecting cuticles from varnish. Here is the list:
- Dance legend Pure manicure. This is a cheap replacement for Skin Defender. The smell of the product is stronger and the color is different. But its effectiveness is not inferior to the most famous remedy. Sold in a bottle like regular nail polish with a bristle brush.
- Kasako Docai. This is a liquid of Korean origin that is white in color and very similar to PVA glue. Easy to apply and has a convenient applicator. It takes a very long time to dry, but is much cheaper than Skin Defender. Fulfills its purpose and is removed from the nail in a single strip
- El Corazon. This is also an inexpensive analogue. Available in pink and blue. It is not clear what is in the product, it smells like some kind of solvent. The price is low and much lower than Skin Defender. Fulfills its purpose, can be used for applying stepping and coloring in ombre style
How to use cuticle protectors:
- Almost all products are sold in bottles with brushes and apply well
- It is necessary to moisten the brush in the product and treat the side rollers and cuticle with it.
- Allow the substance to dry and turn into a thin film. Try to put a lot of product on the brush so that it does not tear after removal
- After this, paint your nails in the desired way and let the polish dry.
- Remove the product with one continuous film
As you can see, after dyeing ombre or stamping, it is not necessary to rub off traces of varnish for several minutes with a stick dipped in acetone. It is enough to use a special product, this will significantly reduce the time for a manicure.
How and with what does a manicurist treat allergies?
First of all, you need to understand what exactly you are allergic to. After taking tests and identifying the allergen, during treatment and subsequently, it is necessary to avoid it (if it is animal hair, do not contact it, if it is gel polish, do not work with the product, etc.).
If the body’s reaction manifests itself in the form of contact dermatitis, treatment involves the use of:
- Antihistamine (Loratadine, Zyrtec, Claritin, Suprastin, Zodak, Tavegil, etc.). Since this group of medications has many side effects, they should be used in courses of no more than 10 days (depending on the doctor’s prescriptions).
- Ointments “Bepanten”, “Dexpanthenol” to moisturize the skin in case of peeling; "Fenistil" to relieve symptoms (itching, swelling, hyperemia); “Radevit”, “Atopra” - to restore the affected areas.
- Depending on the indications, ointments with corticosteroids “Afloderm”, “Advantan”, “Celestoderm”.
- Vitamins A, E, B for moisturizing and speedy regeneration of the dermis.
- Antibiotic ointments to prevent further infection (for cracks), as well as antifungal drugs, for example Triderm.
If you experience symptoms of a respiratory illness:
- It is necessary to take a course of the above antihistamines.
- To relieve symptoms, you can use Vibrocil, Sanorin-Analergin, Allergodil drops, but not more than 7 days.
In both cases, doctors recommend taking enterosorbents (“Polysorb”, “Activated carbon”) in order to quickly remove the allergen from the body, as well as a strict diet (exclude nuts, chocolate, citrus fruits, pomegranates, coffee, honey and alcohol, give preference to boiled, stewed and steamed low-fat foods).
How to remove shellac?
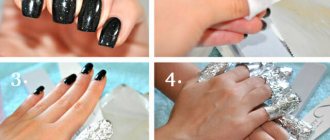
Manicurists advise removing gel polish first on the fingers of one hand, and then on the other. A hand free from the procedure may be needed, for example, to massage the nail plates. You can remove gel polish at home with a removing liquid - either regular or specially created for working with the coating. For this:
- First, take a nail file and file off the glossy layer of varnish. Apply circular movements to all nails.
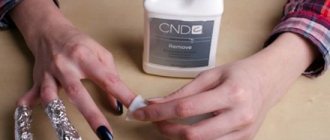
- We will need several cotton pads. Cut a cotton pad into quarters, soak it in shellac remover and wrap it around your finger.
- Each finger is wrapped in foil on top.
- Leave your hands like this for 15 minutes.
Important! If you use regular acetone-based nail polish remover, it may take longer.
- Remove the foil caps from your fingers and use a wooden stick to carefully pry off the coating. It should peel off.
- Shellac sometimes remains in the folds of the skin, so the cuticles need to be thoroughly cleaned.
If you don’t have foil on hand and need to remove the coating, you can do without it. To do this, you should stock up on cotton pads, an orange stick, and liquid with acetone:
- Gently file the top layer with a nail file, but do not press too hard on the nail plate.
- Cut a cotton pad into 2 parts, soak it in shellac remover and divide it into two halves. Wrap each of these halves around the nail plate.
- Leave for at least 15 minutes, then remove the remaining cotton pad and pry off the coating with a wooden stick.
- If you are unable to completely remove the coating the first time, repeat the procedure.
We suggest you familiarize yourself with How to clean an electric hob
Important! To avoid damaging the skin around the nail, it is recommended to lubricate it with cuticle oil before the procedure. Also, if you had to go through multiple rounds to get rid of the shellac, you might want to let your nails rest for a few days before applying gel polish to them again.
How to strengthen your nail after removing the coating
In any case, no matter how great the quality of the gel polish, your nails need to undergo SPA treatments in between coats.
- Make regular therapeutic salt baths for nails, and then massage with vitamins E and A. Mix them in equal quantities and rub into the nail plate.
- Rub a special fortified wax into the nail plate every day, which will fill all the cracks and dimples. After 3-4 sessions, you can forget about problems such as fragility and delamination.
- Prepare castor lotion. To do this, dissolve 3 capsules of vitamin E in 1 teaspoon of castor oil and add 5 drops of eucalyptus or tea tree oil. Rub this mixture with cotton pads every day at night into the nail plate and cuticle, allowing it to be completely absorbed. This lotion will have a restorative and anti-inflammatory effect.
Such procedures will make your nails more well-groomed and smooth.
- We recommend on the topic: how to care for your hands so that your skin remains young.
- How to use gelatin for brittle and peeling nails at home: recipes.
- How to choose a suitable manicure - important nuances.
PVA glue
It would seem a very dubious method, but effective. Using a small brush, apply glue to the skin and cuticle. You need to be careful so that the glue does not leak under the nail. When the glue is exposed to air, it turns into a film that envelops the skin and does not allow the varnish to pass through. Material that gets onto the protective film can be removed using a cotton pad moistened with water.
The method is perfect for manicures done at home. It is accessible, convenient and does not require additional financial expenses.
Features of working with gel polish
Gel polish is a fashion trend of the last few seasons. Its advantage is that having all the necessary tools and equipment, you can do a manicure yourself, without wasting time and money on going to a salon. For many, this has become additional income. But in addition to desire and equipment, you also need to have special skills that will help you do everything perfectly.
There are methods that will help you get a perfect manicure without staining your skin and cuticles:
- apply Vaseline;
- we use PVA;
- apply rich cream;
- We use special means.
There is another method - sticking tape, but it is ineffective and will not be of any use. Let's look at them all in turn.
Reasons why gel polish runs dry
- Poorly performed cuticle processing, in particular, the pterygium was not completely removed
I think you already know that the beauty and ease of applying gel polish is largely determined by the pre-treatment of your nails. To apply gel polish as close to the cuticle as possible without streaking, you need to not only cut the cuticle evenly, but also lift it and clean the space underneath it.
Pterygium is a thin weave that fits quite tightly to the nail, so removing it is not always easy. The most convenient way to clean a pterygium is with a device, but when performing a classic or European manicure, this is a little more complicated.
- Remains of dust under the skin.
Usually, dust remains under the skin after processing the cuticle and pterygium using cutters during hardware manicure. It is removed by degreasing the nail plate. Therefore, to prevent it from remaining, do not forget to lift the skin at the cuticle and apply a degreaser there too.
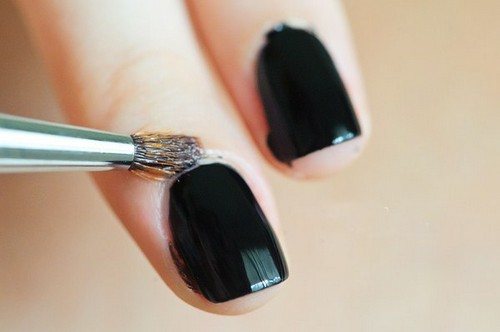
- The brush is placed incorrectly at the cuticle
If you take a well-saturated brush from a bottle directly to the cuticle, you will inevitably get streaks. Start applying the gel polish, stepping back slightly so that most of the material remains on the nail, and a semi-dry brush approaches the cuticle.
In addition, with the first layer, it is better not to immediately try to apply gel polish under the cuticle - it is better to do this already on the second layer, or use a thin brush for this.
If you paint under the cuticle with a brush from a bottle, you need to press it so that it lies like a fan against the cuticle, and then push the gel polish as close to the cuticle as possible.
- Gel polish is too liquid
It will also be difficult to apply without streaking the skin. In this case, I can recommend making the layer thinner and applying it with an almost dry brush. The number of layers, of course, will have to be made more.
Special protective equipment
Along with the advent of this type of manicure, gel polish, special products appeared that will help protect the cuticle. They have proven themselves well and are used by all manicure professionals. Their advantages are as follows.
- The composition contains natural rubber and the absence of harmful components.
- They smell nice. Their formula includes essential oils that have a positive effect on the skin.
- Dries quickly.
- The container is small in size and will fit anywhere.
- A small and neat brush ensures easy application and integrity of the nail surface.
- They have a long shelf life at low cost.
Orange wood stick
Such sticks can be purchased at a store that sells manicure products. This stick's job is usually to work on the cuticles, but it can also help when removing excess polish from the skin around the nail. To do this, moisten the sharp edge of the stick in nail polish remover, then dip the excess with a cotton swab and carefully move the stick over those areas of the skin where the polish was carelessly applied.
Important! If the varnish is reluctant to give up its position, then press the stick in this area for a short time and repeat the attempt to remove it.
Applying a brush
We take the most ordinary brush of medium or small size.
The procedure is simple and straightforward:
- take the emulsion to remove varnish, dip a brush into it;
- We clean, as in the previous methods, until completely wiped.
Choose for yourself the most convenient and suitable way to remove unwanted product from your nails, or even better, use the protection methods given above. Experiment, be original, then your manicure will be your pride and highlight.
To learn how to carefully paint your nails with gel polish, see below.
We suggest you read How to freeze eggplants for the winter in the freezer
Hygienic care of manicure cutters according to salon rules
No matter how careful the manicure is, skin particles, nail dust, and grease remain on the instruments. This is an excellent breeding ground for bacteria and spores of causative agents of dermatological diseases. The longer dirty instruments are stored, the more luxuriantly the “infectious bouquet” blooms. This is why treatment of cutters is necessary immediately after a manicure.
Sanitary standards 2.1.2.1199-03 (approved by the Ministry of Health) allow the use of rotating and cutting instruments in salons after four-stage treatment according to the viral hepatitis regime. The process includes:
- treatment of cutters from biological dirt;
- disinfection;
- pre-sterilization cleansing;
- sterilization
After this, the cutters are sealed until next use. This is the order that salon masters follow. You should also adhere to it at home, especially if several people use the manicure set.
Using warm water
- Apply nail polish. Take your favorite nail polish and apply a base coat, color coat, and top coat. As a general rule, it is best to apply two coats of color. Inspect the bottle to see how many coats are recommended.
Let your nails dry completely. Allow the polish to dry before removing any nail polish that gets on your fingers. Otherwise, you will only smear the color layer on your nails.
Get your hands wet. Fill the sink with warm, soapy water. Use moisturizing soap to soften your hands. Once your nails are completely dry, place your fingers in the sink. Soak them in water for about 2-3 minutes. It doesn't matter whether you dangle them in the water or leave them motionless.
- If you applied water-based polish, soak your fingers for 5 minutes or more to allow the color layer to release from your nails.
If you don't have time to soak your nails, you can easily do this in the shower.
- Dry your nails gently. Take the cotton wool in your other hand and gently wipe the polish off the skin. If the polish is difficult to remove, try soaking your fingers for another minute and try again. After removing all the polish around your nails, dry your hands. If necessary, add another top coat to give the polish extra shine.
Using Elmer's glue
Prepare everything you need. Elmer's glue is best, but white PVA glue will work. In addition to glue, you will also need a brush and nail polish. You also need a small paper saucer or something to pour the glue into.
Not everyone knows how to use gel nail polish!
Even now, not everyone knows what gel nail polish is and how to handle it correctly, although it appeared quite a long time ago. How to use gel polish so as not to harm your body?
Gel polish is used for both manicure and pedicure, for a single-color coating and for gel designs. How to use this miracle product correctly in order to fully experience all the ease of use?
Regardless of the date of manufacture, gel nail polish
Before each use it is necessary to mix with a spatula.
By applying one coat of gel polish, you can get a translucent finish and pastel colors, and by applying two coats, you can get a full, rich, opaque color. To use directly on the nail plate, it is advisable to take the materials in this order - first, a means for degreasing the nail plate and removing all types of moisture, then a primer or base for better contact of the gel polish material with the nail plate, and after all this, the gel polish itself to set the shine and final coat. High-quality materials do not require removal of residual stickiness and additional sawdust. In general, a natural nail and the methods of preparing it for the effects of gel polish are completely no different from preparing for artificial nail extensions. Apply a little primer gel to the prepared surface of the natural nail. The nail plate should become matte. If there is too much primer gel, this will most likely cause the gel polish to peel off later. Too much primer if after drying the nail is still shiny or worse, looks wet. Excess drug should be removed using a foam sponge. But there is no need to remove the dispersion layer after polymerization of the nail in a UV device. When gel polish needs to be applied over existing acrylic nails, a layer of strengthening gel before the procedure will also not be amiss. Using a thin brush to work with gel polish, apply it in a thin layer over the dispersion layer of gel primer. You need to be especially careful when applying the gel polish near the cuticle, and you should also cover the end of the edge of the nail. Gel that gets on the cuticle or loose skin around the nail will inevitably lead to rapid peeling of the artificial coating from the nail plate. You can remove excess gel from the surface of the cuticle or skin near the nail by using a special cuticle pusher. For better performance of the work, you should adhere to the following algorithm of actions - it is better to start work with the little finger of your right hand. While the little finger of the right hand is in the UV apparatus, the little finger on the left hand is processed, and the hands in the UV apparatus are swapped. By continuing to alternate application and polymerization, you can apply gel polish to all fingers much faster. This procedure also prevents the gel polish from flowing onto the cuticle and periungual area. This procedure is recommended by experienced craftsmen for those who are just starting to think about how to use gel polish
most accurately. Then a thin layer of a special ultra-fixing gel is applied to the nail. The thickness of the ultra-fixing gel along the edges of the nail and in the cuticle area should be minimal. Also, do not forget about sealing the nail with ultra-fixing gel by applying it to the sides and end of the free part of the nail. This will give the nail protection from mechanical stress. To fix the ultra-fixing layer, the hand is left in the UV device for one minute. It is best to remove excess gel from the cuticle and skin around the nail using a special cuticle pusher. In order to remove the sticky dispersion layer, it is best to use a foam sponge and special preparations for cleaning gel polish.
One foam sponge should not be used on more than three nails, otherwise the nail may become dull when dry. If all proportions and recommendations are followed correctly, the coating on all nails should be smooth and shiny.
Shellac - pros and cons
First, let's look at the advantages of shellac:
- Allows you to grow your nails. Shellac is perfect for those with any nails, whether long or short. It solves several main problems at once: if your nails are thin and brittle, it strengthens them and makes it possible to grow them. After all, the nail under the coating does not delaminate or crack.
- Stays on nails for a long time. Shellac cannot be removed without special products, which means it is not afraid of household chemicals. You can safely wash dishes, cook and do other household chores without any damage to your nails. This varnish lasts up to 3 weeks.
- Gives a bright glossy shine. Shellac gives incredible shine to nails that does not fade over time.
- Pleases with the variety of palette. Today, many colors have been developed - from classic pink tones to bright, rich shades. The palette is constantly updated with fashionable seasonal colors.
- Shellac is harmless. Shellac does not contain dangerous substances such as formaldehyde. This means that pregnant girls can also get a shellac manicure. It will not cause harm to health, since gentle substances are used in its production. In this case, if desired, the coating can be removed independently.
Its disadvantages include:
- High price. Shellac is an expensive procedure, sometimes the cost is equal to standard extensions. In addition, such a coating also needs correction, which is quite expensive. If your nails grow quickly, then you will have to resort to correction quite often; it is unlikely that you can do it at home.
- Nail diseases. In appearance, the coating seems durable, however, it is susceptible to temperature conflicts. Our nail expands under the influence of heat and moisture, then contracts again, taking on a natural shape. Such deformation of the nail plate can cause invisible microcracks in the coating, through which dirt and water can get under the shellac layer, and these are excellent conditions for the growth of bacteria. As a result, we may end up with nail fungus or some other disease.
Do you always need to remove the sticky layer from the base?
The sticky layer from the base should always be removed for several reasons:
It makes it difficult to apply the flower bed evenly. The brush clings to the surface and gets stuck in one place. The gel polish clumps up in some areas, while in others it is impossible to paint over the nail with it. All this leads to uneven coverage.
It’s impossible to get the perfect highlight or control the thickness of the material. And this leads not only to detachment, but also to deformation of the nail plates, increasing the likelihood of breakage. For the same reasons, you need to remove the sticky layer before applying topcoat. This is the final part of the coating. The problems with a finish applied to a sticky layer will be the same, only they will be even more noticeable.
- It may cause material conflict. Often they use the base of one company, the flower bed from another manufacturer, and the finish from a third. The dispersion layer between them is an extra “gasket”. If the polymerized surfaces are neutral in relation to each other, then stickiness can cause rejection. And the coating will quickly fall off entirely or begin to peel off in pieces.
- It will prevent some types of decor from being fixed well. It is a myth that stickiness helps stickers and sliders stick. After all, after applying to the nail, they need to be smoothed with an orange stick so that there are no air gaps between the film and the base. Otherwise, the coating will not last long, because emptiness is a detachment.
And if the slider or foil tape were placed poorly, smoothing them out on a sticky surface will be problematic. The first is a thin film. And it will simply tear, after which everything will have to be redone. The same problem will occur with foil strips.
It will attract all the debris, invisible specks of dust, etc. Sometimes nails are covered only with a base, for example, camouflage or to level, shine, and give them thickness. The flower bed is not used, but a finishing agent is required. But it won’t be possible to apply it beautifully and efficiently to the sticky surface of the base.
Watch the video about what the sticky layer is for:
The sticky or dispersive layer of gel polish is what remains on the coating after polymerization. It can be easily detected by touching the surface of the painted nail with the pad of your finger. The leather will stick slightly and you can see the imprint on the coating. The sticky layer has no special purpose. It’s just that the composition of gel polishes and some bases and tops is such that, as a result of exposure to ultraviolet radiation, they harden, and an adhesive substance appears on top.
You can leave it only if you use transfer foil. The decor will be more clearly imprinted on the nail plate if its surface is sticky. But high-quality foil also adheres well to a smooth nail after removing the dispersion layer. To secure rhinestones and elements made of gel plasticine, the latter does not play any role; such stickiness is not enough. Volumetric decor must be planted on a damp base or special glue.