Products for protecting skin from varnish during manicure. Their use and removal.
A beautiful manicure is the key to a girl’s good mood. There are quite a lot of techniques for performing it, so even experienced ladies who practice home manicure sometimes face the need to wipe off excess varnish from the skin of their fingers and cuticles.
If you notice any nail polish outside the nail plate and manage to immediately remove it with a cotton swab dipped in acetone, then beauty on your fingers is guaranteed. And if not, you will have to scrub it for a long time.
Salon professionals know a number of ways to prevent such inconvenience.
Let's consider these methods in more detail.
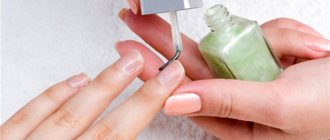
What do you cover your fingers with to protect them from nail polish during manicure? What is the name of the product?
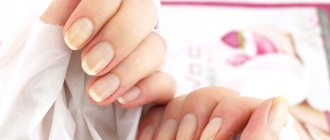
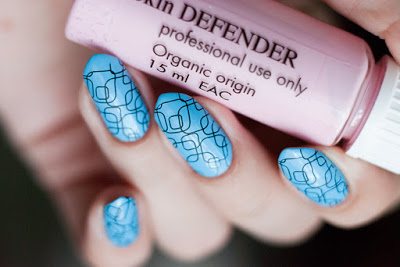
Defender in the girl's hands and on her fingers after applying varnish
Among the means to protect the skin around the nail plates and the fingers themselves during manicure are:
- scotch
- PVA glue
- rich hand or face cream
- petrolatum
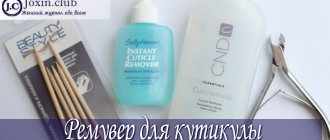
- cuticle softener
- liquid tape, or liquid latex
- protective liquid
- Skin Defender
If the first four can safely be attributed to improvised means for home manicure, then the last three are definitely for professionals.
You will find Skin Defender in a pink bottle with a special brush. However, there are also ordinary ones - white ones with the usual brush, as for applying varnish.
The liquid tape has a pleasant mint color. The brush in the bottle is identical to the varnish brush.
Each of the listed products has proven itself well for specific types of manicure.
Special means
Cosmetics manufacturers regularly release new products to ensure that performing various cosmetic procedures at home becomes as high-quality as in specialized salons. Professional manicure at home is becoming increasingly popular, so manufacturers are striving to provide women with the opportunity to fully perform it. In addition to the well-known gel polishes, shellac and other products, you can also purchase a special product that will protect the cuticle from varnish. The difference between these products and non-professional drugs is their convenient application and trouble-free removal from the skin.
Composition and benefits
Special cuticle protection products contain natural ingredients that have a beneficial effect on the skin. They not only protect it from varnish, but also soften, disinfect and restore. The composition of the drugs may differ depending on the manufacturer that produces them. But at the heart of all means are:
- rubber;
- oils;
- iron oxide.
The product has many advantages and is suitable for professional manicure.
- Has a pleasant aroma.
- Dries quickly.
- Has antiseptic and regenerating properties.
There is no doubt that such drugs differ from traditional methods. For example, creams and Vaseline are unable to fully protect the cuticle, and glue has a negative effect on its condition and is difficult to remove.
Application
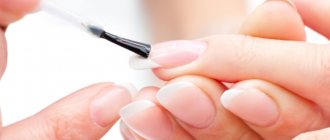
It is not difficult to use special preparations to protect the cuticle. The product is designed with ease of use in mind. It has a gel consistency which makes it easy to apply. The composition covers all necessary areas in two layers. The gel dries very quickly, which makes it possible to quickly begin manicure.
The gel comes off very easily. After drying, it forms a film that easily comes off the skin along with any excess varnish that gets on it. The skin itself looks elastic and healthy. No additional care is required after the procedure.
When choosing a product that will be used to protect the cuticle from excess polish and create the perfect manicure, you should pay attention to the composition of the product. When performing the procedure at home, despite the fact that glue gives good results, it should not be used often, since it is harmful to the skin and nail plates. As a result of frequent use of glue, nails may become unhealthy, since the glue contains aggressive substances. It is best to give preference to professional products that will take care of the quality of the manicure and the condition of the cuticle and skin around the nail plates.
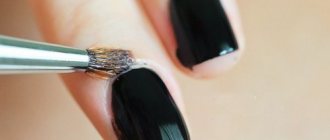
How to remove nail polish from a finger around a nail?
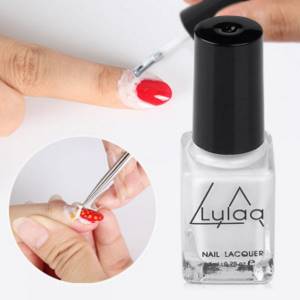
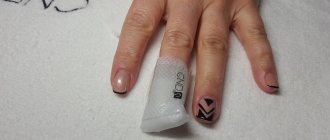
liquid tape - applied to the finger and removed after the varnish has hardened
The most convenient way is to use liquid tape, defender or PVA glue. They are removed with a film after the varnish has dried on the fingers.
- To do this, use tweezers. With one end, pry the edge of the film on the skin, press it with the other and gently pull it up and to the side. Or use a wooden stick to separate part of the dry film from the skin and pick it up with tweezers.
- The stained surface will be easily removed and leave clean skin and a beautiful edge along the nail line.
The second method is to quickly wipe off excess fresh polish with cotton wool soaked in nail polish remover.
A number of other proven methods:
- correction marker,
- a toothpick or match with a thin layer of cotton wool wrapped in it, which should be dipped in acetone before use,
- synthetic thin brush, dry cloth and nail polish remover. Dip the brush into the liquid and move it forcefully over the stained areas of the cuticle and skin ridges. Wipe the brush on a napkin, dip it in the liquid again and rub it 2-3 times over the same places without pressing.
- cuticle oil or regular sunflower oil,
- a hot shower an hour after the manicure has dried, followed by a massage of the cuticle areas and skin ridges with a terry towel
- washing hands with soap and then moisturizing the skin with cream. This way you will soften the varnish on areas of the skin and easily remove it, for example, with a towel or scraping,
- orange stick. The technique for using it is similar to using a toothpick with cotton wool. Therefore, keep nail polish remover and a napkin on hand to blot the stick before treating the stained areas.
So, we looked at a number of ways to prevent polish from spreading on the skin and cuticles during manicure procedures. We determined their effectiveness for different types of manicure.
If you are an adherent of any particular method of protecting your hands during manicure, then it’s time to try an alternative and get your experience and opinion on the ease of use.
Non-professional means
Many women use creams and ointments to achieve the perfect nail design. Creams (ointments) with a greasy consistency are best suited for protecting against varnish. This will make it easier to remove remaining varnish. Recently, girls have been giving preference to drugs such as Vaseline and glue (PVA). These options are even suitable for water design.
Cream
Using a rich cream to create a protective layer against excess varnish is very simple. You can use any face or hand cream. Moisturizers or other types of cream will not work.
No special tricks are needed to protect the skin. The cream is simply applied to the cuticle and the area around it. At the same time, the composition should not get on the nail itself, as this can ruin the entire manicure. After the manicure is completed, the cream is removed with a cotton swab.
However, this method is not suitable for performing water techniques, as well as those methods of nail design where a sponge is used.
Petrolatum
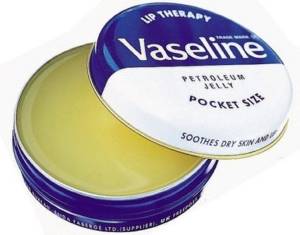
Instead of cream, you can use Vaseline. It has great protective properties, including water-repellent. The viscous and oily texture of the drug perfectly envelops the skin and cuticle around the nail, thus preventing contamination with varnish.
But the downside of this product is that the drug is easily removed from the skin when touched with a sponge or other manicure instrument. In addition, if Vaseline gets on the nail polish brush, the cosmetic product may be applied unevenly to the nail plate. Remove Vaseline in the same way as cream, using a cotton swab.
PVA glue
An extraordinary method of protecting the cuticle from varnish is the use of glue (PVA). Surprisingly, this product gives excellent results and is suitable for any type of manicure. You need to use glue carefully. Use a brush to cover all areas that need protection. In this case, you must not allow the glue to get on the plate itself. After the product is applied, you should wait for it to dry completely. Only after this they begin to do a manicure.
You can remove the glue using cotton swabs and water, but only after the manicure itself has dried.
Using PVA glue is an excellent alternative to professional products, and it is much cheaper.
The perfect cuticle design: three simple ways to create the look.
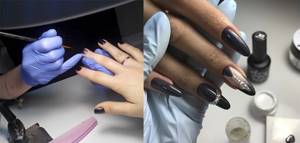
So we moved on to the most important thing - creating a finished look in gel polish using the tricks of subcuticle design. The general technique for creating a manicure in this style is as follows:
- Having prepared your nails, apply base to them as close to the cuticle as possible, but without going beyond it. And don’t forget to seal the free edge;
- Gel polish must be applied in very, very thin layers, without making any indentations, using a natural brush or a painting brush. Try to additionally slightly pull back the back of the nail with the thumb and forefinger of your free hand;
- dry the first layer for 2 minutes in a UV lamp and 30 seconds in an LED device;
- Apply a second (if necessary, then a third layer), polymerizing in a lamp for the same amount of time. Do not forget to seal each applied layer of color coating;
- Without removing the sticky layer, apply top coat. The area where the finish is applied must match the area of the colored gel polish. Drying in a UV lamp should take 3 minutes;
- Decorate the manicure with any desired decoration or painting, repeat the application of the top and, after baking in the lamp, remove the stickiness. The movements should be wiping, and the napkin with liquid to remove stickiness should move from the cuticle to the free edge.
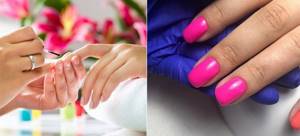
The very effect of the coating, as if by magic growing from under the nail fold, can be created in three ways.
Using a separate brush.
It is more convenient to work in this case by applying a few drops of shellac to the palette (to draw the subcuticle pocket).
And as a tool, choose a thin brush with a beveled angle from a set for Chinese nail painting. Stages of design execution:
- place the brush sideways to the nail plate as close as possible to the cuticle and paint the semicircle and the area of the side ridges with several strokes of equal thickness, pulling the skin with your finger;
- dry the contour in the lamp and re-apply the gel polish to the previously dried strokes;
- Having drawn a kind of frame (translucent hole), use a brush from the gel polish itself to paint the central area of the nail with thin, smooth strokes;
- try not to create overlapping layers. If they accidentally formed, and you noticed it after drying in the lamp, lightly buff the edges of the color coating, smoothing out the transitions. The top will help you completely eliminate visual flaws.
Using the original gel polish brush.
Just like the first method, this option also requires concentration and accuracy.
As a rule, beginners begin to master the rather complex subcuticular technique from here. Image creation steps:
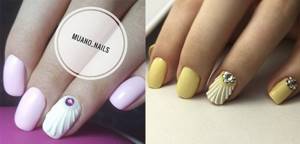
- Having collected a little gel polish on the nail, place the brush at an angle of 45 degrees to the nail (lift the back roller and pull it with your finger);
- Using the pointed corner of the brush, make a stroke in a semicircle, spreading the brush like a fan. Repeat the same application on the other side of the nail;
- usually the central zone of the nail is already relatively evenly painted. However, to be sure, apply a few strokes to even out the color. If you need to remove over-applied coating, increase the angle of movement of the brush on the nail. For a more dense application of color, try to hold the brush almost lying on the nail.

Mechanical (tactile) method.
Creating an image in this way is convenient only if you (or the client) have sufficiently flexible periungual skin (elastic, mobile, moisturized and well-groomed). Otherwise, your hands will quickly get tired of constantly controlling the cuticle and back roller. Due to the labor-intensive and elaborate nature of the work, this method is most often used by experienced craftsmen. And they paint the nail with the original brush, from the gel polish. Involuntary flaws are corrected with a dry hair brush. Essentially, with this subcuticle technique, you are using a second coating method. The only difference is that you push back the cuticle more than once, at the very beginning (before applying strokes), but accompany each brush stroke by constantly pushing back the overhanging skin. Thanks to this, although the manicure takes longer, it is performed more carefully and efficiently. The manicure turns out to be the most expressive and looks fresh and tidy for longer.
The best oils for nail care
Products for softening cuticles and stimulating nail growth are used in regular care and maintain the well-groomed appearance of the gel coating. By applying them regularly, you will soon forget about hangnails and the need to use nail clippers, as the softened cuticle will become completely invisible.
MBR Biochange Cell Power Nail Oil
5.0
★★★★★
editorial assessment
100%
buyers recommend this product
Premium nail care from the German brand MBR will get rid of hangnails, rough cuticles and brittle plates. The product packaging is equipped with a thin spout for precise distribution along the periungual fold. The oil has a rich and dense texture that is quickly absorbed and instantly softens dry skin.
The product contains: almond, avocado, argan and macadamia oils, as well as vitamin E. This formula intensively nourishes, smoothes, and moisturizes the cuticle and nails. By using Biochange Cell daily, you will soon get rid of hangnails and be able to grow long and strong nails.
Advantages:
- Rich natural composition;
- Convenient packaging format;
- Gives a well-groomed appearance to the cuticle;
- Strengthens and stimulates nail growth;
- Gets rid of hangnails;
- Quickly absorbed.
Flaws:
- High cost - almost 4 thousand.
MBR manicure oil is an expensive pleasure that will be appreciated by women who spare no expense on quality personal care.
OPI ProSpa Nail & Cuticle Oil
5.0
★★★★★
editorial assessment
100%
buyers recommend this product
OPI SPA oil will provide comprehensive nail and cuticle care. The product contains a combination of oil extracts of grapes, avocado, sesame, sunflower, as well as lecithin and vitamins A, E, B and D. These components nourish, soften, strengthen the nail matrix and cuticle, and prevent the formation of hangnails.
Thanks to its non-greasy texture, the oil is quickly absorbed, stimulating the growth of healthy and strong nails. Nail & Cuticle Oil has earned the best reviews from manicurists and ordinary girls, who claim that it allows you to maintain the cuticle in good condition and prevents the plate from delaminating.
Advantages:
- Non-greasy, quickly absorbing texture;
- Convenient brush included;
- Softens the cuticle;
- Gives a glossy shine to nails;
- Stimulates plate growth;
- Good composition.
Flaws:
- High price (about 1200 rubles for 15 ml).
OPI oil is especially recommended for the care of rough and dry cuticles, as well as thin and brittle nails.
Seche Condition Keratin Infused Cuticle Oil
4.9
★★★★★
editorial assessment
98%
buyers recommend this product
Almond scented oil will give your manicure a perfect look. Thanks to the convenient brush and weightless texture, the product spreads easily over the skin and plate and is quickly absorbed.
The product contains: keratin, vitamin E, jojoba and almond oils. This cocktail perfectly softens, moisturizes, eliminates roughness, and also gives the nails smoothness and a glossy shine.
Keratin Infused will keep your manicure looking well-groomed even in frosty weather, and also quickly neutralizes cuticle dryness after contact with cleaning agents.
Advantages:
- Good composition;
- Quickly absorbed;
- Pleasant aroma;
- Cost-effective;
- Complex caring effect.
Flaws:
- Hard to find on sale.
Oil from Seche Condition is a godsend for girls who cannot grow their nails because they are brittle, because the keratin in its composition thickens the structure and returns it to a uniform texture.
READ ALSO
18 Best Nail Polishes
