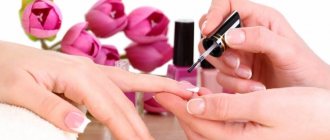
Nail plate straightening is the most popular salon service today. It exists not only to give a beautiful look to natural nails, but also to correct deformations of the nail plate. The procedure itself cannot be called complicated. However, in order to get the desired effect, it is necessary to correctly assess the initial condition of the nails. Depending on the type of deformation, one or another alignment technique is used.
There are three types of most common deformities that can be visually corrected by alignment:
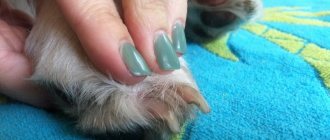
Onychogryphosis nails. Onychogryphosis, pecking or downward growing nails are a common deformity in which the free edge of the nail bends downward, resembling the claw of a bird of prey.
Springboard nails. With such a deformation, the growth zone of the nails is directed upward. The free edge also faces upward, making the nails visually resemble a springboard.
Injured nails. These are nails that have been sawed or injured as a result of mechanical damage, and have uneven surfaces. Most often, these irregularities are the result of an unprofessional manicure, when strong pressure with a pusher or an orange stick on the nail leaves transverse grooves, dents and pits on it.
In the case of springboard-shaped and onychogryphosis nails, it is more advisable to consult a specialist. Correcting such deformations without sufficient experience is difficult, whereas a master can do it quickly and efficiently. If you have flat or mechanically damaged nails, you can easily straighten them yourself.
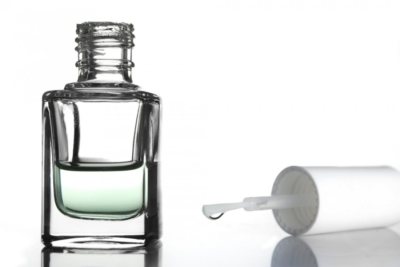
There are two ways to give a perfectly smooth, convex surface to the nail plate: using a rubber base for gel polish or using a regular liquid base and acrylic powder.
What is nail plate alignment?
Each of us has a different nail structure. Lucky are those girls whose hair is perfectly even and smooth. But some young ladies have a hypersensitive plate (irregularities, detachments, tubercles). In addition to everything, during manicure, nails are often subjected to various treatments: filing, polishing, removing gel polish with a machine, etc., which also has a bad effect on the condition of the nails.
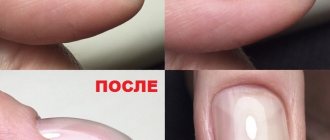
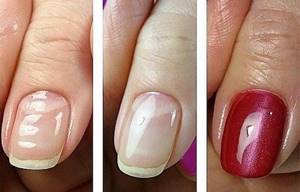
Alignment and strengthening are necessary in order to give the nail the correct architecture. It will also get rid of varnish runs, waves at the end, various bumps and dents. The first layer is a primer, it hides all the irregularities. The second layer is evenly distributed over the nail, smoothly disappearing in the area of the side ridges and cuticle, forming an ideal surface.
This procedure is simply necessary and has a number of advantages:
- Leveling strengthens the nails, and the coating lasts for several weeks before correction.
- The ability to create the correct nail architecture. When adjusted, the nail will grow in the right direction.
- Simplicity and accessibility. In order to make strengthening, you do not need to buy additional products. A simple procedure takes about 10 minutes.
- It is important to do leveling when removing the coating with a device, so that when cutting, a base layer remains. A thin layer of the product will cover and protect the nail from mechanical stress.
- Static and beautiful. The smooth surface gives beautiful and even highlights from different light sources.
Why do irregularities appear?
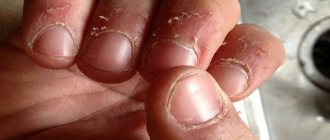
Ribbed, wavy and thin nails are always a problem. With such nails, any manicure does not look very neat. Most often we do not think about the true cause of our deplorable condition.
It is worth paying special attention to this issue, because nails are an indicator of our health. For example, if your nails are covered with a groove near the cuticle, then you should take a course of vitamins to saturate your body with useful microelements. Ribbed plates appear as a result of microtraumas, and also cause fungus, psoriasis or other problems in the body.
Leveling the nail plate with a base
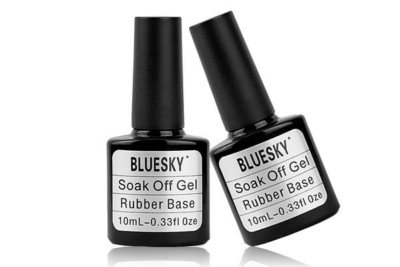
The base should be thick, it is advisable to choose a rubber one. The thicker it is, the easier it will be to strengthen the nail. More liquid products run faster to the side rollers. You need to keep an eye on this.
What bases are suitable:
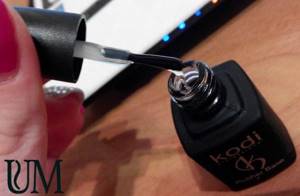
- Kodi;
- Komilfo;
- Lovely Base;
- NeoNail;
- Adore Professional.
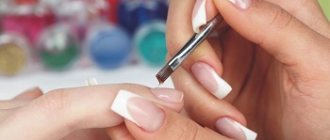
Strengthening technique:
- Prepare your nails for work.
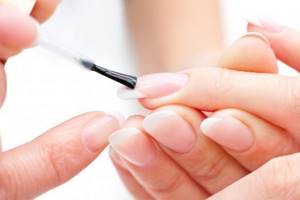
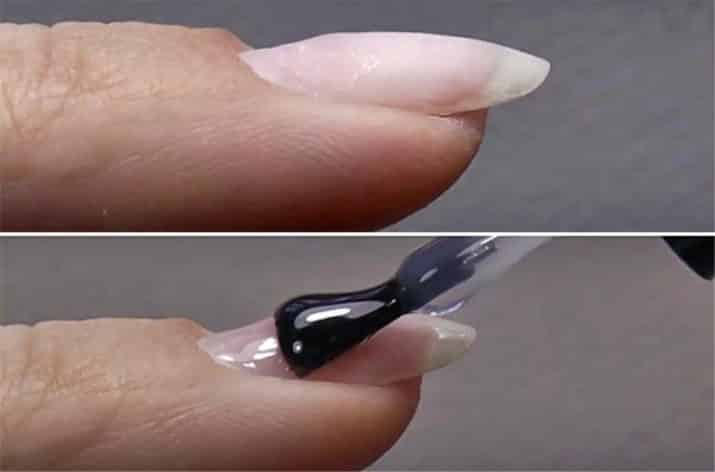
- It’s good to scoop up a drop of the desired size with a brush and apply a thin layer of base.
- Place a drop in the apex area (almost near the cuticle). Pull it to the cuticle and stretch it in 3 movements. The first is in the center, the second is on the right edge, the third is on the left edge. Don't be afraid to ruin something. The base brush is very soft, it will not be able to push through the drop, so movements can be bold.
- Use the corner of the brush to form the architecture of the nail.
- Turn the nail over, seal the end and dry thoroughly.
Video instruction: Base leveling technique
Leveling the nail plate with biogel
The choice of most girls is biogel. It has a thick consistency and dissolves well. Many manufacturers produce special biogels for thin nails. This is a real salvation for problematic nails that suffer from detachments. You need to choose a soft brush with a rounded shape and long bristles. It should practically not touch the nail. The product should stretch only due to surface tension.
Which biogels are suitable:
- Bio Stretch Gel (BSG);
- Atica TM;
- Creator;
- Yoko;
- El Corazon.
Remember that to level with biogel, you also need to apply a base.
Strengthening technique:
- Apply a thin primer layer of basic biogel using a brush to prepared, fat-free and slightly buffed nails.
- Rub the base well, especially in the area of the side rollers, under the cuticle and seal the end.
- Dry the layer. In terms of time, the biogel dries like a regular gel polish: 30 seconds in an LED lamp and 2 minutes in a regular UV lamp.
- The second leveling layer must be applied to a well-dried primer layer. Saturate the brush with material gel and scoop a drop of a suitable size onto the tip.
- Place in the center of the nail about a millimeter from the cuticle.
- Push the brush forward a little towards the cuticle.
- When the drop lies along the cuticle, pull the material down to the tip. Without pressing, distribute the biogel over the nail, not reaching the end of the free edge, so as not to touch the dispersion layer and not violate its integrity. This will distribute the material more evenly.
- It is necessary to work on the side zones. You need to stretch the material from the droplet to the tip closer to the rollers.
- Turning the nail sideways, form a longitudinal line. Using the corner of the brush, lightly grab the layer of biogel and pull it down along the nail in long, even lines.
- Near the side rollers, the thickness of the gel should be minimal.
- The result will be a small volume along the center line of the nail from the cuticle to the tip with the highest point somewhere between the center and the cuticle at about 1/3.
- Turn the finger over and seal the end.
- Dry the layer in a lamp.
Before applying a colored layer, regardless of whether you need to cover your nails with colored gel polish or gel, you need to remove the sticky layer. This is necessary so that the color layer lays down well and evenly.
C-curve nail
It is necessary to ensure that the transverse bend has a beautiful rounded shape without excess materials on the sides. This is especially true when working with liquid materials. To avoid such an error and eliminate all irregularities, you need to turn your finger nail down.
How to choose the right type of product for the job?
Leveling the nail plate is not that difficult. Here you need to take into account the specifics of the material itself and the characteristics of the nail. To strengthen the master, they use several types of bases:
- base for gel polish (rubber base);
- biogel;
- manicure gel (gel for extensions).
Only a professional manicurist will select the necessary preparations.
Any nail straightener should be thick enough. In most cases, bases and gels that are too liquid are not suitable, since they will simply flow off the nail rather than form its correct shape.
Selecting the right drug
When choosing products for work, you need to focus on two important criteria: the properties of the drug and its consistency. The properties of any manicure base include hardness and softness. The consistency varies from liquid to very thick.
Gradation:
- hard bases (Hard, Strong);
- elastic/rubber bases (Rubber, Flexy, Elastic, etc.);
- medium hard bases;
- fragile bases.
Elastic preparations can have a thick consistency, while solid ones can have different textures (both liquid and thick).
Preparations with medium hardness in texture can have medium thickness, while fragile formulas can only be liquid. In this case, hard bases do not dissolve, but require corrective cutting. The thicker the leveling agent is, the longer it will take to self-level and dry in the lamp.
The thickness of the selected consistency can be determined precisely by the self-leveling time. There are several criteria:
- liquid (up to 3 seconds);
- medium (3–5 seconds);
- thick (6–7 seconds);
- as thick as possible (8–10 seconds).
It is best for beginners to work with liquid or medium coatings, as they are quickly and easily distributed over the surface of the nail plate.
- Hard and elastic bases are used to level nails before applying gel polish. Fragile bases on long and mobile nails will instantly crack like glass, taking away the decorative coating along with it.
- Medium bases are suitable for leveling short but densely structured nails that are not subject to special stress or physical work.
To understand how the base was purchased from you, apply a drop of the drug to any dense polyethylene surface (for example, film or file), stretch the drop into a long strip (1–1.5 cm) with the thickness of a medium coating for leveling. Then fix the result in the lamp and remove the sticky layer.
When folded, such a test layer will behave differently:
- if the layer is cracked, then it is a fragile or medium-hard base;
- if the layer bends freely, bends and does not crack, then you have an elastic base;
- if the layer fits tightly and holds its shape, but does not break, then it is a solid base.
Please note that elastic bases may stretch somewhat when worn in particularly stressful areas of long nails. If this happens, then it is better to replace the elastic with a rigid base, which will be much more effective in maintaining the correct shape.
There is also a small percentage of clients whose base wears poorly. In this case, only trial and error will do:
- If the elastic one slides out, try the hard one.
- If the hard part becomes deformed or exposes defects in the plate, then additional strengthening with acrylic powder or gel extensions must be done.
The final choice of drug should also be based on the architectural features of the nail plate:
- If the nail has a curved arched shape , then too thick a composition will give extra volume and bulge to the nail. In such situations, it is better to choose more liquid formulas that will be easily distributed over the surface of the nail plate.
- If the nail is flat and straight , then it just needs additional volume, which means that a thick base will come in handy here.
Leveling the nail plate with manicure gel
An ideal option for those whose nails begin to curl unevenly as the length of the free edge grows. Using the gel, you can strengthen and correct the nail plate.
What gels are suitable:
- Cosmoprofi;
- Kodi;
- CNI;
- Irisk.
If you are leveling your nails with extension gel, it is important to remember that it does not dissolve. It just needs to be cut down.
Strengthening technique:
- Disinfect your hands and file the surface with a buff.
- Coat your feet with an acid-free primer for better adhesion.
- Using a flat brush, rub in a thin layer of gel base.
- Leave the layer to dry in a lamp for a few minutes.
- Use a brush to take a drop of manicure gel and place it in the middle of the nail.
- Push it closer to the cuticle, to the side ridges and carefully level it.
- If most often deformations occur on the free edge, then you need to pay attention to it and carefully level the gel there.
- Dry the layer in a lamp.
- Using a medium-hard file, carefully file all the irregularities of the nail: the side ridges, at the cuticle and the free edge. It is also necessary to trim the end.
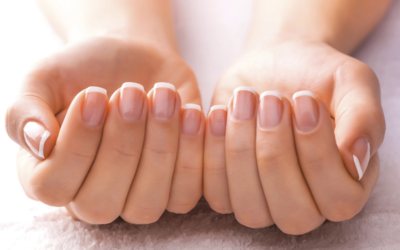
Now your nails are perfectly smooth, and the color coating will lie on them flawlessly!
Important Tips
To prevent the formation of a defect in the future, follow some recommendations.
- Use only high-quality products and bases.
- A polishing file that makes it smooth will not solve the problem, but will only make it worse.
- Take regular hand baths with added salt to strengthen your nails.
- Use oil to slow down cuticle growth, moisturize and nourish the nail.
- Take a special complex of vitamins and minerals designed for nails.
Summarizing the above, we can conclude: it is certainly worth fighting the causes of deformation of the nail plate. However, there is no need to wait until visible flaws disappear on their own. And in order to quickly hide them, you will not need any special knowledge or special equipment.
Life hack: how to make perfect highlights
After we have learned how to level the nail plate, we should learn one more secret. You won't get the perfect highlight without a round lamp. Its appearance directly depends on the light source. With a regular lamp it will be anything: square, angular or oblong. But a beautiful round glare can only be obtained from a round lamp. In its absence, forming it will be very problematic.
In order to get it, a regular round table lamp will do. After applying the strengthening, the nails can be held under a regular lamp for 20-30 seconds, and then sent to polymerize.
What is it for?
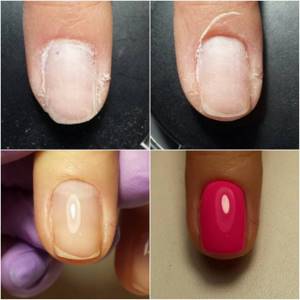
All girls want to have a neat, well-groomed manicure, regardless of whether it has decorations or not. However, imperfections on the surface of the nails can negatively affect its visual condition.
Defects on the nail plate can appear from birth or after mechanical damage to the surface. Regardless of the cause, you can level your nails with a base or gel base to smooth out the bed.
Before leveling the nail plate, pay attention to the parameters that the procedure will help correct:
- The presence of depressions and pits on the surface, which most often appear naturally;
- Lumps or waves on the nail plate are the consequences of mechanical damage;
- Corrugated structure of the marigolds, roughness on them;
- Curvature of the nail shape. Often the free tip is directed downward (pecking nail) or upward, which looks unaesthetic;
- Lack of glossy glare when applying a decorative coating. This parameter is often the main one when evaluating the work performed by a master.
Leveling the nail plate with a base or gel base is carried out immediately after roughing the nails, before applying a decorative coating and completing the design.
The main advantage of the technique is that it almost always provides a positive result, but it takes about twenty minutes, even if the girl does it herself at home. Sometimes the technology is not used on all fingers, but only locally - in problem areas, but then you need to be careful, since the additional leveling layer can be visible, causing the thickness of the manicure on the fingers to vary.