A monochromatic coating on your nails sometimes becomes boring and boring. Fashionistas are starting to look for new design ideas that could highlight their individuality and make them stand out from the crowd. In such cases, marigolds act as an artistic canvas on which you can depict whatever your heart desires. But what to do if not a single suitable idea comes to mind? Try getting a manicure with owls, because their image is popular and decorates clothes, accessories, company logos and much more.
Owl - manicure decoration
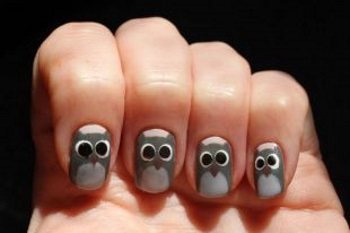
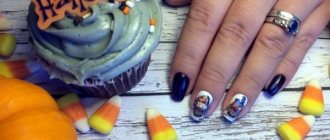
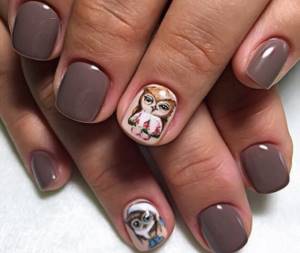
Gray manicure with owls
Owls in different cultures symbolize knowledge for a reason.
People have always considered them wise birds for their ability to notice everything that is happening around them.
And in our time, owls are considered a symbol of enlightenment.
It’s no longer possible to surprise anyone with monochromatic manicures.
Pictures on your nails help you highlight yourself and your passion for creativity.
Owls are now in trend, their images can be found on clothes and accessories, so if you are at least a little artist, then creating an owl design on your nails is your option.
Which nail to apply the image on?
A manicure with owls will look equally great on both short and long nails.
The very idea of an owl depicted on nails is already new and fresh.
- You can give it greater expressiveness by first extending your nails if yours are very short.
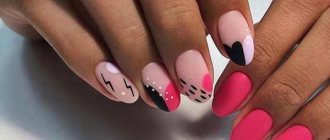
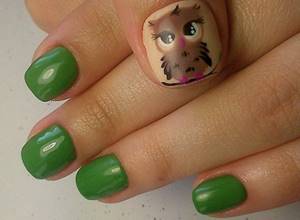
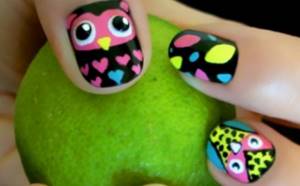
- On rectangular or oval nails, you can depict an owl on the entire plate, or even depict only an owl’s face with round eyes and a small beak in the shape of a heart or triangle.
- A few bright dots will be enough to highlight the image of an owl on your manicure. Moreover, it is not necessary to fill every nail with owls. It is enough to decorate one of them.
- If your nails are long, then you can paint an element of owl decor only on the tips.
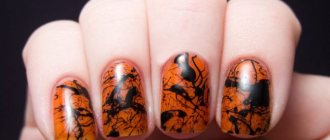
- A manicure where all the nails of one hand will be stylized to resemble a panoramic picture, such as an owl flying against a background of bare branches, will look impressive.
In this type of decor, naturalism will be important.
An example of a manicure with owls on extended nails
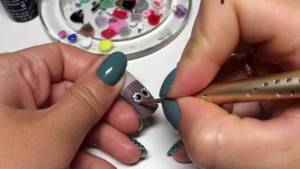
The process of creating a dotted owl drawing
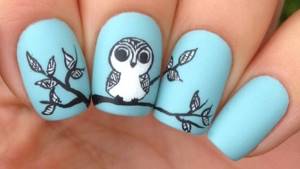
Panoramic manicure with an owl sitting on a branch
Covering nails for manicure with owls
- By giving preference to ordinary varnish , you can depict an owl quite symbolically. The only problem is that the varnishes are not so stable as to preserve the fruits of your creativity for a long time.
- Your owls will stay with you much longer if you paint them with gel polish .
- If you decide to make a design using shellac , then the huge variety of colors and shades of shellac now on sale will help you. You can draw an owl in different styles, even giving it a cartoonish look.
- Acrylic paints have other advantages: they dry quickly and do not crack. Having mastered the basic techniques of painting with acrylic paints, you will be able to create owls in different genres.
Watch a master class on creating a bright manicure with an owl:
Conclusion
We looked at the ideas of owl nail art, and also looked step by step at creating a combined manicure with different shades and textures of varnishes. Feel free to experiment using the techniques described, and the video in this article will provide more visual information.
If you have questions or opinions on the topic, write in the comments.
Did you like the article? Subscribe to our Yandex.Zen channel
Text \ Photo Victoria BOLSHOVA Posted 03/16/2018
0
share:
To favorites
To print
If you want to thank, add clarification or objection to the author - add a comment!
Currently being discussed:
- Lyubov Burkina
20.08.2018
What hair color should I choose? Please give me some advice. I don't know which one I have...
- I
19.08.2018
I had eyelash extensions for 6 months and took a break. After 3 months I increased it again...
- Vasilisa
18.08.2018
Cool hairstyle
18.08.2018
Hi, can I dye my bleached hair (currently red) bright purple...
16.08.2018
Hello! I am a dark girl with black eyes. I want to dye my hair dark...
15.08.2018
The photo shows young beauties. Can older ladies have their eyebrows done? Age...
Comments »
Decorate your owl
A completely unlimited color palette of hand-drawn owls is provided to you to depict these funny and mysterious birds on your manicure.
It all depends on the effect you would like to achieve.
After all, it is not necessary to depict this nocturnal bird in its natural brown-gray shades.
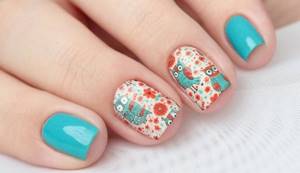
Bright owls and flowers in turquoise manicure
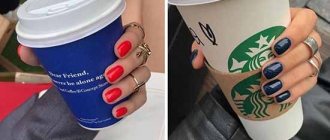
- The pink color will add infantility and dreaminess.
- Brown with black outlines will give the atmosphere of a fairy tale read in an old children's book.
- An orange-blue manicure looks especially fresh on a white background, with many small elements - real summer!
- The decor that will fill the eyes of an owl using the liquid stone technique looks very impressive on the nails.
- By decorating the owl with rhinestones and gold bouillons set on gel, you can achieve the effect of luxury and wealth. But don't indulge too much in decorating your nails, otherwise it may look tacky.
The background for drawing an owl can be either a monochromatic coating or a shade, made, for example, in the shades of the sky. The owl itself can be covered with glitter.
Ways to create nail designs with owls
So, how can you create your own owls on your nails?
- A complete drawing of an owl that will require artistic experience and realism in the image. In addition to artistic skills, you will need brushes for painting
- A schematic or stylized image , it can be created using dots and simple lines
- An owl made using the casting , which can be done on any nails, obtaining the effect of natural gold or silver
- The simplest and most effective way to create a design is to use stickers with a ready-made design; all you need to do is apply it to the nail and fix it with gel.
The advantage of this method is that the result will always look neat - You can use stamping - applying a design using a stencil, where the varnish is applied, and a stamp, with which the design is transferred to the nail
Full length owl drawing on thumb
An example of a schematic image of an owl
The video tutorial will tell you more about how to make a manicure with owls using the casting technique.
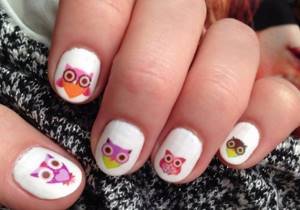
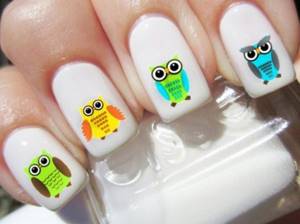
Manicure with owls using stickers
Owls on nails using stamping
We do it at home
In order for the manicure to turn out no worse than in the salon, it is very important to pay attention to the stage of preparing nails for applying varnish. To do this, you need to file them, give them the desired shape, and, if desired, remove the length. The next step is best to make a warm bath for your nails and hands. This way you will not only get a home spa treatment and rest for your hands, but also strengthen your nails.
Read also: The meaning of colors in psychology
After the bath, you should clean your nails, remove cuticles and hangnails.
And only then should you apply nail polish and draw owls on it, or use ready-made stickers, which it is very important to cover with a transparent fixative. It is best to trust detailed drawings of owls to masters in salons, who will also give you a hardware cleaning of your nails. Even if you draw a bird on one hand, you will spend twice as much time on the other, so it is best to turn to professionals for this design.
How to draw an owl yourself at home
Let's try step by step to create your own owl.
You will need a prepared manicure with a base coat of polish already applied.
Consider the option of painting an owl with acrylic paints.
- Using a brush, draw a circle and paint it, draw two ears at the top of the circle
- Using varnish of a different color, we will place two large dots, which will serve as blanks for the owl’s eyes.
- On these blanks we draw the pupils in black, use the same thin brush to detail the ears, and add a black beak triangle
- At the bottom of the picture we draw a branch on which the owl is sitting
- We cover the entire drawing with a protective layer of transparent varnish or gel.
Master class on drawing an owl on nails using dots:
How to draw monograms on nails?
Monograms are curlicues. They can decorate any manicure: both everyday and festive.
Step-by-step instructions on how to learn how to draw monograms on nails:
- Buff the glossy surface of the nail to prevent the paint from spreading.
- Apply paint onto the brush using a twisting motion. It should be elastic and thin, No. 0 or 00. If the material is not collected at the very tip of the bundle, then you need to dip it in paint again.
- Place a point and stretch the paint, slowly lifting the pile. This is the main element of the monogram.
- To make a curl, place a dot on the nail, press the brush, draw the paint, turning the bristle a little, then lift the brush and bring the tail of the monogram to a very thin line. You cannot tear off the brush while drawing the monogram.
- If an unpainted area is formed, then the movement is repeated on top of the applied layer from the very beginning, but there is no need to reapply paint to the brush.
- Dry the finished design and cover it with topcoat.
Manicure design ideas with owls
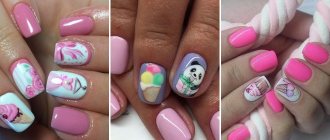
- One of the particularly impressive and expressive decors with an owl is the image of a polar beauty. The silhouette and eyes of the owl are located on the middle finger, and on all the others - its gorgeous plumage.
- A multi-colored manicure with images of owls on long nails will look original and distinctive.
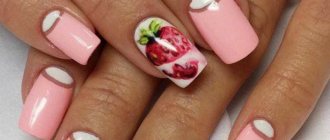
- For a universal and discreet look, a peach manicure with owls would be an excellent option. This nail design is suitable for both girls and beautiful ladies for different occasions.
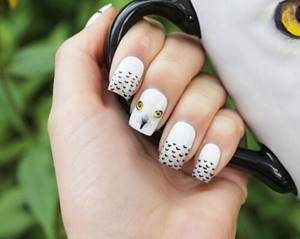
Manicure with a polar owl
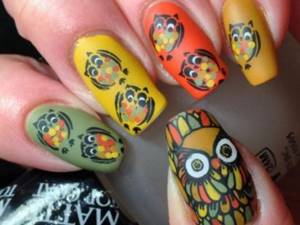
Multicolored nail designs with owls
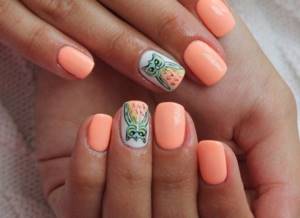
Peach manicure with owls
Peculiarities
An owl manicure is an original and cute idea that can be used to decorate any nails. Due to the small dots that are located around the birds' eyes, the owls acquire a mysterious appearance, and the sickle-shaped feathers become the main decoration in the design.
Read also: How to recognize mental problems
Most cultures believe that the owl is a symbol of wisdom. This opinion is not accidental, since these birds have excellent vision and can see everything without turning their heads. They are able to distinguish stationary objects even in pitch darkness. Many girls choose nail designs with owls on them, based on the aesthetics of the image and the meaning of the design.
When choosing a manicure with owls, you should study its features:
- This design is suitable for nails of any shape;
- wide choice of colors;
- the ability to draw any owls, from realistic birds to cartoon characters;
- owls are suitable for any look.
Useful tips
- Owls are suitable even for a business style if you make them discreet and apply them to your jacket
- A flawless manicure can be created using varnishes of bright and rich colors.
- Use dots, it will allow you to create even small elements in your drawings
- It is better to decorate only a festive manicure with rhinestones.
- Create owl drawings in the same style on different nails, which will look like not just a manicure, but a whole story
An owl on nails, made in different styles and techniques, can become your personal expression of your creative essence. You can't get bored of an owl, it's always fresh and unique.
More interesting articles:
Using a needle
The easiest way to create an unsurpassed manicure are patterns created using the most ordinary sewing needle. In order to create such a manicure, you will need several varnishes (the more varnishes are used, the more interesting and unique the finished work will be) and a regular needle
When choosing the color of varnishes, special attention should be paid to the fact that effective combinations should be created in contrasting shades; if this is not possible, then simply different colors will suit the wave. If you do not pay attention to this issue, the created pattern on the nails will merge and will not produce the desired effect.
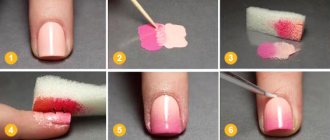
The technology for making such a pattern is quite simple:
- First you need to cover the entire surface of the nail plate with colorless varnish. This simple procedure will help protect your nails from all kinds of damage when working with a sewing needle.
- After the clear varnish has completely dried, you need to apply one coat of the base varnish, which will serve as a tone. If the color of the varnish you have chosen is not saturated enough, this procedure can be repeated again.
- Depending on which design scheme you have chosen for your nails, you need to make small dots or lines without waiting for the background varnish to dry completely.
- Using a needle you need to create the selected pattern. To do this, you need to carefully mix the varnishes with each other.
- After complete drying, the finished drawing must be coated with a fixative. This will extend the life of your manicure.
Just like with a needle, beginners can work with a thin brush. The vast majority of manicure products have a very long brush, which is practically unsuitable for comfortable work, especially for those who do not have sufficient experience. Experts recommend practicing on paper before applying the design to your nail. This will help rid your nails of the excessive influence of acetone on them.