Neat and beautiful nails are the adornment of any woman. They can be bright and short, elegant and long, but in any case, they attract attention. Unfortunately, many are faced with the fact that nails break easily and become more fragile over time, which brings many problems to their wearer.
Interesting: how to strengthen your nails at home.
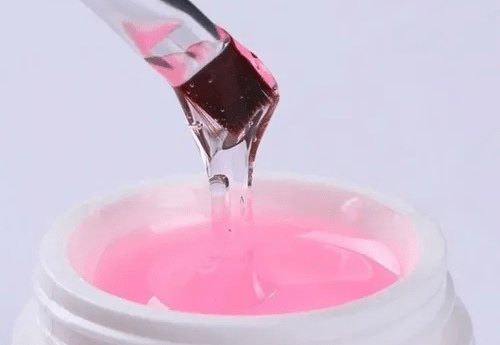
It is much easier to care for and maintain artificial nails, since a thin protective layer protects the natural nail from the harmful effects of various environmental factors. One of the best and surest ways to ensure the beauty of your nails is UV gel, which makes your nails smooth, even and shiny, without spoiling them at all. As part of the article, we will talk about UV nail gel and what it is.
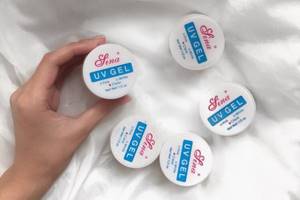
A little about the Lina brand
The Lina brand produces products that are very easy to use, allowing you to form nails with a high level of strength. The gel is in great demand among both beginners and more experienced nail technicians.
The country of origin of the products is China. The ratio of quality and price has pushed the brand to a leading position in the creation of gels for the nail plate.

Single-phase reconstructive UV gel Lina is an innovative product that simultaneously plays the role of 3 coatings: base, modeling and finishing.
At the same time, the product fully meets all the expectations of nail service specialists. The composition is characterized by excellent adhesion to the nail plate, easy modeling and simple filing.
What is camouflage gel
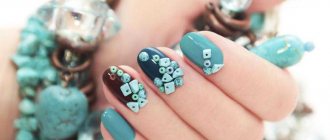
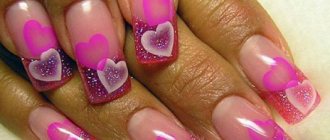
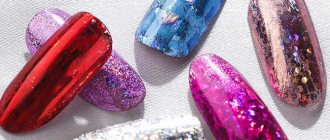
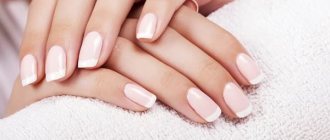
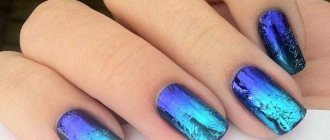
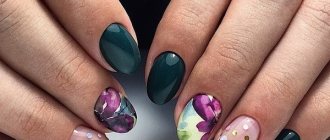
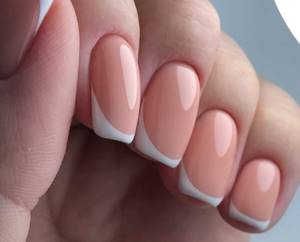
In the last few years, very bright nail art, on which all possible types of decorative decorations are stuck, has gone out of fashion. Neat nails of medium length, the appearance of which is close to natural, are becoming increasingly popular. To create just such a manicure, a camouflage gel is used.
Camouflage gel is an opaque material of varying consistency designed for modeling and extending artificial nails. The gel is laid out on the nail surface and polymerized in a lamp, which ensures high-quality adhesion of the natural plate to the polymer one.
Also, camouflage effectively hides possible imperfections in the nail plates and smoothes the surface.
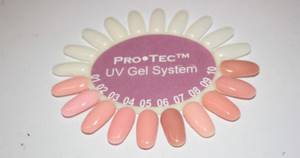
The color of the camouflage material is as close as possible to the natural color of healthy nails. Usually these are pastel shades of peach, beige, and pink.
Composition and purpose
Professional UV gel Lina, intended for nail extension, contains 100% isopropanol. The product is intended for manicure and pedicure.
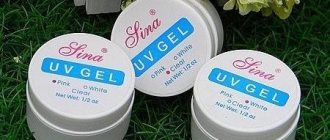
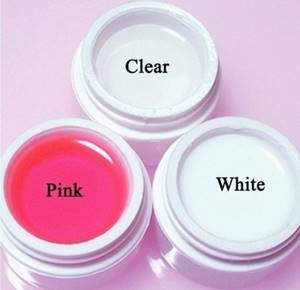
Jars of nail gel UV gel Lina White/Clear.
The extension process is carried out in 3 stages:
| Stage | What they do |
| Base | Initially, a base coat is applied, which is responsible for strong adhesion to the surface of the natural nail plate. |
| Building | At this stage, the shape that the client desires is modeled. |
| Finishing | Upon completion, the surface of the nail plate is covered with a fixing layer, which prevents rapid wear of the material. The fixative is also responsible for the glossy, velvety or matte surface of the nail. |
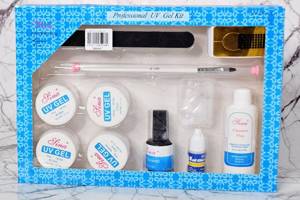
UV gel Lina nail extension product is considered a ready-made professional kit, which makes it possible to perform decorative techniques using ultraviolet gel. Additionally, for the procedure it is necessary to prepare an ultraviolet lamp required for polymerization.
UV gel Lina Clear
The kit includes the following tools:
- ultraviolet gel required for the top coating of the plate, 14.18 g;
- manicure glue in the amount of 1 piece, volume 3 g;
- gel brush;
- file;
- 10 forms;
- 20 French tips;
- 20 square tips;
- napkins in the amount of 4 pcs.
- cleansing composition 56.7 g;
- 2 transparent gels with a volume of 14.18 g;
- white gel in the amount of 1 pc., 14.18 g;
- 1 pink gel, 14.18 g.
Technique for nail extension using camouflage
The extension procedure is carried out mainly in salons, but if you wish and follow all the rules for working with materials and equipment, you can perform extensions at home.
The entire procedure for working with camouflage gel is carried out in several stages:
You can more clearly familiarize yourself with the technique of modeling and extending nails with camouflage material by watching the video:
Initially, camouflage gels were invented and developed to create the perfect jacket. An example of such a manicure is shown in detail in the video:
With the help of camouflage material, you can carry out not only the process of building up nail plates, but also carry out the procedure for strengthening them. You can learn more about the technique by watching the video:
Advantages and disadvantages
UV gel Lina is very easy to use, and it has many positive qualities, namely:
Set of UV gel Lina White/Clear
- Quite economical. Quite often, single-phase gels are chosen by beginning nail technicians. To get better at nail extensions, it is enough to purchase only 1 jar of solution.
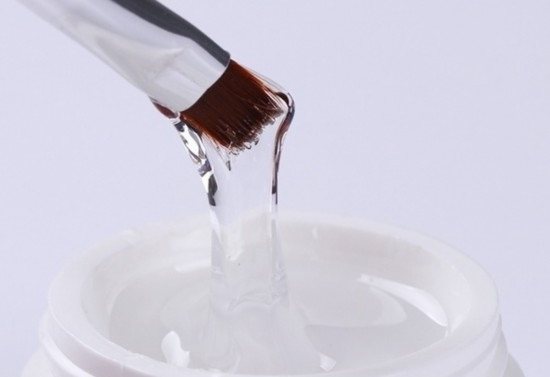
- Consistency of the composition. Unlike three-phase products, single-phase gel is characterized by a fairly liquid texture, but not flowing. Therefore, it is very convenient to apply it to the surface of the plate and distribute it evenly.
- Suitable for creating any shape. This is due to the fact that the solution is quite docile, lends itself well to crimping and there are no difficulties when filing. Therefore, using this tool you can create more complex arched pipe-type contours.
- Easy to use. If you have experience interacting with three-phase products, extensions with a single-phase gel will not cause any particular difficulties. The first time you use it, the result will be quite good.
- Characterized by a huge palette of shades. Manufacturers produce not only traditional transparent, pinkish or white solutions, but also various camouflages with beautiful opal options, with sparkles and shimmer, as well as luminescent decor. In this regard, you can easily select the gel of the required shade.
UV gel Lina Pink
When interacting with various materials intended for performing the procedure, some nuances may arise. If it is not possible to take a training course or if you are planning to do nail extensions as a hobby, you need to prepare for quite a lot of hard work. During the training process, each procedure must be performed carefully and efficiently.
Despite the large number of advantages, the gel has some negative qualities:
- Wear resistance. Unlike materials intended for a three-phase system, the wear resistance of a single-phase solution is much lower. For this reason, correction will have to be performed frequently.
- Semi-liquid consistency. It is quite easy for experienced manicurists to work with this solution. However, beginners in this business will have to get used to this consistency of the material for some period of time.
- Skol. When wearing extended nails, there is a high risk of chipping.
Camouflage properties
Initially, the product was created for the correction of natural nail plates and their lengthening during artificial manicure. The material lay down so smoothly and held firmly that the craftsmen began to think about whether it was possible to extend nails with camouflage gel . The first experiments confirmed the suitable properties and decent results:
It retains its presentable appearance almost until the coating is removed, and this manicure is worn for at least 3 weeks. True, a strong build-up with camouflage gel can only be removed by cutting off the coating. But for this there are soft cutters and gentle technologies that protect the structure of the natural plate.
Necessary tools and aids
You can use the nail extension compound yourself, because it is quite easy to apply and is evenly distributed throughout the nail bed. However, before using UV gel Lina, you first need to ensure its quality. It should not be very liquid, because in this case the solution will quickly spread over the plate. For this reason, there will not be enough time to dry. As a result, such a composition will not be able to complete the procedure.
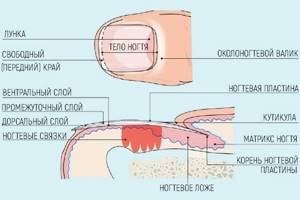
Nail structure
Initially, before extension, it is necessary to prepare tools and auxiliaries:
- orange stick or pusher;
- buff;
- gel;
- brush;
- degreaser;
- file;
- primer;
- ultraviolet lamp;
- extension forms.
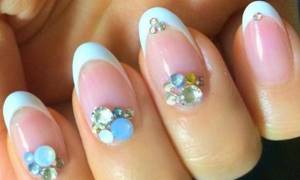
To create a decorative design, you need to prepare colored pigments and decorative elements that can be used to cover the nail plate.
Each instrument must be disinfected with an antiseptic. This is required in order not to introduce infection into the body if the periungual area is damaged.
Camouflage Features
The structure of the material in terms of density is very similar to the structure of a natural nail, so after the extension procedure, artificial nails are difficult to distinguish from real ones. The main advantage of camouflage material is that the polymer composition allows natural fabrics to breathe under layers of manicure. It does not cause irritating reactions and also prevents the appearance of fungal formations.
The polymer fills the damaged or deformed area of the plate, creating a perfectly smooth surface and the most favorable conditions for nail restoration. You can also correct the architecture of your nails with gel.
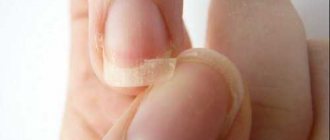
Preparing the nail plate
UV gel Lina should be used only after the surface of the plate has been prepared. Its detachments cannot be avoided if the material interacts with the skin, cuticle or pterygium during the procedure. This is why the preparation stage is very important.
There are no recommendations regarding interaction with a single-phase composition, since this occurs in the same way as when using any other product:
- Clean the plate from pterium, cut off the pushed back and polished cuticle with a ball-shaped cutter.
- Treat areas adjacent to the side rollers.
- The ends are filed with a file, the abrasiveness of which is 180 grit. Polish your nails and remove any dust particles.
- Wipe with a lint-free cloth, previously soaked in Klinser solution. This particular product is suitable, since materials from the pharmacy contain alcohol, which is very aggressive towards the skin and can react with other materials. The result may be difficult or damaged work.
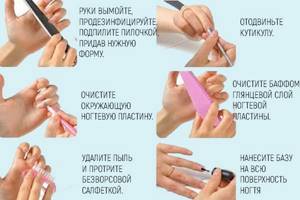
Step-by-step treatment of the nail before applying the gel
When preparing, it is advisable to use a primer, but some masters skip this step because they do not consider it mandatory. However, in the absence of any obstacles in the form of an allergic reaction, it is better to use a primer, because its action is similar to double-sided tape that can adhere the plate to the applied solution.
The primer can also solve a number of other problems, for example, degrease and dry, prevent infection and remove excess moisture. Acid and acid-free formulations are available. These mixtures are used to process the plate before varnishing.
Before single-phase gel, the plate must be coated with an acid primer. During the application process, it is necessary to ensure that the product does not get on the skin. The composition can dry quickly in air within a few minutes, so there is no need to purchase a lamp.
If more than 30 minutes have passed since applying the primer, you will need to repeat the process. In this regard, there is no need to cover all 10 nail plates before starting the procedure.
Instructions for use
Most novice craftsmen are mistaken in the fact that it is quite possible to carry out modeling with a single-phase composition in a short time. In fact, the technology involves similar steps as when interacting with three-phase means. When laying the composition in a thick layer, the normal effect will not be achieved.
This solution is categorically not suitable for modern upper forms; therefore, traditional lower forms can be used directly.
In the absence of sufficient experience, it is not advisable to rush. It is necessary to interact with each finger separately, drying each layer in turn. Before taking the product, the surface of the nails must be well treated, remove the greasy layer and cover with primer.
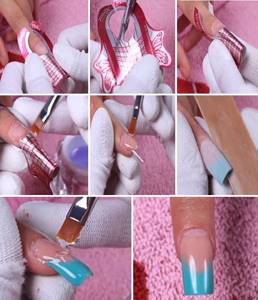
Step-by-step gel nail extensions look something like this.
UV gel Lina should be used according to the following step-by-step steps:
- Fit the mold to the plate, making cuts so that the base touches the surface tightly.
- Glue the ends, making sure that the symmetrical elements match. To prevent the form from coming unglued, you can take a stationery stapler.
- Apply the base layer onto the plate using rubbing movements, moving towards the cuticle from the end. The solution should not come into contact with the skin, otherwise detachment in the cuticle area is inevitable.
- Carry out the polymerization procedure in a lamp for the period recommended by the manufacturer. To evaluate the effect, lightly tap the plate with a pusher.
- Place a drop of gel on the mold in the area where there will be a free edge. Place the product according to the markings. Having made the apex relative to the desired length, remove your fingers to dry.
- After assessing the surface, apply the compound to the gaps if necessary. Remove unnecessary bulges with a file.
- If you do not plan to make any design decisions, cover the nail with a thin layer of gel and turn your palm down to even out the composition. Place your hand in the lamp.
- After the time has elapsed, make a file, controlling the direction of the side edges and constantly checking the symmetry of the nail plate. There is no need to cover the nail after the solution, but you can use a velor or satin finish for decoration.
- Finally, remove dust and stickiness using a special product.
You should carefully follow the manufacturer's advice, especially if the solution is used for the first time. How to work and how long it takes to dry the layers is carefully described on the product packaging. On average, the nail plate will need to dry from 1 to 3 minutes.
Single-phase gel can cause a burning sensation during the drying stage of the nails. This is due to the fact that the composition changes one state of aggregation to another, forming crystal lattices, which is accompanied by the release of heat. The burning sensation is not the result of a deficiency in the solution, but of its specificity.

Layers when strengthening nails with gel
Solving this problem is quite simple. To do this, you will need to reduce the lamp power, provided that such a function is present in the electrical appliance. If the device does not have a temperature regulator, you can periodically stick your hand out for a few seconds, thus allowing the material to cool. When the gel sets, the burning sensation should go away.
The work of removing the gel at home is very important, as is interaction with the single-phase modeling gel. For the gel, soaking is not required, because if you wait more than 30 minutes, there will be no result. Single-phase gel can only be removed with a medium-abrasive file or a special cutter.
Manicure technique with camouflage
Before applying camouflage gel to your nails , the plates are prepared. Here everything goes according to the standard scheme. The cuticle, pterygium, and skin ridges are corrected. Then the plate is cleaned of dust and skin particles. The stage ends with degreasing and applying primer.
Let's look at the step-by-step process of nail extensions with camouflage gel.
Once the application technique is mastered, you can experiment. Add designs and ornaments, decorate your smile with glitter, sequins or colored gel polish.
Source
Efficiency
The gel can be used by both beginners and more experienced manicurists and pedicurists. With proper application of the composition, extended nails will keep excellent shape for 2-4 weeks. Also, the duration of wearing will depend on how the girl cares for and treats the nail plate.
Single-phase UV gel Lina is suitable for strengthening the nail plate without extensions. It can be used as a base for gel polish, as well as to restore damaged nails.
Camouflage properties
Initially, the product was created for the correction of natural nail plates and their lengthening during artificial manicure. The material lay down so smoothly and held firmly that the craftsmen began to think about whether it was possible to extend nails with camouflage gel . The first experiments confirmed the suitable properties and decent results:
It retains its presentable appearance almost until the coating is removed, and this manicure is worn for at least 3 weeks. True, a strong build-up with camouflage gel can only be removed by cutting off the coating. But for this there are soft cutters and gentle technologies that protect the structure of the natural plate.