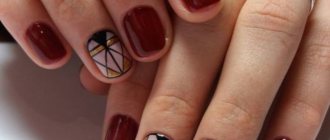
Has it ever happened to you that, well, you really liked the work of the master and would like to share a successful manicure with subscribers on Instagram, VKontakte or post a photo on Facebook (or just save it in your album as a souvenir), but, alas, no matter how many pictures did they do it - everything is wrong: either the hands seem ugly, then the background is not the same, or the pose let us down? Yes, sometimes even the most beautiful fingers lack photogenicity! Let's figure out why this happens and how to photograph a manicure correctly.
How to photograph nails and manicure correctly?
Most clients come to manicurists through social networks, Instagram, and various sites on the Internet. “Word of mouth” also works when one of the neighbors or employees at work brags about their manicure, and close people want to get to this master. A master can make a name for himself and increase his client base using the Internet. The most popular platform for this is Instagram. Initially, the site was developed as a photo network, the main advantage of which was beautiful photographs. A manicurist can attract clients by showing perfect work. There are a lot of tricks that you should follow to get the perfect photos.
How to photograph nails and manicure correctly:
- When looking through your Instagram feed, it’s easy to notice that almost all the photos are perfect, there are no specks of dust or specks on the nails. In real life, this is impossible to achieve; minor errors are removed in photo editors.
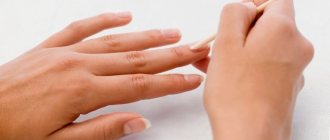
- Often, after using powder or degreaser, the skin dries out, becoming covered with a white film, and the slightest peeling is visible. Therefore, you need to apply a degreaser and a few drops of regular cuticle oil to a napkin.
- The mixture must be thoroughly rubbed into the area of the cuticle, side ridges, sinuses, under the nail in the hyponychium area. Dust often accumulates there too, and it can play a cruel joke if your thumb gets into the frame.
Professional shooting
If a simple street photo is suitable for a personal blog, then highly specialized photographs are taken for advertising. Portfolio cards rarely contain a deep plot or story. The emphasis in them is placed on the manicure itself, highlighting its quality and style.
Photos in “desktop” format look most advantageous. There is no perspective in such photographs, as well as a blurry background. The viewer's attention glides along the flat surface, clinging to the work of the nail artist, and not to the blurred space.
In the studio, manicures are removed using professional equipment. This means a high-quality camera, soft and light boxes, as well as reflective surfaces. The process of preparing photographs also includes processing the images in a photo editor.
How to photograph nails in a photo box?
A photobox is a box covered on the sides with fabric, into which hands or objects are immersed. The walls of the photo box are white or light, so the photographs turn out to be as contrasty, bright, and unusual as possible. However, the main disadvantage of the photobox is the inconvenience of hand placement. Basically, such products are intended for photographing inanimate objects, clothing, and jewelry.
How to take photos of nails in a photo box:
- It is very difficult to place a hand in a photo box so that it is surrounded on all sides by a white background and the manicure is clearly visible. Therefore, many famous artists and even bloggers do not use photo boxes.
- It is most convenient to use a photobox on the same side as the master. That is, sitting at opposite ends of the table will not work. It is necessary to place the photo box with the opening facing the client. There are two ways to place your hands inside: hug the photophone, so the two hands will be at a decent distance from each other. Or place them directly inside the tunnel.
- In this case, the number of ways is limited. Therefore, many craftsmen make photo boxes themselves. To do this, take an ordinary cardboard box, which is peeled off on all sides with white paper. On the client's side, two small holes are made at the bottom. This is where the hands are inserted. There will be no wall in the box on the artist’s side, so it will be possible to photograph the manicure beautifully.
Photobox
What background is best to photograph nails against?
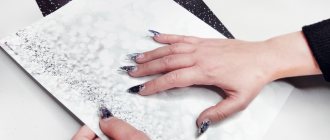
For beautiful photographs, first of all, you need to choose a suitable photo background. There are several possible photo backdrop options. You can use photo backgrounds purchased on AliExpress. These can be ordinary drawings of stones, marble, greenery, or abstract ornaments.
What background is it better to photograph nails against?
- As a photo background, you can use ordinary colored cardboard, which is sold in stationery stores. There are large formats that need to be placed in the center of the table, and the client’s hands with manicure done on the photo background.
- The client's clothing will not attract attention. This option is used if it is necessary to photograph two hands at once, and not only the hands, but also the client’s torso are captured in the lens.
- Such a photo backdrop will complement the composition and show your nails in an advantageous light. If you look closely, almost all the artists who publish photos on Instagram have perfect pictures, and there are no unevenness or roughness in the cuticle area. To achieve this effect, it is not enough to use a degreaser after work.
A beautiful photo is the key to success
The development of social networks has made it possible to talk about one’s own life online using instant photos. Today you can share photos in one click.
You can use such rapid progress for fun. Or you can turn technology into a powerful engine for your own brand.
High-quality photographs of manicures will be useful, first of all, to nail artists. Good photographs of the work will be useful for the master’s portfolio - the cover of a mini-business. Nail salon clients don’t mind boasting about their transformation either.
—
The main rules of a good photo
Without delving into the intricacies of photography, you can combine the main rules for photographing nails into a concise list:
- neatness. The photograph must be flawless;
- simplicity. There should be no confusion when looking at the photo. Looking at the screen, a person should immediately understand that the frame is about a manicure;
- light and color. A nice picture is the key to success. It should attract, not repel. Acid colors, “torn” backgrounds and an abundance of blurry details will be unpleasant to the eye;
- logo. Small and unobtrusive, not claiming to be the main role.
How to take pictures of nails on your phone?
It is important to position your fingers and hands correctly. Therefore, manicurists position each finger separately, fixing its position.
How to take pictures of nails on your phone:
- Sometimes this is very difficult to do. The phalanges of the fingers are uneven and can move to the right or left, causing curvature of the nail. Therefore, in the photograph it may appear that the nail is filed crookedly. Although in fact this is an individual feature of the client.
- It is necessary to adjust the position of the fingers so that they look advantageous, interesting and do not seem crooked. It is best if the wrists are not on top of the nails and fingers, but under them. It is necessary to position the client's hands so that the wrist is on the table, the fingers are bent and as relaxed as possible.
- It is thanks to maximum relaxation that photographs turn out natural and do not emphasize defects. If the fingers are bent, the skin on them is further smoothed, and wrinkles are not so clearly visible, attracting attention, distracting from the nails. The main task during a photo shoot is to successfully set the light and catch the angle. Unnecessary details should not distract a potential client when viewing photos.
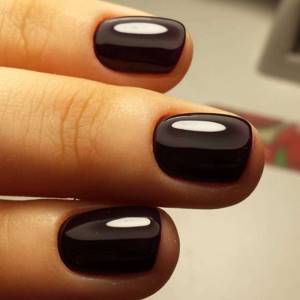
Manicure photo
Newbie mistakes
The first photographs of a manicure rarely evoke admiration, even if the artist’s work turned out to be impeccable. It's all about the photographer's inexperience. To avoid mistakes, experts recommend familiarizing yourself with the list of common “failures”.
Common mistakes:
- too little attention to nails - the manicure is lost against the background of numerous details;
- huge nails. Macro mode allows you to take high-quality photos, but you shouldn’t take up 90% of the frame with manicure;
- blurry foreground. Frames with cloudy, intrusive details put pressure on the eyes. Such heavy pictures are unlikely to get millions of likes;
- unhealthy look. In addition to nails, your skin should also radiate health.
How to photograph nails for Instagram?
Even if you take good photographs, you can’t do without editing. It's best to do this on your phone to save time. One of the popular programs for processing photos on your phone is Snapseed. This is a program that resembles the photo editor Photoshop. The main task is to adjust brightness, contrast, and color balance.
How to take photos of nails for Instagram:
- Under artificial lighting in the manicurist’s office, the hands become overexposed, or vice versa, the white background becomes too bright, darkening the skin of the hands. Therefore, you need to even out the color, lighten the skin of your hands or background. To do this, use the “white balance” function.
- After this, you can lighten the skin of your hands, making it brighter and richer. A greater number of folds and wrinkles that form on the hands are removed if the fingers are straight. It is necessary to divert the attention of a potential client from the skin of the hands and its imperfections to the manicure.
- It is necessary that the user is not distracted by anything. An obligatory step is cropping the photographs, that is, cropping them into a square shape. After all, Instagram photos are square. A prerequisite during editing is the application of inscriptions or a watermark. This is necessary so that photos of your work are not stolen by novice artists. You can get inspired by compositions and choose interesting angles on Pinterest or Insta. Subscribe to interesting sources that you like.
- An application that manicurists often use when posting photos on Instagram is AirBrush. You need to go into the application, upload a photo from the gallery, and use the “Acne” function. When you press on the dust or specks that remain on your nails after a manicure, they will disappear. It is best not to do such manipulations in the cuticle area, because blurring occurs. Using this editor you can remove wrinkles and creases on your hands. It is recommended to lighten the area around the cuticle to make the manicure more expressive. This is especially important if pastel colors are used.
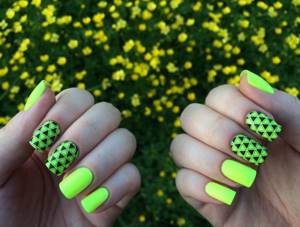
Shots on a smartphone
—
You can take a high-quality shot without using complex equipment. You can get a delicious picture in the field, armed with simple tips:
- center of the frame. For convenience, you can turn on a grid layout on your phone screen. The most important parts of the frame should be located in the central sector;
- Avoid sun rays. Natural lighting will play into the hands of the photographer, but will ruin the picture if a killer bleaching ray falls on the model’s brush;
- minimalism. Props are great, but you need to know how to work with them. In order not to clutter the frame, it is better to remove unnecessary details from it;
- thumbs up. The optimal angle is with the brush pointing upwards in the frame;
- purity. Any blemishes on the background, skin unevenness and other minor troubles are easier to prevent during shooting than to try to eliminate in a photo editor;
- proportions. It is best if the brush takes up exactly as much space as it would have in real life. The camera can be positioned at a distance of 50 cm from your hand. Agree, no one looks at a manicure by touching it with their nose;
- settings. Most smartphones are equipped with functions like macro or beauty. These settings will help you get a neat picture.
In addition to creating the frame itself, nail experts advise taking time to process the image. Almost every card needs cropping, exposure adjustments, and skin tone work.
You can process photos directly on your smartphone by downloading any convenient editor.
How do you photograph nails with highlights?
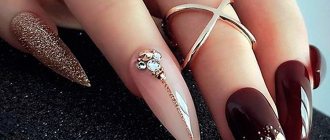
Sometimes photographs of nails with a standard coating without designs and decorations look quite boring and dull. The main task is to focus on the quality of the coating, perfect highlights, rich color and beautiful shape. It’s a good idea to use additional decor for such photos. This could be jewelry, rings. Often, manicurists put stickers on models’ hands, put on jewelry and jewelry to attract attention and make the photo rich, bright, and interesting.
How to photograph nails with highlights:
- You need to choose the right light. If the main task is to photograph round highlights, a standard fluorescent lamp, which also has a round shape, is used for this purpose. It is necessary to direct the lamp from top to bottom on the nails and photograph the resulting highlights.
- For a manicure in light pastel colors, you can use plants. These can be either fresh flowers with green leaves or sprigs of dry cotton. Interesting dried flowers will do. The most popular option is to use fashion magazines as a photo background.
- They are often used by bloggers and manicurists to decorate their work. Photos look best in daylight. If possible, you can go outside with the client and take a photo of your hands. Not a single lighting device or a large number of ring lamps can replace daylight.
Glare
How to remove a candy card
To get high-quality photographs, it is recommended to prepare for shooting. The chances of getting a good shot while running along the road from the salon are extremely low.
Scene selection
—
Every photo is a little story. It should have a backstory, a main character, and background music.
- the genre of photography and its subject matter will serve as a background;
- the main character will be a manicure;
- the background melody will be minor details.
These three components will help create not just a photo, but a real story. The main task of the photographer is to “catch” the eye of the beholder, forcing him to walk around the picture, looking for interesting details.
We choose the genre depending on the style of manicure. Light airy samples require an equally weightless background. Stylish and strict designs will suit a more “evening” atmosphere.
Separately, it is worth considering subjects for pedicure. Here well-groomed legs are the main character. Therefore, it is important to surround them with a special story. For example, place them on a plush blanket or depict them walking on wooden floorboards.
Process Features

—
Depending on the color and texture of the varnish, choose the optimal angle. Matte samples are best taken from above. Glossy and glitter-coated ones require a special angle so that the glare does not overlap the nail plate too much.
If the client is the model, choosing an angle will be much easier. Taking off your own manicure is more difficult. It is recommended to use a tripod and a shutter timer. This feature will help you get sharp, blur-free photos.
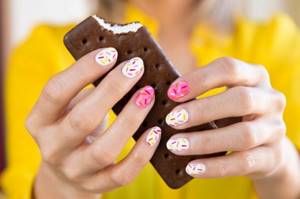
Keep your hands busy
—
A hand reaching out from space looks strange, to say the least. A brush floating in the air has the same effect. Conclusion - you need something to do with your hands.
It is ideal if your palms gently clasp a simple object - a cup, an apple or a notepad. The background subject should not attract too much attention, so it is recommended to use neutral colors.
Nail artists use a small life hack. To prevent veins from showing through the skin of the hand, they remove the hand in a vertical position. To do this, just place your palm against the wall. In this position, the blood will drain from the hand, and the effect of smooth skin will appear.
Using a bottle of polish as a “base” is somewhat outdated. To demonstrate the shade of the coating in its original form, just place the jar in the background, slightly blurring it.
You can also use the model’s face as a background image, gently resting the pads of your palm on the chin. However, no matter how impressive the photo turns out to be, model permission will be required before including it in the portfolio.
Lighting
—
Photography literally means “painting with light.” To make the drawing perfect, it is important to choose the right lighting.
Lighting Tips:
- natural light. The strongest trump card in any photo. All you have to do is sit the model by the window and click the shutter;
- It is not recommended to dilute window light with artificial sources. Mixing light temperatures is a crime;
- if the lighting is artificial, you will need a lot of it. It is advisable to place light sources on both sides of the subject. Ordinary table lamps are suitable as spotlights;
- reflector. When shooting near a window, the light will be directed from one side. To prevent the other from falling into blackness, it is recommended to place a piece of foil or other reflective surface opposite the window. The glare of the sun received from such a reflector is directed onto the model’s hand.
Never use the camera's built-in flash. Of course, if you don't want to get a flat picture.
How to photograph nails with a ring lamp?
A ring lamp is mainly used when there is no need to create round highlights. For round highlights, use a standard round lamp. The ring light is ideal for photo matte designs where a lot of color is not needed.
How to take pictures of nails with a ring lamp:
- It is best to use this type of lighting when creating a photograph with foil, shimmer and a lot of reflective particles. If you use a regular round lamp, there can be a lot of light, and there will be highlights on the nails, especially in places where decorative elements are located: foil, Yuki flakes or mica.
- The ring lamp can be positioned from top to bottom. There is a lamp on top, and the client’s nails under it. You can do it differently by placing a ring lamp above the client's head so that the light falls from top to bottom, and vertically.
- This can be achieved by using special tripods with adjustable lamp position. A pretty good option is to place the lamp to the left or right of the client’s hand. It all depends on what kind of highlight you want to get and the characteristics of the manicure.
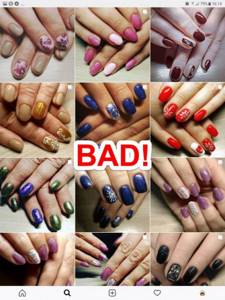
You can’t take pictures like that
Read on the topic:
- Nail psoriasis or fungus: how to distinguish?
- Is nail onycholysis a fungus?
- Lamisil: cream for nail fungus
- Treatment of nail fungus with baking soda
- Teymurov's paste for nail fungus: instructions for use
At the initial stage, when the master does not have much money, there is no opportunity to purchase photo backgrounds; they can be made independently. To do this, you need to select a suitable picture on the Internet and print it on a color printer or photo paper.