- July 20, 2018
- Nail care
- Nikita Karpov
Short nails have been gaining popularity lately. Firstly, they are easier to care for; secondly, they are much more convenient. Don't worry that you won't be able to create an original design on your nails. Now there are a huge number of them. After all, a short manicure does not mean boring or old-fashioned.
Preparation
To achieve a high-quality manicure on short nails at home, you need to prepare your nails. First you need to give the desired shape to the nail plate. A metal file will not help you with this, so put it aside. When working with short nails, sand files that are made on a cardboard or plastic base are perfect. You can also use ceramic or glass. Don't forget the polishing file. It will help smooth the surface of the nail before applying varnish, as well as extend the wear of the manicure.
It is equally important to choose the right nail shape. Most often, preference is given to square. You need to remember that in this case it is better to pay attention to your fingers and their length. For example, for short ones, a shape that can visually lengthen them is perfect - for example, oval.
It is imperative to remove the cuticle from the nail plate. This can be done using a classic edged or unedged manicure. Before applying polish, degrease your nails with nail polish remover. Only after all these procedures can you begin to create an unsurpassed design.
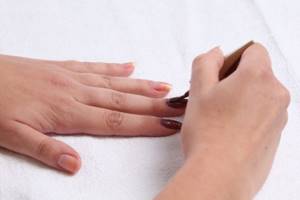
Gel polish application technique
Before starting a manicure, prepare your nails for the procedure.
- It is necessary to prepare the nail plate for manicure: you need to remove the cuticle, file the nails to the same length, give them shape and remove the gloss from the surface of the nail with a soft buff.
- Apply a special dehydrating agent . In its absence, you can use alcohol or nail polish remover with acetone.
- Apply a base coat to protect the nail plate from being painted with colored pigments. The base is applied in one thin layer, but do not forget to seal the end of the nail with the same base coat. The base layer is polymerized in a UV lamp for 2-3 minutes.
- Next, apply a layer of colored gel polish , not forgetting to seal the end of the nail, only not with the base, but with gel polish. It should also dry in an ultraviolet lamp for about 2-3 minutes.
- If the colored gel polish does not apply evenly or its color is not intense enough, you must repeat step 4.
- The manicure must be completed with a top coat, with the obligatory sealing of the end of the nail and drying under an ultraviolet lamp.
- We remove the sticky layer from the coating with a special product - a cleaner, which can be replaced with diluted alcohol, vodka or, as a last resort, acetone-free nail polish remover.
- At the end of the manicure, you need to apply caring nourishing oils to the cuticle.
The procedure for applying products to the end of a short nail requires special care, otherwise you can stain the skin near the free edge with the products.

Gel polish manicure process
If you still don’t understand the process of applying gel polish, then you should watch this procedure in the video tutorial:
What you will need
If you decide to do a manicure at home, you need to prepare in advance and purchase basic tools. You will need dots, a thin paint brush, adhesive tape or stencils.
Nowadays you can easily repeat any design you like. The main thing is to follow the rules for applying varnish and fixing it. At the end of creating the design, you need to apply a top coat; it will help the manicure last for several weeks.
Modern craftsmen have almost completely abandoned simple varnish and prefer to use only gel coating. It can last more than two weeks without additional care and with any use. This coating also provides the opportunity to turn even the most amazing design ideas into reality. This article presents photos of a gel manicure for short nails.
Fashionable wardrobe for mini nails: what to look for?
In order for your manicure outfit to be as harmonious as possible and give you only positive emotions, we advise you to adhere to the following rules for manicure for short nails:
- Remember that the health of your nails is more important than the pursuit of fashion. Use only soft buffs to prepare the nail plate (tools less than 150 grit can damage natural nails with a minimum length);
- Try to make the design as light and comfortable to wear as possible. Choose dense and pigmented gel polishes that will give a perfectly smooth, non-streaking coating in just one layer. Capricious tones and textures can be applied in two passes, but each should be very thin and well dried in a lamp. An acid-free primer is highly recommended for brittle and brittle nails;
- Make it a good habit to gently push back your cuticles every day when massaging with creams or oils. In this way, you will achieve several goals at once: over time, the nail plate will naturally lengthen, the cuticle will become thinner and softer, hardware and edged manicures will cause less discomfort, the rate of cuticle growth will decrease;
- The gel should not be applied close to the cuticle (under the cuticle), since as the nail grows, the transition will not look aesthetically pleasing. If you have very slowly growing nails, give preference to camouflage gel polishes. Or use a gradient where the light part of the stretch will be as close as possible to the natural color of your nail plate. And don’t forget to use soft removers to control cuticle growth so that your manicure looks neat and well-groomed;
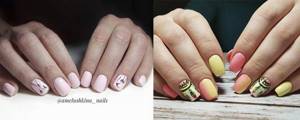
Photo by: @amelushkina_nails/@tnlprofessional
- To ensure that the design on all nails looks perfect, do not forget to coat your thumb nails with gel polish and dry them separately. UV or LED lamps, the bottom of which has a recess for the correct placement of fingers, will be an excellent help for beginners;
- The chosen shellac color and design as a whole should visually make your nails longer. The nails are shortened with voluminous large decor, and horizontal stripes are lengthened (manicure tape or simply painted with a brush);
- It is preferable to create nail art on short nails with a flat decor rather than a textured one. An excellent choice would be rubbing, sequins, dry mica, painting with gel pastes, air puffing manicure, etc. On a small surface, an abundance of rhinestones or beads will look foreign, while a gentle ombre will create the desired tenderness and femininity;
- If you are planning to create a patterned image, try to place the elements of the design vertically. Small single flowers or curls are undesirable, as they will simply get lost in the space of the nail plate and will not become its stylish decoration;
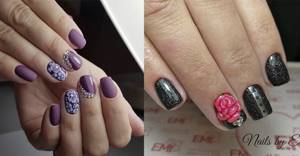
Photo by: @ulya_kuzmenko/@nails_salongbelladonna
- When creating a gel polish manicure at home, try to ensure that all nails are the same in length and shape. Otherwise, such dissonance will not add the desired beauty and charm to your hands. An oval nail shape is suitable for short fingers, and a rectangular one for long fingers. A useful life hack for wide nails - paint only the center of the plate, slightly not reaching the edges, this way your nails will look a little slimmer;
- Don't forget about stylistic harmony. With a short length, a manicure with more than three shades of coating will look pretentious. It is better to put off the multi-color kaleidoscope until the time when your nails under the gel polish barrier get stronger and acquire the necessary strength, flexibility and resistance to mechanical damage.
In order for a manicure on a short length to be expressive and neat, to produce a stunning effect, but not to go beyond the bounds of taste and decency, not to take much time, but to look elegant, we recommend that you practice implementing it first on tips. We present to your attention our stylish selection of simple but elegant nail art, which will be an excellent decoration for short and minimal-length nails.
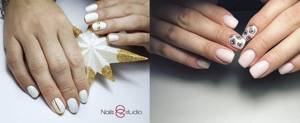
Photo by: @nailsstudio/@vangogh_nail_browbar
How to create the perfect manicure
Not every manicure you do yourself at home on short nails will look attractive. Quite often it is made too catchy. The best option is plain. With its help you can perfectly emphasize the shape of your fingers and highlight your image. Moreover, on short nails, bright colors look more attractive and are not as noticeable as on long ones.
Lovers of French manicure for such nails should try doing it as follows:
- Apply polish to match your skin tone.
- Draw a small, thin white line at the edge of your nail.
If you do everything carefully, you will end up with slender, well-groomed and beautiful fingers. After all, beauty is in simplicity.
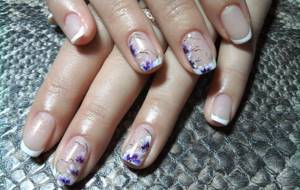
A large number of drawings, patterns, and mixing colors will suit long nails. For short ones, it is better to use such designs on one or two fingers. You can also make a small design on each one.
It is very important to paint your nails correctly. There is one old and simple scheme:
- First you need to draw a strip along the center of the nail plate, starting from the cuticle.
- Then draw two more stripes on the sides.
This simple method will help you create a neat manicure with polish on short nails. His photo is presented below.

Manicure at home for the inexperienced
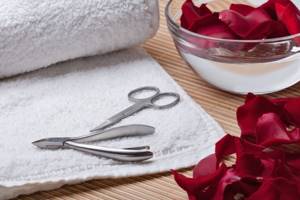
It’s not at all difficult to do an easy DIY manicure at home for beginners. It's not as complicated as it's supposed to be. First of all, you need to worry about the required devices. To implement a manicure you will need:
- nail scissors;
- file;
- metal tweezers;
- spatula or orange cuticle stick;
- nail polish remover;
- cotton pads;
- hand cream;
- initial coating for varnish;
- colored varnish and fixative.
Using these devices you can perform a high-quality manicure.

Easy DIY manicure
>So, let's move on to the main work. Let's start making an easy manicure with your own hands step by step. We strictly follow the following instructions, consisting of 4 points:
- Softening the cuticle. You need to start by steaming your fingers in a container of water. This will soften the cuticle and remove it without injuring your fingers. For the bath, take a not very large bowl and fill it with warm water. You can mix two tablespoons of sea salt and olive oil, 2 – 4 drops of essential oil, such as lemon, into the water to lighten the tone of the plate. Completely immerse your fingers in the resulting solution for 10 - 15 minutes. Steaming will make the skin soft and easy to remove.
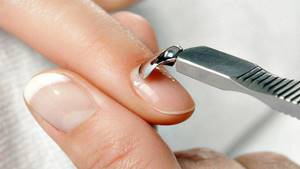
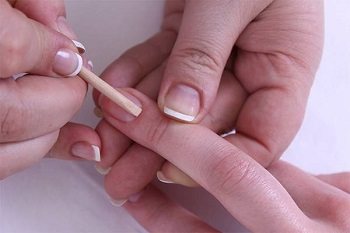
- Cuticle removal. Everything must be done without excessive effort and haste. On each finger, carefully remove the cuticle from the nail space. Using the sharp side of an orange stick or spatula, push out the excess skin from under the cuticle. If there are uneven edges, use metal tweezers. If you prefer an unedged manicure, the cuticle is removed using a special substance. Then the nail must be given an individual shape.
- Nail shapes: If you prefer short nails, carefully trim them with nail scissors. The selection of the shape depends on the characteristics of the nail itself. If they are weak, it is best to choose a shape resembling a square. Those with strong nails can give them a pointed look. There are five of them in total:
- oval;
- round;
- square;
- pointed;
- stiletto – very sharp.
You should file your nails strictly in one direction to avoid delamination. You need to pay attention to the same length of the nails and the similarity of their appearance. After completing these manipulations, apply nail polish.
4.Painting nails with varnish
This is the final stage of manicure and one of the most difficult. The varnish must be applied to the nail carefully, without touching the surrounding skin. So, the final step of an easy manicure for beginners should be followed by adhering to the following tips:
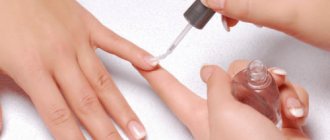
- degrease the nail plate with nail polish remover;
- cover with a special base for varnish;
- Now we paint the nail, with the main color starting to move from its base to the edge in the central part, subsequent strokes are made in the same direction, describing an arc on the sides of the plate;
- We make a finishing layer for the durability and shine of the resulting manicure.
There is a little secret. To make it easy to remove the polish, lubricate your hands with regular cream from the skin next to the nail before starting coloring. Next, carefully degrease the nail with a cotton swab and paint it. The cream will not allow the varnish to be absorbed into the skin, and it is easily erased from its surface.
How to visually lengthen short nails?
You can often hear from women that they do not want to cut long nails (even if they are inconvenient), since in this case their fingers will look short and rough. This is all nonsense. You just need to properly care for what you have. Moreover, there are three simple rules that will visually help lengthen your nails.
You need to take care of the cuticle. Everyone knows about this rule, but for short nails it is especially important. When you push back the cuticle, the nail plate visually appears larger. As a result, you can get a fashionable manicure for short nails.
There is an opinion that it is better not to cut the cuticle, as it protects the nail plate. Some people disagree with this statement. Therefore, in the fight against cuticles, you can use unedged and trimmed manicure. In both cases, it is necessary to soften it and then move it to the root. In the case of an unedged manicure, everything is left like that, but in an edged manicure it is cut off.
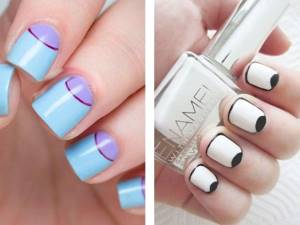
You can lengthen your nail using a special design. Vertical stripes in manicure will help perfectly with this. The most important thing is to draw stripes that are not the same color as the base color. There must be contrast.
You can also try adding diagonal stripes. In this case, do not be afraid to use bright colors - they will be appropriate.
Video manicure ideas for short nails at home step by step
A very interesting photo and video about how manicure fashion has changed will help you observe the frequency and speed with which women’s tastes changed. Even without visiting expensive beauty salons, you can with great success draw for yourself something that you will not see in any photo in the public domain or in any magazine.
Evidence that people have been caring for their hands since ancient times goes back to Ancient Egypt about 2,400 years ago. During excavations, a whole staff of mummies were discovered, which were listed in the document as “guardians of the pharaoh’s nails.” But then it was possible to draw only with henna, which, by the way, is still very popular in the East and has become popularized in Europe. This only says that with a large number of different tools and a large selection of colors, you can come up with a beautiful and fashionable design easily and simply.
So, the video is about how to make a stylish, beautiful design for short nails yourself.
Share with your friends!
more
Read us in the Zen channel
Varnish selection
For manicures on short nails at home, calm and warm colors are best. Basically, these are nude and pastel shades. They can visually lengthen your fingers as they blend in with your skin color. It's best to use shades that are several shades lighter than your skin tone.
When using dark tones, it is better not to paint over the entire nail. If you leave a few millimeters on the sides, then visually the finger will appear graceful and elongated.
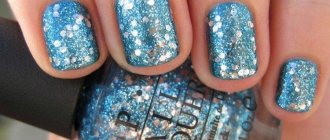
Not only the color of the varnish is very important, but also its texture. Matte and glossy nails are suitable for such nails, but you will have to say goodbye to glitter. Because it will make your nails look even shorter.
Oddly enough, with a bright varnish, a manicure on short nails perfectly highlights them. Don't be afraid to experiment.
Those with fair skin tones should pay attention to dark red and plum polishes. They are able to create contrast and accentuate the nails. But orange or scarlet nail polish is perfect for dark-skinned girls.
Main types of manicure
French manicure for short nails
When performing a French nail polish on short nails, you should remember several important points:
- The regrown length of the plate should be at least 3 mm, otherwise the nail will look unsightly. The most optimal regrown part is up to 5 mm.
- The width of the strip should be thin, neat, with smooth edges. A wide gap will take up almost the entire nail and will not look like a French manicure.
- You can differentiate the top and bottom of the nail using a silvery thin line.
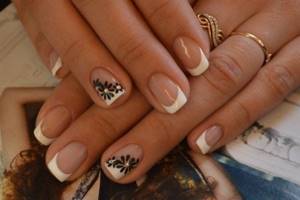
- A white pattern can be applied to the ring finger.
- rhinestones .
To make a beautiful French jacket, you can use varnishes that will differ not only in color , but also in structure. You can apply pearlescent and matte. The first varnish should be painted on a white stripe, it will visually lengthen the nail, and the second - the root part. Matteness will add style and originality.
Classic manicure
This type of hand care is also called trimming, since the cuticle is cut with the help of special nippers and baths are carried out to nourish the skin of the hands and the periungual part. If you use the nippers correctly, the burrs will not appear within 1-2 weeks .
Another advantage is that the varnish coating lasts quite a long time, allowing you to grow claws of the required length. The method of applying varnish itself is very simple. Any girl can paint her nails at home. You can use one varnish, or several. Which texture to use is up to you. Gel and acrylic will do. It looks like an ideal one-color varnish, matte, pearlescent, shiny.
Wet and dry manicure
Wet care is similar to classic. Before applying attractive paint, your hands and fingers should be in order. Carry out the cuticle trimming procedure, make baths and masks. The skin will soften and the nail plate will be ready for painting. There is a disadvantage of carrying out a wet procedure - the layered nail will become soft, and when it dries, the varnish will fall off.
Dry care is different in that it is carried out without the use of cuticle remover. You can purchase a special product that breaks down unnecessary cells that have grown back. You can remove them without any problems, as the skin will become soft.
This manicure has advantages:
- You will not be able to injure the periungual part and the plate itself with pliers.
- The polish lasts a long time, even on peeling nails.
What the nails will be like in structure and color is also up to you to decide. Almost all shades and textures look good on short nails.

European manicure
This type of hand care takes place without metal cuticle cutting devices. It is perfect for those with thin nail plates and sensitive skin. The creation technology is very similar to dry.
To remove unnecessary cells and free the plate from them, you should use cuticle removers . They are gentle on dry skin. Then you should remove the cuticle with an orange stick or any other made from natural wood. Next, you need to carefully apply the nourishing agent - oil, lotion, cream.
After the procedures, it is better to leave the protective layer without coating for a couple of days. If you want to apply it immediately, then you should cover the nail after the varnish with a special dryer .
The difficulty of doing this for many depends on the fact that there are no special products at hand, although they can be purchased without problems at the pharmacy.
Advantages of European manicure:
- The nails look neat and beautiful even without paint.
- It can be coated with colored or colorless varnish.
- Nail plates and skin are not injured.
- The product helps to moisturize, restore, and rejuvenate the skin of hands and nails.
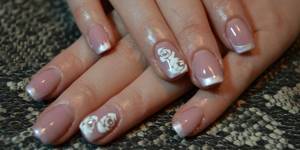
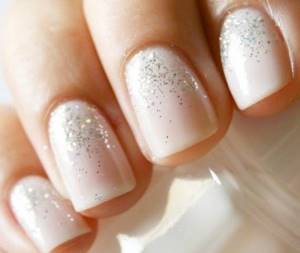
Wedding manicure for short nails
The choice of colors for this look is huge. Typically, brides with fair skin choose delicate, pastel shades that will match the color of the dress. Girls with dark skin can also decide on a bright palette of colors.
The design and style of the nails depends on your desire. You can choose floral patterns, ornaments, sparkles, rhinestones, just don’t overdo it.
A heavy design will overload the nail and make it even smaller visually.
To create a beautiful wedding manicure, masters can use regular varnishes and those with a gel base.
The advantages of shellac are that you do not have to carry out the aftercare procedure immediately after the wedding. You can do this during your honeymoon.
Many ladies choose the classic method of painting in light colors . It looks perfect on short nails and suits the image of a bride. Long ones cause bewilderment, look unnatural and aggressive. French is also considered popular for weddings . The white shade and light stripes are perfect for the delicate look of the bride.
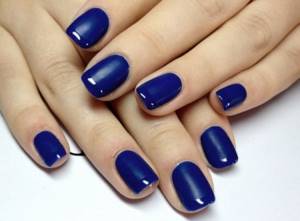
What manicure is fashionable in 2022?
Short nails are not just a monochromatic manicure. Despite the small coverage area, you can make interesting designs on it.
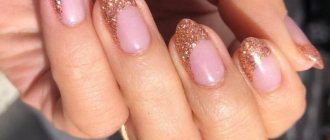
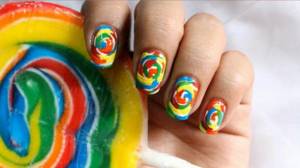
In 2022, manicures using bright colors and combining them on one surface are considered fashionable. It is also worth paying attention to gold and metallic shades. You can see a photo of a manicure on short nails in this style.
Manicure with foil
This design is made using pieces of foil (possibly using different shades) and with areas of the effect of an incompletely painted nail. This design looks trendy.
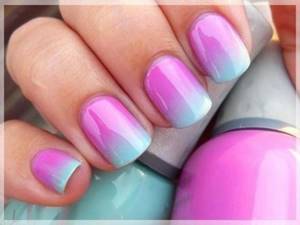
How to do ombre?
Ombre or gradient is one of the most famous and popular types of manicure. It is often found among celebrities and various beauty blogs. In order to do this manicure on short nails at home, you will only need a couple of polishes and a sponge or a piece of sponge.
First, take a sponge or small piece of sponge and apply two stripes of the polishes you are going to use. It is best to use them from the same range of shades. Then apply the sponge to the nail plate. Remember to apply a fresh coat of polish to each nail. In order not to have to worry about removing the remaining nail polish on your fingers, apply a special substance around the nail plate, which can be easily removed after a manicure. If this is not the case, then a simple cotton swab dipped in acetone will help to cope with this problem.
If you can't master the ombre technique on one nail, you can try transitioning the color scheme on all nails. That is, apply different varnishes on each finger from light to dark in the same color scheme. There are many photos of summer manicure. Short nails with this design look very interesting.
New manicures
How to grow nails
Gradient manicure
An interesting option would be to use rhinestones, which can be used to lay out absolutely any shape. The use of multi-colored pebbles can decorate the simplest and most modest manicure, for example, autumn, dark and gloomy.
Using rhinestones
If a classic French manicure is not suitable for some reason, you can replace it with a lunar manicure. It looks a little different, but at the same time stylish and beautiful.
Lunar design
Geometric design is suitable for girls striving for the ideal. Clear, even lines, geometric shapes - all this is used in manicure. It turns out to be unusual, but extremely stylish and fashionable.
Geometry in manicure
One option can replace another, it is possible to use several designs at the same time. At the same time, do not forget about the basic rules of manicure: do it carefully, do not rush. A balanced diet full of vitamins, minerals, and nutrients will help maintain the condition of the nail plate. A small adjustment to your diet can change your situation for the better in a short time.
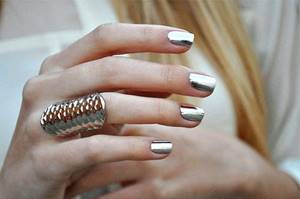
Metallic design
For short nails, metallic polish is ideal. Since it is impossible to carry it for a long time on long ones, it begins to chip and peel off. In a manicure, you can use various metallic options: silver stripes or patterns, mirror or chrome manicure, adding foil. This effect can be used as you wish. The most important thing is that it doesn’t end up being stuck on. A photo cannot fully convey the beauty of such a manicure on short nails.
Geometric design
Many girls think that geometric designs on nails are too strict or rude. On the contrary, this design will make the manicure laconic and interesting. Moreover, to implement it, you will not need special skills, so you will not have to contact a master.
If you want to try geometry, you can try the simplest option. Apply an arrow to the tip of the nail. To do this, you need to draw two thin lines so that they connect and form an acute angle. It should look towards the tip of the nail.
For a more complex design, you need to glue strips of masking tape to the nail plate. You can choose their direction at your own discretion. In this case, they will act as a ruler. The varnish should be applied on both sides of the tape. The combination of colors can be varied. A photo of a manicure design on short nails is presented below in this article.
Design with dots
There is another option for a fashionable manicure - with a dot. With it you can easily lengthen even the smallest nails. To make this manicure design for short nails, first you need to paint your nail with a single-color varnish. It is better to do this in two layers so that the color is more expressive. Once you do this, let the nail plate dry. Then you need to take any thin brush (suitable even for painting) and place small dots. The varnish you use to make them should be a contrasting color.
The location of the points does not matter. They can be done in a chaotic order. To visually stretch the nail, the points must be placed in a strict sequence. From the base of the nail plate they are large, closer to the tip - smaller. You should be careful with this design: if you go too far in the number of dots, it will turn out too flashy and tasteless.
It is important to monitor the thickness of the varnish on the brush. When it gets too thick, you need to wipe it off with acetone and reapply.
Nail care
The health of your nails reflects the general condition of the body and often indicates internal problems. If the following problems are detected, you must immediately proceed to treatment:
- A change in the color of the nail plate indicates a deficiency of vitamins A and E, and a lack of iron.
- Slow growth is a violation of metabolic processes.
- Rapid growth – hormone imbalance, thyroid dysfunction.
- Thin nail plate – lack of phosphorus and calcium.
It is necessary to monitor the condition of your nails regularly. You don't need to put a lot of effort into this. Home procedures will help maintain their condition, which include:
- When performing everyday household chores, your hands should be protected; ordinary latex gloves are suitable for this;
- before going outside, you should use a nourishing protective cream that will protect the nail plate from external negative factors: wind, high or low air temperature;
- to maintain the condition of the cuticle, it is recommended to take regular baths, preferably oil baths;
- perform manicure correctly, trim carefully, use only manicure tools.
Note! Dermatologists do not recommend removing cuticles. From a biological point of view, it performs a protective function: it prevents the penetration of pathogenic bacteria.
This kind of procedure should become a habit and become a regular daily ritual. An addition and continuation of caring procedures are decorative ones, for which it is better to turn to a professional. He knows all nail models and can select them individually, taking into account the client’s characteristics. The basis of this is a modeling gel for nail extensions, which allows you to get a unique manicure.
Space on nails
Space is a trend of the last year. It is used everywhere: on bags, shoes, clothes. Nails are no exception either. It's pretty easy to make. It does not require precision in creation.
The base color is dark - black or dark blue. It should be applied in several layers. After it dries, you need to apply white polish to the nail using a sponge or small sponge. Thus, the effect of cosmic haze should be obtained. Then don't wait for it to dry. Apply any varnish in small strokes.
Graffiti or nail art
Graffiti or nail art is considered the easiest design to create. After all, this is an ordinary abstraction that is created individually by each person.
First you need to coat your nail with a base polish. It is advisable to use light colors and thick consistency. The coating should be dense and should not show through. Next, using brushes or toothpicks, you need to make streaks and lines. For them, take multi-colored varnishes. Photos of a gel polish manicure on short nails are presented below.
Fashionable ideas for spectacular gel polish for short nails (with photos)
On short nails, and even on a narrow nail plate, you can’t go wild in terms of design. But there is good news - you can apply any patterns and designs with gel polish. The color palette is constantly expanding and replenished with incredibly rich colors. With such multicolor, minimal decor will look stunning. Let's look at a few photos where gel polish on short nails looks most impressive.
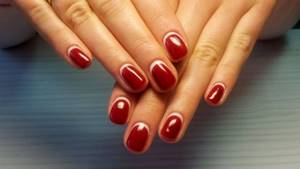
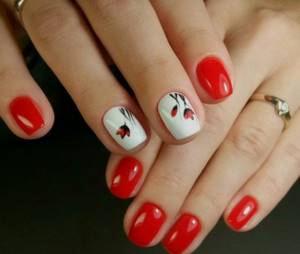
Red gel polish on short nails
The red color in gel polish looks especially bright and rich. Thanks to the surface of the coating, the effect of a lacquered box is created . As an additional decoration, you can draw unopened flower buds that are relevant this season. A design on two nails will be enough to follow fashion and embody artistic skills.
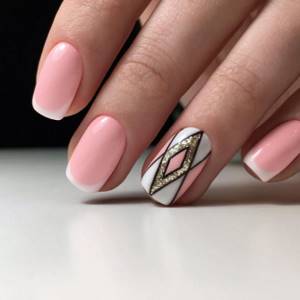
Pictures for short nails with gel polish coating
On a short nail length, only pictures with a small, monotonous pattern look good. Those that are too voluminous simply won’t fit in a small area, and using a small piece of design often doesn’t make sense . It’s better to use any picture on one or two nails; you still want to show other colors from the gel polish palette.
Designs for short nails with gel polish (with photo)
The subject of drawings also needs to be approached with caution. Only a person with artistic training can depict small details quite clearly, and even duplicate them on several nails. And here the stamping technique comes to the rescue . Small one-color images look very organic on small, bright nails.

Bright summer gel polish for short nails (with photo)
In terms of brightness, varnish manufacturers took care in advance and thoroughly. It is probably impossible to imagine a shade or color that has not yet been embodied in gel polishes. The brightness can always be diluted with camouflage gel or discreet monochrome patterns.
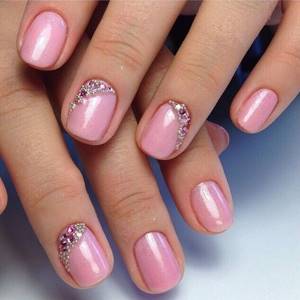
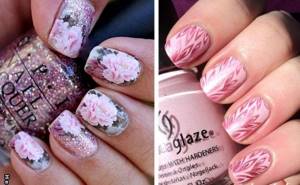
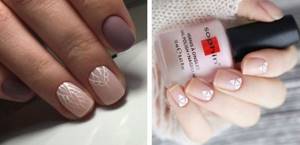
Delicate design with gel polish coating
If you don’t want to draw attention to your hands , gel polish coating also provides this option. The palette of calm colors, of course, is not as diverse as that of bright ones, but it is also worthy of attention. A nude manicure with a discreet design will give your hands a well-groomed and sophisticated look.
Discreet design with gel polish coating
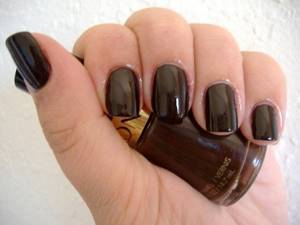
The restrained dark palette is also adequately presented. Charcoal and slate gray, caramel, terracotta shades will add a touch of nobility to your manicure . Even such restrained colors are not boring with a certain imagination and are exponents of the excellent taste of the hostess.

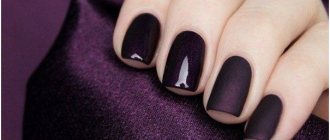
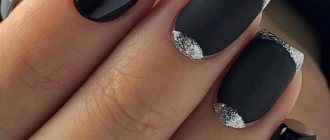
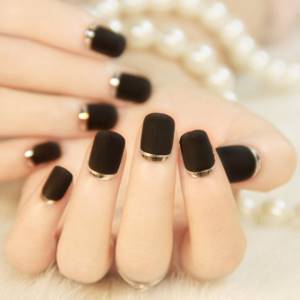
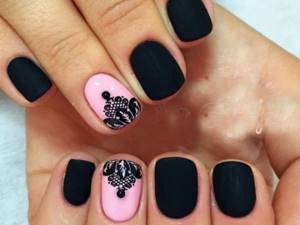
Black design with gel polish coating
Black is a color with its own history. It is in black that a glossy manicure looks rather teenage and defiant. But with a matte top, black takes on a dusty charcoal hue and plays out completely differently . In combination with gold, silver and stones it looks aristocratic and sophisticated.
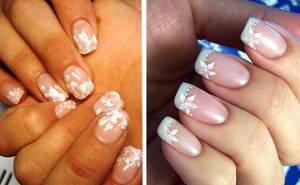
Wedding design with gel polish coating
In contrast to all established traditions, wedding manicures on short nails are becoming increasingly popular. Delicate patterns completely transform short nails and, together with a lush wedding dress, create a gentle image of a princess from a fairy tale . Even in wedding photos, the design of short nails covered with gel polish looks appropriate.
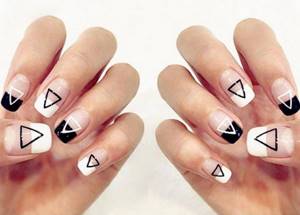
Geometry in nail design with gel polish coating
Even if you didn’t do well with geometry at school, you simply must try out geometric designs on your nails. Moreover, this is a very popular modern trend. Clear lines, triangles and other, in general, simple shapes form unusual and interesting pictures on the nails. In terms of the number of options, geometric motifs are in no way inferior to floral ones.
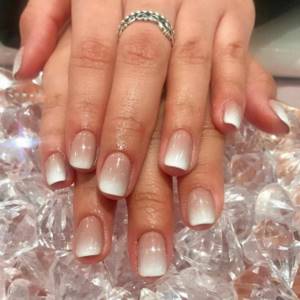
French design with gel polish coating
A French manicure performed with gel polish with a short nail length allows the hostess to go, as they say, to both the feast and the world. Lines of any colors for a French smile based on any colors do not create boundaries for the design. Colored hole, double smile - options for those who do not want to constantly follow traditions .
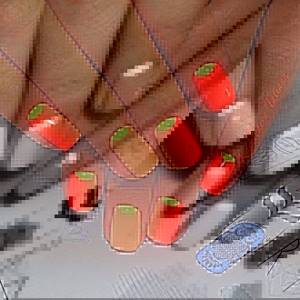
Funny manicure
Manicure is an opportunity to express yourself and create something interesting on your nails. Of course, beautiful designs with neat patterns look amazing, but sometimes you want to stand out. This can be done with the help of funny and amusing drawings. They look very cute on short nails.
It is best to choose images that you can easily repeat at home. The easiest option is to paint scrambled eggs on your nails. The tip of the nail should be painted over with white varnish that does not show through. Be sure to wait for it to dry. Next, place yellow dots in the middle of the white spot - they will imitate an egg yolk.
The article presents just a small list of designs that can be used on short nails at home. There are also matte, moonlit, shiny, French, manicure with rhinestones and others. Each of them will look great, the main thing is to follow the rules of color combinations and not use too much of everything in one manicure.
Remember: short nails are not a reason to go without a manicure or do the most primitive designs. Don't be afraid to experiment.
French manicure options
It is wrong to believe that French manicure is only done on long nails. It is perfect for short lengths and looks more elegant and natural.
Classic design - transparent or beige nail plate, white “smile” at the end of the nail (free nail area).
Colored French manicure is also popular - the smile is painted in bright colors, amber, and the plate remains natural in color or is also painted in a different color. There are only three ways to draw a French smile.
Method one
Using a thin brush, outline the thickness of the smile. Then it is rounded and well painted. The end of the nail is fixed. First, all fingers of one hand are painted, except the thumb, and sent to the lamp.
Then four fingers of the other hand are painted and also sent for drying. Finally, the thumbs of both hands are painted. If the design is not done, the nails are covered with a topcoat.
Method two
On both sides of the nail plate (slightly closer to the edge than the middle of the nail), a thin brush draws a line towards the edge - small triangles are obtained.
These lines are connected by a thin horizontal stripe. Then the entire design is painted over, rounded and the end of the nail is sealed.
Painting occurs in the same way as in the first method - 4 nails, 4 nails, 2 large nails .
This method is more suitable for medium-length and long nails, because it makes the smile area thicker.
Method three
Without preliminary lines, a smile is outlined with a thin (or flat) brush, starting from one of the edges of the nail. All voids are immediately painted over.
This method requires preparation and skill ; it is extremely rare to paint all 10 nails perfectly the first time.