What do we think about first of all when starting a manicure? In addition to hygiene and neatness, the purely aesthetic effect of the procedure is of great importance. The nails should be beautifully decorated. The beauty formula for manicure is the harmony of shape and color. That's why decorating your nails starts with giving them shape.
Important!
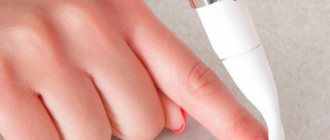
A common mistake is to trim the length of your nails with scissors. It would seem that there is nothing “special” about this: if you trim a little, you will have to cut less, but this is a deceptively simple way out. When we cut our nails with scissors, we bend the nail plate, and under the influence of pressure, its edge becomes covered with microcracks. Brittle nails may even begin to crumble from this procedure. In any case, we weaken the nail plate in this way, which has a bad effect on its strength and ability to maintain a given shape. Don't be surprised later if your nails start to break, flake or curl. If you want your nails to please you with their strength, remember: we do not cut our nails with scissors, but only file them or cut them off with special clippers!
How to choose the right nail shape
Nail art trends annually offer us several options for current forms. Classic elegant shapes, based on basic geometric shapes, do not lose their relevance from year to year, and extravagant configurations become hotly fashionable for a season or two, and then become a thing of the past.
But it’s not only trends that dictate to us what shape to cut out on our nails. Individual factors are also important. Each of us has hands, fingers and nails that have individual proportions and sizes that are not always pleasing with classic clean lines. And manicure is an art designed to hide imperfections and bring any individuality as close to ideal as possible.
Therefore, the shape of the nails must be chosen in accordance not only with trends, but also with the individual characteristics of the shape of hands and nails. The classic ideal is a fairly narrow brush, straight, long fingers, and elongated nails. This is the model we strive for.
Let's see which nail shape suits which finger and hand shape.
Oval
The oval shape is considered classic and universal, suitable for any type of hands and nails. It also matches with most designs.
Usually the oval shape is cut out not too long. This solution allows you to work with your hands comfortably, because your nails remain strong and do not get in the way. Another plus is that this shape lasts for a long time, because it is natural and requires minimal correction. The secret of the harmony of the oval shape is that it follows the shape of the nail hole. This is also a hint when working, because the configuration of the hole is different for each person.
Round
Similar to oval, but more rounded. It is usually recommended for larger, wider hands and less graceful fingers. The most advantageous look is a round shape with a length of no more than 2–3 mm.
Square
It is also not recommended to cut this configuration, leaving too much length. The advantages of the square shape are the strength of the nails, a harmonious combination with a wide brush and large fingers, and always a stylish look. The fact is that it never goes out of fashion and always looks very current and stylish.
Square-oval
This shape combines the style of a square with the convenience of an oval. The rounded corners do not interfere or catch, while the nail is formally square. But you have to accept that the square-oval shape looks less fashionable and more pragmatic than the square one with sharp corners. But it allows any nail length.
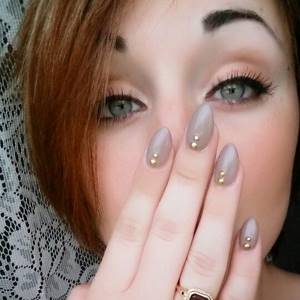
Almond-shaped
The marigold follows the shape of an almond. This configuration is cut out on the basis of an oval, but the side parts are more inclined, the middle part of the nail is pointed and not round. Almond-shaped nails can have different lengths; they don’t look good if they are too short. They give the image a piquant predatory look and make short fingers visually more graceful, however, if the palm is wide and the fingers are thick, it is better to abandon this shape.
By the way!
In addition to these classic and always relevant forms, there are specific configurations that periodically come into fashion: pipe, pointe shoes, stilettos and others, but they are almost never cut out on natural nails. Such exotic designs are usually possible with extensions.
Decor
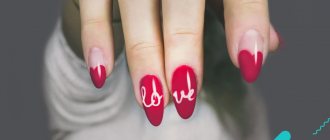
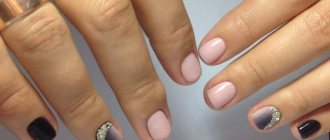
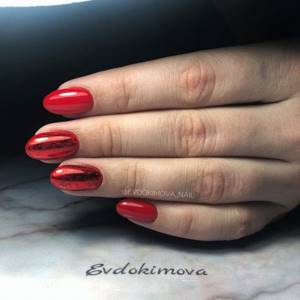
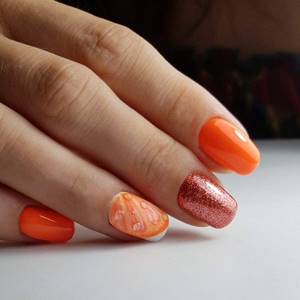
Today, oval nails in a dark color palette look good, and the following shades of varnish give nobility and sophistication:
- wine;
- burgundy;
- Navy blue;
- black.
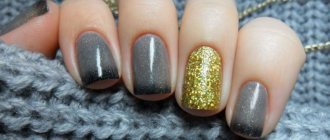
In these colors you can perform a complete manicure, and you can also accent several nails or decorate any element. The oval shape is one of the safest for dark-colored varnishes, because when applying them, due to the lack of clear angles and lines, errors are not noticeable during application.
A velvety texture is becoming increasingly common in the matte finish of oval nails. It looks great both as an accent and as a whole.
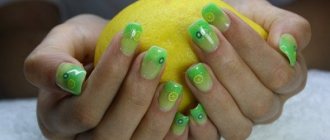
Volumetric manicures with colorful patterns or bright colors, as well as in a pattern known as a sweater, are extremely popular. This is a pattern whose relief is similar to knitting. It is on oval-shaped nails with soft outlines that this type of manicure looks amazing.
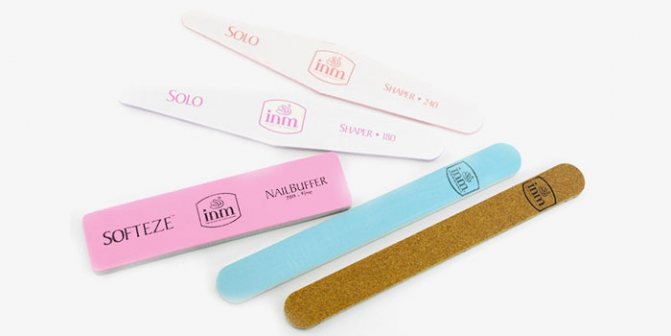
How to choose a nail file
The main tool for giving the chosen shape to our nails is a nail file. Nowadays there are a huge number of different files available for sale, which differ both in the material from which they are made and in the degree of abrasiveness. I think you will agree that in order to do a manicure with your own hands at a professional level, first of all, you need to understand nail files like a real pro. Therefore, I propose to arrange a small educational program on saws.
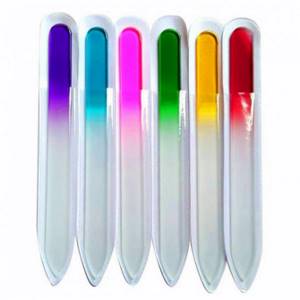
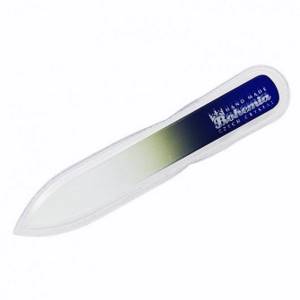
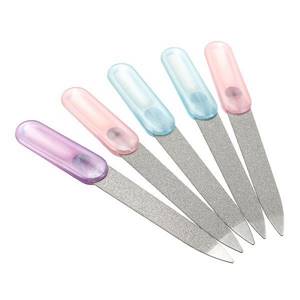
Glass files
This version of files is very gentle and gentle on nails. If you have a weak nail plate that is prone to peeling and crumbling, choose a glass file.
Glass files are “eternal”. If you're tired of constantly buying files because their abrasive coating wears off, buy a glass or crystal copy and forget about this problem forever!
Advice
I really love glass nail files. I like that they go “like clockwork”, they cut very finely, but surprisingly effectively, and they give a smooth, polished edge. But, alas, you cannot carry such a file in your purse. I once had a similar sad experience. Something shifted in the bag, and my beautiful (and expensive) nail file crumbled into pieces; even the suede case couldn’t save it. Since then I have only used glass files at home.
Crystal files
They have the same properties as glass. They do not spoil the nails, they are filed evenly and smoothly. You can even use a crystal nail file to treat the cuticle without damaging the skin.
Important!
Another advantage of crystal and glass files is their inertness, thanks to which they are not afraid of any disinfectant solutions, which, you see, is very convenient and hygienic. If you don't break your little helper, it will serve you for a lifetime. The disadvantages of such files include their fragility.
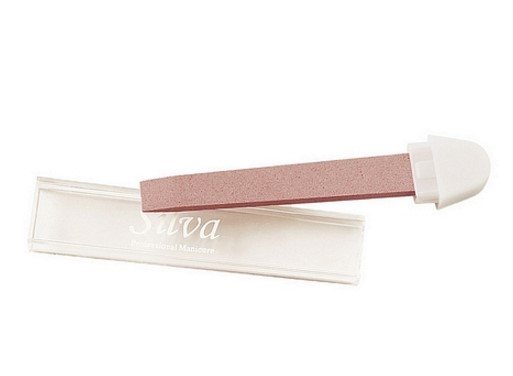
Ceramic nail files
Coated nail files made from ceramic can have varying degrees of abrasiveness. They are suitable for nails and cuticles.
Manufacturers of ceramic files claim that their products are suitable for peeling nails. Such files do not wear out and, theoretically, can last forever. In life, of course, everything is not so rosy, since chips may appear on the nail file.
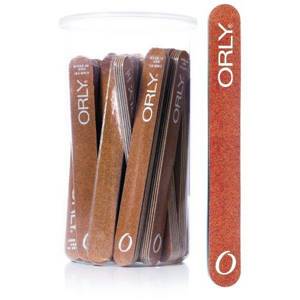
Pomegranate files
The abrasive particles here are made of garnet crumbs. Spraying is usually applied to a wooden base.
These are durable files that last for several years of regular use, but they are very rough and are suitable for extended nails or for quickly cutting the length of natural nails, followed by polishing, for example, with a glass nail file.
Important!
Spraying on files can be not only garnet, but also from other materials, for example, aluminum oxide (stone file) or silicon carbide. Different types of spraying work differently. It also matters how large the particles are used for spraying, but we’ll talk about that later. For the quality and durability of the file, it is of great importance how dense and durable the spraying is, and whether it allows you to wash and disinfect the tool. All these points must be paid attention to when purchasing.
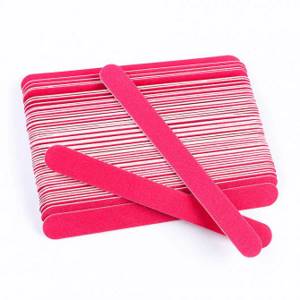
Paper-based files
These files are practically disposable and are more suitable for salons. They're pretty inexpensive.
Usually, a cardboard base is sprayed on, which allows you to process nails. Previously, such files were not waterproof and could not be disinfected, but now special resistant materials are used, or the files are sold complete with a special disinfectant. In my opinion, this is a good option for a handbag or for travel.
Foam plastic files (polyethylene)
These files and buffs are very nice. They are a little soft, flexible and very delicate.
Typically, one side is for filing and the other for polishing the nail plate. The advantage of plastic files is that they are gentle on the nails, but the disadvantage is that you cannot seriously remove the length with such a file, that is, it is not universal. Over time (I would say quite quickly), polyethylene files wear out and cease to perform their functions.

Metal files
As the name implies, the base of such files is made of metal, hence the property of the file - its strength. The abrasive surface can be organized in one of two ways:
- spraying of mineral chips;
- laser processing of metal.
Laser-processed files are practically eternal, while those with spraying may wear out over time, but are also very durable and reliable.
I love metal nail files for their strength and durability. You can carry them in your purse, take them with you on trips and not be afraid that you will be left without a tool at the most inopportune moment. But they are still a little rough for sensitive nails, and since mine are just like that, I only have a metal file on duty, in my cosmetic bag. I use it only in situations when my favorite glass file is out of reach.
What is abrasiveness, and how to choose a file based on this criterion
To file a nail, the file must have the property of abrasiveness. Outwardly, this is expressed in the fact that its surface is not smooth, but rough to one degree or another, due to which it cuts the nail.
The roughness of files is measured in special units called grit. It is these units that will help us learn how to choose the right file for our nails, which can be artificial or natural, and the latter can be quite durable or, conversely, thin, fragile, and prone to delamination. An incorrectly chosen nail file that is too rough will turn your nails into rags, and a nail file that is too gentle will result in you spending hours puffing away at your manicure.
Advice
The basic rule: the less grit, the more aggressive the file. It's easy to remember. The number of grits indicates how many abrasive particles fit on a square centimeter of the surface of the file. The fewer there are, the larger they are, and the larger they are, the rougher the file. Sometimes two values are indicated separated by a dash. This means that the two sides of the file have different degrees of abrasiveness. Such files are practical: we cut off the length with one side and polish the other.
Let's take a closer look at which file is suitable for which nails:
- 60–80 grit is a very coarse file only for artificial nails, mainly for cutting lengths.
- 100–150 grit - also save this file for extended nails, it is suitable for giving them the intended shape.
- 150–240 grit characterizes the file as medium-hard. This file should still not be used on natural nail plates. But for the final processing of artificial nails, it will be just right.
- Files from 240 grit and above are already suitable for processing natural nails.
- 240–400 grit - soft files, suitable for processing natural nails.
- Files with an abrasiveness of 400 to 900 grit are soft enough to prepare the nail plates for polishing.
- 900–1200 grit indicates that this is a very gentle file or buff, designed to polish the nail plates and give them a wonderful shine.
Bonus! More than 180 photo ideas! Beautiful manicure!
For the most curious and always read our articles to the end, we have prepared a small bonus - more than 180 ideas for a beautiful manicure! Meet 180 interesting nail designs with photos! A beautiful manicure inspires!
If you also have your own ideas for a beautiful manicure, share them with the readers of our magazine through the comments! Rate the article, give us a like - if it was useful to you! Thank you!
Price issue
So, we figured out that, despite all our ardent desire to save money, we won’t be able to get by with just one nail file. You will have to buy at least three files in order to remove the length, shape and polish your nails, and you will also need a “duty” file for your cosmetic bag. All these files have different requirements: a tool for home use should be durable and stable, but for a handbag you can choose a simpler file, but it should not be fragile and brittle.
What prices for nail files do online stores offer us:
- files on a wooden base - from 30 rubles ;
- ceramic files - from 100 to 400 rubles ;
- glass files - on average 200 rubles ;
- files for artificial nails - from 40 to 100 rubles ;
- metal files with laser notches - from 200 to 350 rubles .
In general, a nail file is a necessary item, but usually you already have something similar at home, and there is no need to rush. So I recommend keeping an eye out for sales and buying discounted tools. If you especially like some nail files and are suitable, but do not belong to the “eternal” category, buy them as a spare, because they do not take up much space.
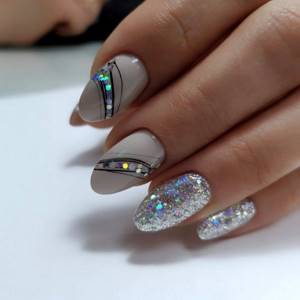
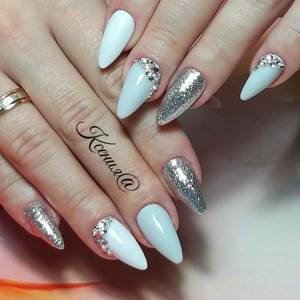
Decor with rhinestones and stickers
If you don’t want to show creativity and creativity with different shades of varnish, then create your own nail design using decorative rhinestones or stickers. They can be placed on the nail plate in an artistic manner
It is only important to wait until the base varnish has completely dried. To prevent the decor from falling off, cover the nails with a transparent top coat.
Loading …
These simple manicure ideas that you can implement yourself at home are good for both short nails and nails of other lengths. Stay stylish under any circumstances.
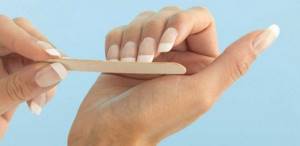
How to file your nails
You probably know that cutting your hair incorrectly causes it to deteriorate and begin to split? It's the same with nails. Incorrect filing can seriously harm them. If you soak the plate using the wrong methods, it deteriorates further, the nails peel and deteriorate more and more. Let's be smart so as not to spoil our nails.
Advice!
Always choose a file that is a little softer than you would like.
So, you have chosen a suitable file, thought about the length and shape of the nails, suitable for the shape of your hands and the length of your fingers, in harmony with the outlines of the holes. Now you can start filing. Remember these simple rules:
- Only file nails on clean hands.
- Remove the coating from your nails.
- Don't forget to treat the nail file with a disinfectant.
- In most cases, you only need to move the file in one direction - from the sides of the nail to its center. Otherwise, the tip of the nail becomes loose.
- Press the file firmly against the tip of the nail; keep it perpendicular, but do not saw with excessive force.
- Use a coarser file first to remove the length. You can also do this with special nippers. Then take a softer file to give the end of the nail the desired shape.
- After finishing filing, the edges of the nail are still rough. Now it’s time for a gentle polishing file, which will smooth out all the unevenness.
- You can also polish the surface of the nail plate with a buff. This manicure looks neat and beautiful even without a decorative coating.
- At the end of the procedure, rub in moisturizing cream or nail oil.
Preparation for the procedure
Before you start decorating your nails, prepare all the necessary tools:
- Nail scissors. Used to adjust the shape and shorten nails to the required length.
- Tweezers. Used to eliminate cuticles and hangnails.
- Files. Helps correct the shape and length of nails. There are these types:
- Disposable with a paper base, covered with graphite on top.
- Metal. Used for healthy, undamaged nail plates.
- Plastic. Suitable for natural nails.
- Glass. Used for filing thin, weak surfaces that have been chewed.
- Ceramic.
According to the grain size of the files, there are:
- Rough, for cutting down artificial materials (gel, acrylic).
- Medium, forms the length of the plate.
- Soft - for finishing.
- Very soft - for polishing.
For the procedure we will also need:
- Wooden sticks. With their help, they remove dirt under the nails and move the cuticles.
- Nail brush. Cleanses the skin of the hands and nail plate from impurities, softens rough skin.
- Nail polish remover. Removes old varnish and degreases the plate before painting.
- Cuticle softener. A special cream or liquid that softens the cuticle skin and slows down its growth in the future.
- White correction pencil. Colors the tips of the nails from the inside.
Give your nails the desired shape
Different nail shapes require different filing techniques. Knowing little tricks will help you achieve the best results.
Oval and round shape
Align your nails to length. Start filing them from the sides to the center with movements in one direction, stopping a couple of millimeters before the middle of the nail. Round the center part. Use a fine file to polish the free edge of the nail.
Almond shape
An almond-shaped or even more pointed, “cat-shaped” shape is sawn on the basis of an elongated oval. After you have filed the oval, continue working with the nail file on the sides of the nail until you achieve the desired slope of the sides and the intended sharpness of the tip. Smooth the edges with a polisher.
Sawing a square
The square shape of the nail can have sharp or more or less rounded corners. However, it all starts with an angular square. First, we file the nails horizontally, and this is the case when you can file with back-and-forth movements. Bend your fingers, turn your palm towards you and place your finger on the nail file so that the nail is perpendicular to it. File down the horizontal lines on each finger. Now process the sides, making sure that they are parallel to each other. You can make the side parts inclined towards each other, it will be a trapezoidal shape. In any case, we slightly round the corners so that they do not cling to anything. Depending on the idea, you can round them more. Polishing.
Oval
They look almost like square nails, but their ends and corners are slightly rounded rather than filed straight down. This makes the nails easier to maintain and less likely to break at the sides. They are truly suitable for all women, regardless of the length of the fingers and the width of the palm.
When choosing a specific nail shape, we must count on the fact that not only the shape is important, but also the method of cutting it. The key is to get rid of scissors and clippers that cause split nails. Remember, however, that no matter what nail length or shape you choose, clean and well-groomed hands are key.
How to file a nail if you don’t have a file at hand
Sometimes you need to file your nail urgently. For example, it broke, delaminated. This can happen because the nails are too fragile and brittle. In this case, it makes sense to figure out what the problem is: perhaps you wear polish too often and do not allow the nail plate to recover, or your diet lacks protein and microelements, or you pay little attention to nail care. In any case, restoring nails is a long process, and a broken nail requires action right away.
It also happens that the nails are fine, but the edge may break off due to an impact. I often get hangnails on my nails from getting caught in the teeth of a zipper. And, although I try to carry a file in my purse, sometimes it happens that I don’t have it at hand.
There are fun ways to file a nail without a file, although, of course, this is just a temporary measure. So, they file their nails:
- ribbed side of the coin;
- asphalt;
- brick.
10 mistakes when using a nail file:
- Purchasing a low-quality tool.
- Using a nail file that is too rough.
- Using only one file, while for high-quality filing you need 2-3 files of varying degrees of abrasiveness.
- Filing painted nails. The density of the nail and the coating are different, hence the unpredictable effect of such treatment. However, if we are talking about the fact that the painted nail is broken, it is better to carefully file it.
- Too frequent filing. I know that for some girls this turns into an obsessive habit. Don’t do this, because even the most careful filing always causes microtrauma to the nail plate.
- Sawing in different directions. This way you can get peeling nails.
- Filing wet nails. Water softens the nail plate and is injured when filing.
- Cutting takes too long. If the nail is long, cut off the tip with a nail clipper. The gold standard for filing is no more than 10 file strokes on each side. This is what we should strive for.
- Filing the edge of the nail too deeply.
- Cleaning dirt from under the nails with the tip of a nail file. This can cause injury, and the wounds under the nail are very painful and take a long time to heal.
Any girl should know how to file her nails correctly. Science is not tricky, but without knowing the subtleties, even such a simple procedure can cause harm to yourself. This is why it is necessary to know and follow the rules.
Do you have your own favorite ways to file your nails? Let's discuss them!