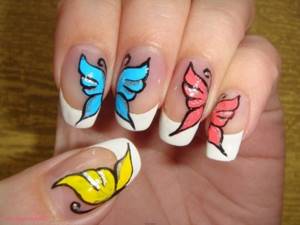
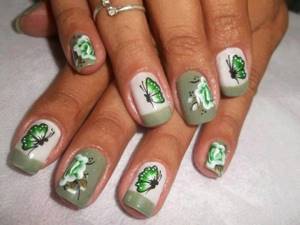
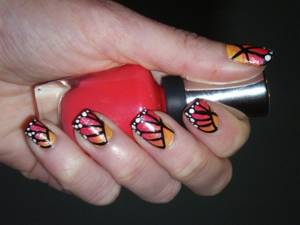
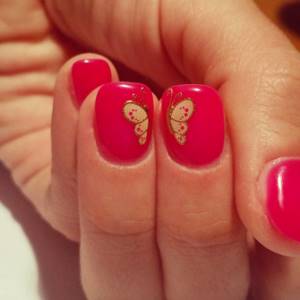
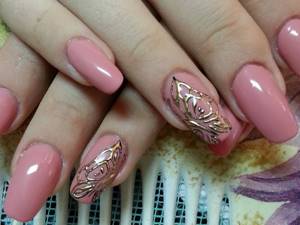
Modern fashionistas prefer to paint real works of art on their nails - they use whatever they can to decorate their nails. Manicures with butterflies are also at the peak of popularity, to create which you don’t have to visit a salon.
Well-groomed women's hands are a sign of self-confidence, femininity and beauty. A good manicure never goes unnoticed . This is one of the most important factors of female charm. Thanks to a large number of techniques and a variety of designs, you can make a real masterpiece out of your marigolds.
This article will focus on butterflies . No, we won't dive into biology lessons. We will learn how to draw these airy creatures on our nails.
How to draw a butterfly on nails step by step with a photo?
Spectacular nail art will require some effort on your part: perseverance, time and precision. But after a few experiments, you will be able to easily cope with the butterfly drawing.
Drawing a butterfly on your nails is easier than it seems
Before this procedure, you need to decide on the materials. First of all, choose a palette of varnishes for yourself . Then prepare the necessary tools :
- A flat brush with a slightly beveled edge
- A thin brush called a “hair”
- Nail polishes
- Dots
An airy and delicate butterfly on your nails will lift your spirits. But before you start painting, get your nails in order . Using a special product , clean the nail plate and treat the cuticle . Now you can start drawing.
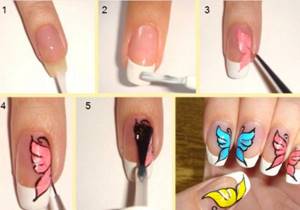
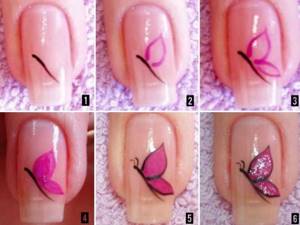
Step-by-step creation of butterflies on nails
- You will need several steps. To begin, apply a base polish to your nails . It can be any color you wish. But it’s better if it is a muted and discreet tone, for example, beige or pink
- When the base dries a little, we begin to draw a butterfly . For convenience, you can use an improvised palette (a piece of cardboard). Apply two shades of varnish on it , for example blue and white. Dip one edge of the brush into blue polish, and the other into white. Having mixed the shades in this way, draw the butterfly wings
- Once you have completed this task, you can begin drawing the contour. Frame the drawing with a thin brush and black varnish . To make the butterflies look realistic, you need to paint small veins on the wings with a thin brush.
- Now you need dots. You will need to draw several black dots that will imitate the body of a butterfly. For brightness, you can put white peas in the center of each point . Using a thin brush, add black mustaches
- If you want to make your drawing brighter , you can decorate it with rhinestones or sparkles . Next, coat the nails with a fixing varnish to make the design last longer.
There is an easier way to create butterfly wings using a needle.
Just a few steps and your nails will look mesmerizing!
We draw on our own
Now let's understand how to decorate your nails with butterflies, how to draw them on your nails, understand all the stages and look at photos that show the whole process step by step.

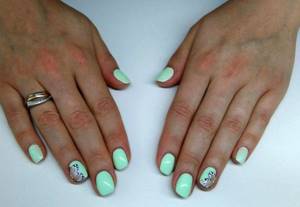
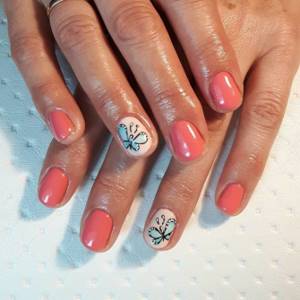
Minimalistic and stylish design
A small butterfly on top of a colored jacket
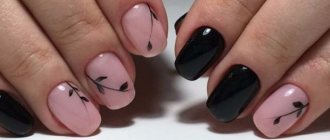
Bright butterflies contrast with the black coating on neighboring fingers
First, let's prepare the tools that we will use while drawing. We will need:
- A nail dot is a special stick that ends in a ball. In extreme cases, dots can be replaced with a wooden toothpick.
- A narrow brush.
- Flat brush.
- The sponge is only needed to create a gradient.
- Tweezers if you will decorate the butterfly with rhinestones.
Once the set listed above is assembled, you should move on to preparing your nails. We give the nails the desired length and shape, and tidy up the cuticles. We cover the “canvas” with a base layer of varnish and be sure to let it dry completely before moving on to the next stage.
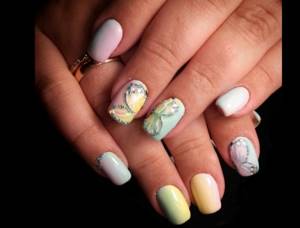
Delicate spring manicure
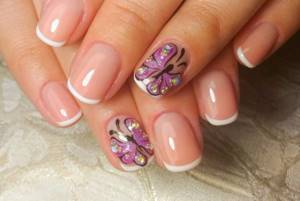
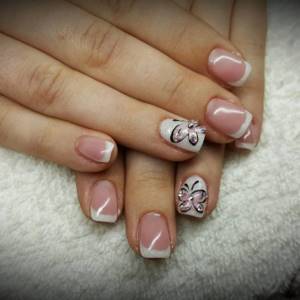
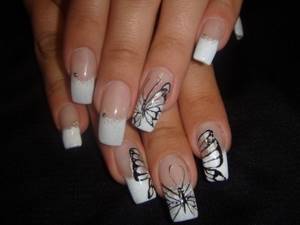
The classic French jacket is decorated with a beautiful butterfly
Rhinestones and sparkles are often used to decorate butterflies.
Advice! Only impeccably well-groomed hands with a properly done manicure will be the ideal basis for such an exquisite painting.
How to draw a butterfly on nails with gel polish, photo
Gel polish differs from regular polish in that it has a more durable structure and fits perfectly on the nail plate . But it requires drying under an ultraviolet lamp . Therefore, if you decide to paint a butterfly yourself with gel polish, stock up on the necessary tools.
Nail design “Butterflies” with gel polish
- First of all, prepare your nails . Trim the ends, trim the cuticles and lightly sand the nail plate. Wipe your nails with a degreaser and apply base. Then dry it a little under the lamp
- Now you need to apply gel polish for the base . The choice of shade is optional. But it is better to pay attention to pastel colors , then the drawing will look brighter and more voluminous . Dry your nails under the lamp again
- Drop two shades of varnish onto the palette, for example. Dip one edge of the brush into one polish, and the other into another. Having mixed the shades in this way, paint the butterfly wings with gel polish. Dry again. For expressiveness, you can repeat the drawing of the theme again in the same shades . You can sprinkle the butterfly wings with sparkles or decorate them with rhinestones
- With a thin brush we apply contours, draw the body and antennae of the butterfly. To do this, you can choose black or brown varnish. Then we cover the finished drawing with fixing varnish . Dry it and you're done
Who is it suitable for?
Nail designs with butterflies are suitable for summer manicure, they look cute and gentle. Suitable for young girls and women, ardent and romantic natures. The painting allows you to stand out and show your imagination; it differs from each other in the shape of the wings, antennae, body, and range of colors. The insect can be stylized as abstract or drawn in a realistic style.
Attention! When choosing colors for a pattern, avoid dark, aggressive shades. Soft pastel gives the butterflies tenderness and lightness.
How to paint a butterfly on your nails step by step with shellac?
Shellac is often confused with gel polish, but they are far from the same thing. Shellac is a very flexible varnish that is resistant to any damage . It has virtually no odor and dries quickly. The color palette is quite rich, which allows you to choose a color to suit your taste. And most importantly, it is practically harmless .
Painting butterflies with shellac is as easy as painting with gel polish
It applies perfectly and has a beautiful gloss . The application technique is no different from gel polish. Shellac requires drying under an ultraviolet lamp . But such a manicure will last for a month without any damage. You can apply various designs to shellac or paint with shellac itself. Try to draw airy and beautiful butterflies on your nails. They look great and add a sense of lightness to the entire look.
Step-by-step drawing of “Butterflies” with shellac
How to draw a butterfly with a needle on extended long nails?
In order for beautiful butterflies to appear on your nails, you don’t have to go to the salon. It is enough to have at your disposal several shades of varnish, a sewing needle and a fixative.
- First of all, provide good lighting. Also, prepare everything you need.
- For large patterns or dots you will need a large needle , and use thin ones for small details. You can paint both short nails and long extended nails
- Apply the base to your nails, and after drying, cover them with your chosen varnish. After the base has dried, you can begin to apply the butterfly design . There are no limits to your imagination here. Experiment, fantasize, use different colors of varnish
- After applying the design, be sure to go over the nails with a fixative. This will make your manicure last much longer.
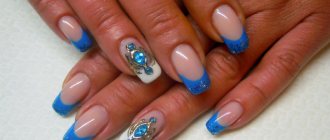
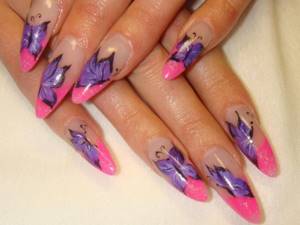
Butterflies on extended nails
On long extended nails, the “Butterfly” design will look very impressive.
But here are a few more secrets so that creating patterns on your nails will only bring pleasure .
- Bright pictures are best placed in the corner of the nail plate
- Follow the color combination . Oversaturation can play a cruel joke. The drawing will look clumsy and funny. It is better to use the application technique on one of the nails on your hand. Modest interesting drawings will arouse more interest
- It is better to always start drawing work with the little finger . Even if something goes wrong, the work will still seem finished than if you started with your thumb
- Use sparkles or rhinestones in your work , so the drawing will look more advantageous
- Choose thick varnish for the main color
Sequins and rhinestones will greatly decorate your nail art in the “Butterfly” style.
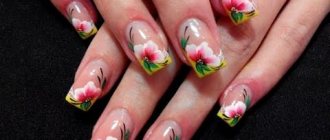
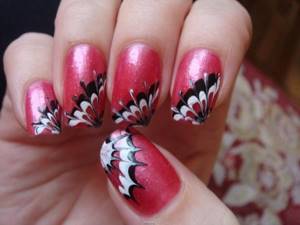
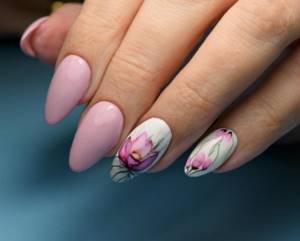
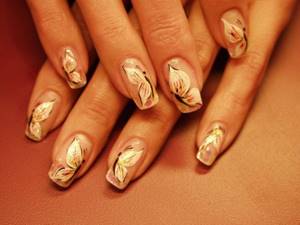
Watercolor manicure with flowers
Flowers are the most common nail design option using watercolor technique. In order for the floral image to have a more neat and beautiful appearance, it is worth paying tribute to the finished pictures. This will provide a unique opportunity to monitor the correct application of specific ornaments and colorful shades. Watercolor paints provide a unique chance to obtain the desired color range by mixing and diluting paints. Thus, the desired floral design does not require multi-layer applications. You just need to approach the shades correctly and apply them as carefully as possible.
How to draw a butterfly on short nails?
If you are the owner of short nails , then you do not have to do only a single-color manicure. A well-chosen ornament will hide imperfections on the hands and emphasize their advantages. Butterflies also look interesting on short nails. However, you should listen to a few tips before applying this design to your nails:
- It is better to place the butterflies closer to the free edge of the nail, this will help visually lengthen your fingers
- To make the nail plate appear narrower , several dark accents should prevail in the design
- When applying a butterfly design to a colored base , leave one millimeter on the sides of the nail unpainted.
- For short square-shaped nails, clean lines are suitable. Smooth and blurry lines will look great on other shapes
Butterfly wings on short nails
Remember that the manicure should not be dissonant with your image . For the rest, use your imagination and act!
You can be a smart person and think about the beauty of your nails
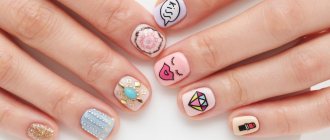
In order for these designs to truly become decorations of our nails, we should familiarize ourselves with the basics of design and choose the most successful options for depicting butterflies on nails. This design is usually called nail art. You have most likely already encountered this term in the press and literature.
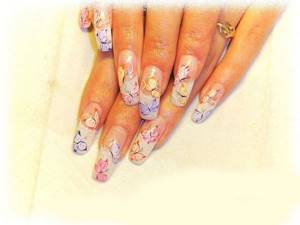
Images of butterflies on nails can be very diverse. Simple drawings, almost abstract, in which you can only guess the contours of delicate wings, or carefully drawn, accurate images, fascinating with realism and bright colors. In this matter, the only limitation is the “ceiling” of your imagination. Create and show the world the fruits of your imagination!
Images of butterflies on nails can be very diverse
Half a butterfly on each finger. A complete composition is obtained by putting two fingers together
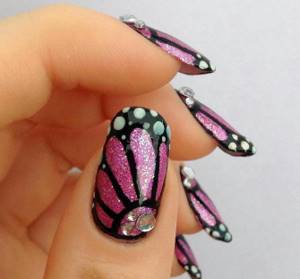
Only the wings of a butterfly are shown here
Such drawings can be done on different backgrounds. A bright base will serve as an excellent background for the outline of a cute creature, and on nails coated with pastel-colored varnish, you can draw a multicolored bright butterfly. Moreover, butterflies usually look more impressive against a light background.
Advice! A classic French manicure is an excellent background for creating such an image.
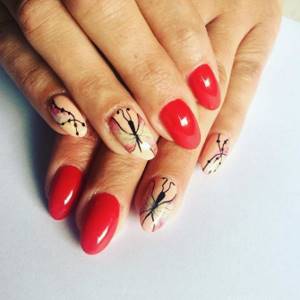
If you wish, you can cover all your fingers with the same pattern, or you can depict a butterfly on only one nail. Another popular technique is to depict the wings of one butterfly on two adjacent nails.
Borrowed from leading fashion designers, this solution will look fresh and attract the attention of others.
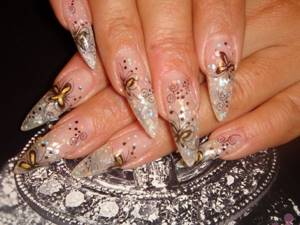
When creating images of butterflies, you can use foil for their wings - golden or silver in a shade of your choice.
For a manicure done for an evening outfit, it is appropriate to use special techniques and materials. To create such a manicure, modeling elements, rhinestones, sparkles, and beads are used. True, in this case, as in no other, a sense of proportion is important in order to get an exquisite manicure, without a hint of redundancy and vulgarity. You don’t want to negate the results of your hard work, do you? Using large rhinestones, you can carefully place only one pebble on the corner of a wing or instead of the head of a delicate beauty.
A bright base will serve as an excellent background for the outline of a cute creature, and on nails coated with pastel-colored varnish, you can draw a multi-colored bright butterfly
A classic French jacket is an excellent background for creating such an image.
If desired, you can cover all your fingers with the same pattern, or you can depict a butterfly on only one nail
A neat, tasteful manicure with butterflies will be appropriate in both summer and cold winter in any environment.
How to draw a butterfly from broken glass on your nails?
The “broken glass” manicure technology looks very original and attractive . Moreover, to achieve this effect you do not need stones or diamond dust. It is enough to buy either a special film or regular foil and show a little patience. Let's try to understand this trendy nail art and create a butterfly on your nails in this style.
- Take foil or special film , cut it into small pieces
- Choose gel polishes of your favorite shades and fixer
- Apply base coat to nails and dry
- Then apply the main gel polish . You can apply it only to those areas where you plan to make the composition
- tweezers, glue small pieces of foil in the shape of butterfly wings onto the base that has not yet dried.
- Outline with a dark outline and add antennae and body
- Dry it a little and then go over your nails with a fixative.
Butterfly made of broken glass
In sunny weather, such a design will literally “burn” with multi-colored shades.
How to draw a white butterfly on your nails?
Classic white color is always in fashion. And designs with white varnish on nails look very gentle and natural. To make the white butterfly look advantageous on your nails, use varnishes in rich shades as a base . For lovers of strict classics, black, raspberry or pink varnish is suitable. Youth style involves the use of blue, green or yellow shades.
Manicure “White Butterfly”
You can apply the design using a needle, brush, toothpick or a special dots device . A white butterfly with a black outline will look beautiful.
How to draw a black butterfly on your nails?
Black color always attracts attention. It looks expressive and at the same time restrained. To paint a black butterfly on your nails , you will need black polish. You can use gel polish or shellac , then the drawing will look brighter and more voluminous. And it will last much longer.
Black butterfly on nails
For the background coating, you can take any color from a huge palette of varnishes. It will be enough to apply a base varnish, cover it with the chosen varnish on top - and you can paint. A black butterfly with white or colored splashes will look best . You can add some flowers to this design.
Nail length
When decorating fingers in the butterfly design style, the length of the nails does not matter. This insect is universal in its shape and, depending on the length, the pattern can be extended or compressed, making it more rounded. Short nails do not require a special approach. The main thing is to avoid large images and an abundance of decorative elements. Small, discreet designs in pastel colors will decorate short nails. Long nails allow your imagination to run wild and allow for richer decor. In this case, everything is possible - large drawings, additional elements, bright rich colors.
How to draw a simple butterfly on your nails?
In order for beautiful light butterflies , you don’t have to go to the salon. You can make this beauty . It will take a little patience and diligence, but believe me, the result is worth it!
- You will need regular nail polish and a toothpick. The process includes several stages
- prepare your nails thoroughly . Remove the polish from your nails, clean them well and file them. After this, use a base coat.
- When the coating is dry, you can begin to apply the design. Dip the tip of a toothpick into black polish and place a few dots . This will be the body of the butterfly. draw wings around this point . Add mustache. That's it, the simple butterfly is ready
- Now let the varnish dry well and you can apply a layer of sealing varnish.
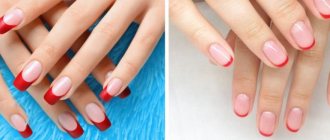
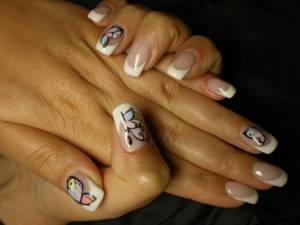
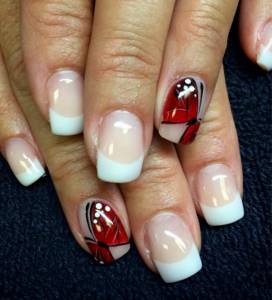
White jacket with butterflies on nails, photo
Discreet and elegant French manicure always remains in fashion. Doing this manicure at home is quite simple. And if you decorate it with butterflies , then a good mood and attention to your person will be ensured.

French in combination with butterflies is a very sophisticated manicure
- To do this you will need a base varnish, a wide brush, varnish of several shades, glitter and a fixer.
- The base is applied to the nails . Next, the tip of the nail must be painted with white or some other varnish and dried. Apply another coat of polish to the tip of the nail
- Now you can start drawing the butterfly . Using several shades of varnish we paint the wings. We outline the contours and attach several rhinestones or sparkles. Apply fixing varnish
As you can see, there is nothing complicated about this technique. Even a beginner can handle this. And an original French manicure with magnificent butterflies will decorate your nails.
Butterfly nail stickers
If you don’t want to bother with drawings of butterflies , there is a great solution - ready-made stickers . It doesn't take much time or effort to apply them to your nails. Just paint your nails with any polish and glue butterflies . Moreover, such stickers will last a long time if you cover the top of the nails with a fixing varnish .
You can also create original butterflies on your nails using stickers.
Such stickers are self-adhesive and water-based. In the first case, there is already glue on the sticker, and you just need to glue it right away. In the second case, the sticker must be dipped in water to activate the adhesive base, glued to the nail and excess water removed with a napkin.
Whatever method you choose, know that airy and beautiful butterflies on nails are not only beautiful, but also original . Allow yourself to be unique!
Butterfly using stamping method
For those who do not feel ready for drawing feats, we can offer excellent options for stamping or ready-made stickers.
A small life hack for applying a butterfly image using reverse stamping using a silicone mat. Typically, a stamping kit includes one stamp, rubber or silicone, with which an impression is made on the nail. If you want to get an image made in several colors, then you will need to resort to the reverse stamping technique. A convenient device for it would be a regular silicone mat for cutting dough, which is sold in any supermarket. It is great for making several blank designs at once, which are then placed and secured on the nail bed.
Step-by-step instruction:
- We apply an aqua base and two layers of varnish of the chosen color or design.
- We wait until it dries completely.
- Apply a base coat to the silicone mat in an even layer of medium thickness.
- Dry it for 2-3 minutes.
- Apply stamping paint to the selected butterfly design on the plate.
- Remove excess with a scraper.
- Transfer the butterfly from the plate to the stamp, and then in a rolling motion onto the dried base layer on the mat.
- We repeat step 7 as many times as we need designs on the nails.
- We color our butterflies with the chosen colors.
- Let it dry for a few minutes (the duration is determined by the properties of the varnish).
- Using a pusher and tweezers, carefully separate the dried sticker from the mat.
- We place it on the nail, level it, cut off the excess, press along the contour with a pusher or toothpick.
- Repeat steps 11-12 as many times as necessary.
- Apply top coat to all nails.
As you can see, drawing is not a very complicated process, although it requires a certain range of skills. However, persistence and accuracy will help you plant a bright and beautiful butterfly directly on your nail.