The invention of new generations of varnishes has made life much easier for many women: modern manicure is distinguished by its durable coating and long service life, and the variety of designs amazes with its solution. However, not everyone can afford to regularly visit a professional manicurist due to busy schedules or the high cost of the service. And someone may be interested in the possibility of designing their own nails. Everything is actually not that complicated, and as you gain some experience and have the desire, everyone will be able to do a manicure on their own, while saving a significant amount of time and money.
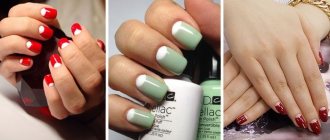
Let's talk about the most popular nail decor - French, and consider in detail how to make a similar option at home using shellac.
How to do a French manicure at home
You probably want to know how to make French shellac at home or can you cope with using regular varnish? We'll tell you some tricks that will come in handy. How to make a French coat correctly? You can use special strips for this. Besides, you can do without them. For success, it is enough to choose the optimal technique based on available materials and experience. In any case, by doing your own manicure, you save time and money. We invite you to learn about what types of techniques exist when creating such a popular French jacket. You will be able to decide on the most suitable manicure method and cope with the task without outside help.
Fifth stage: completion
When you dry the resulting coating, you can apply additional elements. These can be a variety of drawings using shellac or acrylic paints. Also, craftsmen often use decorative elements such as rhinestones, sparkles, beads, and so on.
After fixing the selected decor, you can apply the final coating. The base has a rather liquid consistency and is more reminiscent of a regular clear varnish. This substance must also be dried in a lamp. Treat your nails for five minutes. After this, evaluate the quality of the manicure and, if necessary, correct defects.
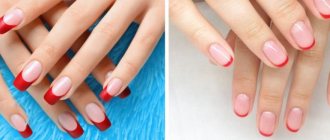
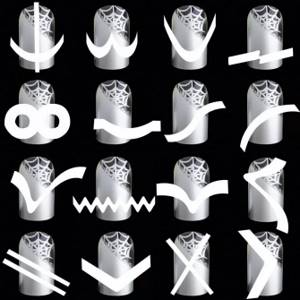
With stripes
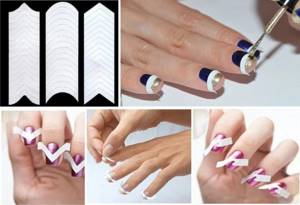
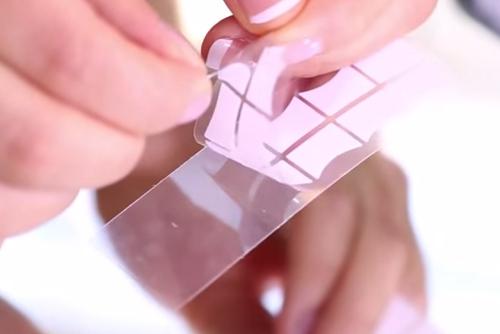
Very often, fashionistas resort to using special stripes, knowing how to make the perfect French jacket. They will help you get the job done very quickly. In addition, the strips will be indispensable for those who are beginners or are simply too lazy to use brushes to draw a detailed smile.
How to make a French jacket evenly? Let's talk in detail about creating decor with stripes:
- first you need to apply a colorless base or primer that will seal and protect the nail plate;
- the strip must be applied to the nail to try it on before further work;
- it's time to remove the protective film and attach the strip no more than 5 mm from the edge;
- the remaining part of the nail must be painted over with white or milky varnish;
- Once the polish is completely dry, all that remains is to remove the strip and cover the nail with a glossy topcoat.
Fourth step: drawing a smile
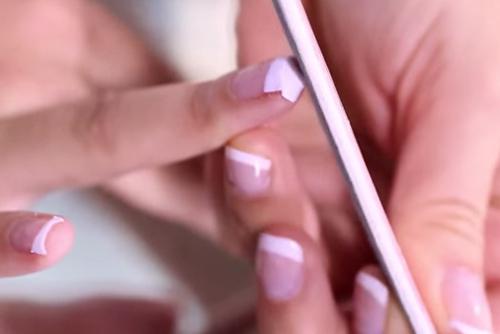
If you are good enough with a brush, then use it to create a smile. Place a small amount of the desired color on the palette and from there take the shade and create a smile. To manipulate, you will need a very thin brush.
If you do not have artistic skills, then purchase special stencils. They may be disposable. These are glued to the very tip of the nail. Also, reusable stencils have recently become increasingly popular. They are made of soft silicone and are suitable for several applications. Apply the selected product to the tip of the nail and cover the voids with a suitable shade. Remember that all layers must be very thin. Otherwise, the shellac will simply wrinkle during drying.
Without stripes
Before you make a French jacket for yourself, you should stock up on strips. French manicure can be done without stripes. In this case, the work technique will differ only in that you need to make stencil strips. Otherwise, the whole process looks as usual.
So, what to replace special stencils with, and what tricks to consider:
- use masking or regular tape as an alternative to special strips. It is necessary to cut small pieces of tape, shape the cut into a plate and stick it to the free edge;
- you can apply peel-off liquid (used to protect the cuticle when creating an ombre effect) to prevent the white paint from spreading;
- instead of strips, you can use regular cling film;
- It is convenient to use a medical adhesive plaster to replace the stencil.
How to make a French jacket at home without stripes is clearly shown in the video.
With stencil
How to make a French jacket at home using the simplest method? Special stencils will help even those who have no experience in this matter to make a French manicure with varnish at home. What types of stencils are there:
- paper;
- metal.
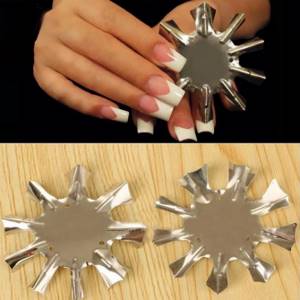
The latter are durable and comfortable. We suggest you learn how to make a French jacket with a stencil:
- wait for the applied layers of base and base color to dry completely;
- apply some white paint to the patterned metal plate;
- attach the stamp with a corner, then make an impression along the free edge of the plate;
- After the varnish has dried, complete the manicure with a matte or glossy top coat.
Now you know how to make a French polish with gel or regular varnish with a stencil.
Preparation
Having appeared in the distant 1930s, French manicure still does not lose its relevance. We have already told the story of its appearance in a recent article, however, there are facts indicating that the “discoverer” of the French look was not Jeff Pink, but Max Factor, the ruler of mascaras and eye shadows. The old man did not have time to patent his invention and the enterprising Jeff began to use it on a commercial basis in 1970. By the way, the first star to dare to wear French hair was Barbara Streisend, the then trendsetter and super-popular vocalist.
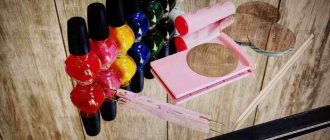
At first glance, it seems that creating such a design is not an easy task. And even more so, it is inaccessible to beginners. We are in a hurry to “deceive” your expectations - everything is possible! The main thing is to choose the right tools and materials, on which the success of the entire action depends 50%. ProstoNails has collected everything you need for a DIY French manicure in one table, which you can see below:
| Tool or material | Functionality |
| Nail polish remover or remover | Dissolves the previous coating, leveling the pigment |
| Metal pusher | Minimally injures the plate when removed and pushes back the cuticle |
| File, abrasiveness from 110 to 180 grit | Removes excess length and corrects the desired shape of nails |
| Orange stick and oil | Necessary for unedged manicure to soften the epidermis |
| Cuticle trimmers and liquid | Softens overgrown skin, which then needs to be cut off with scissors |
| Polishing buff | For grinding plate irregularities for better coating adherence |
| Base and top | To prepare and, accordingly, consolidate the result |
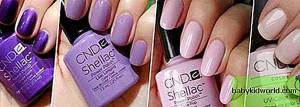
| Nude nail polish | Used as a base color, imitates the natural soft pink shade of the nail bed. |
| White varnish shade | To draw a “smile” line. This can be done either with gel or with regular varnish of medium thickness. |
| Stencils | Strips that help to evenly paint free edges. Use your imagination, the perfect line can be made using tape |
The necessary list of attributes for your ideal jacket has been collected! Add to it just a drop of effort and a little bit of zeal - then the result will definitely please you with the perfection of execution.
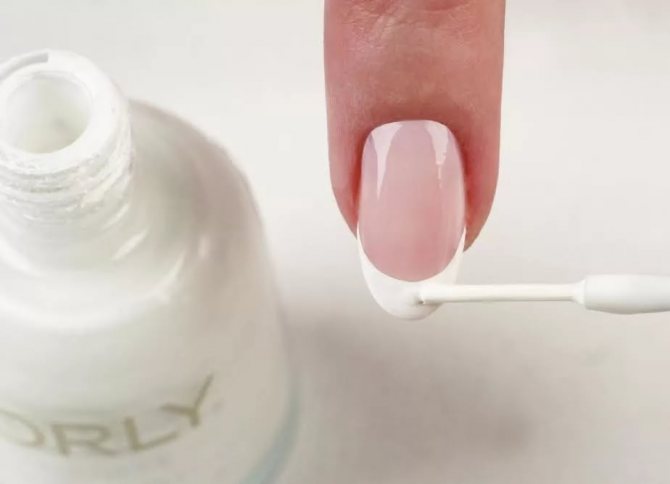
With a brush
How to make a French jacket without a stencil? This is quite real. Let's talk about how to apply French polish using a brush. This event will seem very difficult for beginners. It's best to delve deeper into the topic to understand the technique for creating perfectly straight white lines. In the meantime, we will give some important tips that will help you make a neat French manicure:
- It is easiest to work with a brush with long bristles, which should be elastic and not very densely packed;
- during modeling, you should move your finger, not your brush, to achieve the clearest possible line;
- for the manicure to look natural, the smile line should reflect the shape of the cuticle;
- first you need to create a thin line of a smile, and only after that start sketching;
- The end of the nail must be sealed with the flat side of the brush, this will prevent the formation of cracks and chips;
- It is preferable to use tools with synthetic bristles.
Now you know how to make French nails using a brush.
Reverse French
A reverse French manicure, or moon manicure, involves painting not the free edge, as is done in a classic French manicure, but the holes from below.
You can stick to the traditional palette and do a reverse French look with beige and white shellac, but it’s worth experimenting and choosing other shades depending on the time of year and outfit. A black manicure with a silver or golden hole looks incredibly impressive.
Reverse French is quite simple to do, since the application technology remains the same: the nail is completely covered with camouflage or colored shellac, and then a smile line of any shape is drawn. By the way, to create a lunar jacket, you can also use a stencil, which can be removed just as easily as in a classic jacket.
French manicure with gel polish
How to apply French gel polish on your nails? A manicure created using gel polish is durable and strong. That is why modern fashionistas love him so much. You don't have to spend an hour or two for correction, because your nails will look perfect for a long time.
Experts give their recommendations to those who are planning to do their own French gel manicure at home:
- It is preferable to use an acid-free primer;
- The base should not be concentrated along the edges; apply it evenly in a thin layer;
- after each stage of manicure it is necessary to carry out polymerization under a lamp;
- if you remove the sticky layer on the camouflage coating with a lint-free napkin, the smile line will not spread;
- prepare a good top coat before applying French shellac at home. It is best to use a self-leveling, high-quality topcoat. With its help you will be able to remove unevenness in front of the decorative element. In addition, you will consolidate the result;
- a sanding buffer will help polish the transition if you were unable to make the coating even;
- If you are interested in French manicure with gel polish at home, take care of the required consistency of the material. To prevent the material from spreading, mix gel paint and gel polish in a 1:1 ratio;
- Remember that the easiest way to apply materials is that they are of medium density and do not have a very thick consistency.
How to make French shellac with stencils or regular varnish? Each material has its own disadvantages and advantages. Let's talk about regular varnishes.
How long does high-quality shellac last on nails?
Shellac is loved by many women because of its strength, durability and beautiful appearance. However, one of the most important questions is: how long does shellac last on nails?
If you read the instructions, you will find that gel polish can stay on your nails for 14 days, but it will last longer, it’s just that during this time your nails will grow and an untreated stripe will appear in the cuticle area.
If you read the instructions, you will find that gel polish can stay on your nails for 14 days
It is invisible in most cases, but some women want a more perfect look. Gel polish can last up to 1 month - everything is individual for everyone, and depends on the quality of application of the product. On average, shellac lasts 3-4 weeks.
However, if you often have to work with chemicals and soap solutions, the product may not withstand such intensity, especially in the place where the layer is the least thin. Then the shellac will last 1-2 weeks.
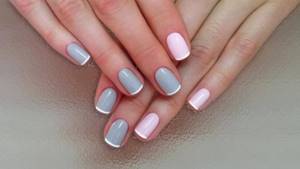
How to do a French manicure with regular polish
How to do a French manicure at home using the simplest materials? Before you do a manicure with ordinary varnish, consider the disadvantages of such an event. Be prepared for the fact that the coating will not last long on your nails. However, there are also advantages of this manicure - you can easily and quickly correct it. And for this you don’t have to contact a specialist.
Also learn that doing a manicure on short nails is somewhat more difficult. You will have to act extremely carefully, because the drawing will be very miniature. Remember the following tips on how to make a French manicure, follow them step by step and you will get a pretty good result:
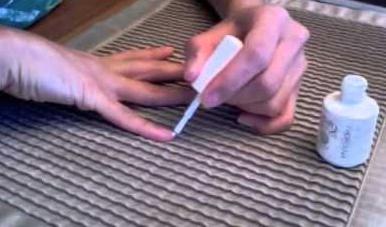
- First, the nails must be brought into proper shape. To do this, you need to remove excess length, make the nail shape neat, and remove the cuticle. At the end, all that remains is to go over the surface of the nails with a buff;
- Next, the nails need to be covered with a thin layer of base;
- after the base has dried, apply beige or light pink varnish;
- for a design with stickers, all you have to do is place a stencil and paint the gaps with white;
- when manually applying the edging, you should not make it too far from the edge of the nail, so as not to visually reduce the length of the plate;
- In the end, all that remains is to cover the nails with topcoat and apply oil that slows down the growth of the cuticle.
Now you have learned how to make a beautiful French manicure with regular varnish. This material has its advantages in the form of low price and ease of use. You don't need a special lamp to dry regular nail polish.
Third step: creating color
What will your nail design be? Shellac (French) can be chosen colored or classic. If you need to apply foundation, follow this procedure. Choose pastel or bright shades. Remember that the manicure should complement the main image, and not be the center of attention. After creating the coating, dry it in a lamp. It costs about three minutes to hold the handles in the device.
How to do an even French manicure - expert advice
Do you want to know how to make French polish as smooth as possible at home? Of course, with sticker stencils it is much easier to make straight lines. However, the use of these items is not required. Surely you have already realized that it is quite possible to do an even manicure on your own. And for the idea to be one hundred percent successful, find out how to make a French jacket yourself, not forgetting the following recommendations:
- Before removing old varnish, you should apply a rich cream to the skin in advance. This will help cope with dry skin by tightening the lipid barrier;
- Before doing a French manicure at home, you can whiten your nails with ordinary toothpaste. In this case, the yellow pigment will be muted, and the delicate nude will look much more pleasant;
- It is advisable to use a degreaser before applying top and finish. This will improve the durability of the manicure;
- Before you apply French gel polish at home, do not forget about convenient drying of your nails. Before applying each subsequent layer of varnish, you need to thoroughly dry the previous layer;
- if it is not possible to make a drawing using a dots pen, it can be replaced with a ballpoint pen;
- to draw a perfectly even smile, you can replace the stencil with an ordinary stationery eraser;
- use glitter or gloss to hide uneven areas of your manicure;
- If you want to dry your polish as quickly as possible, you should dip your nails in ice water.
These are the latest tips on how to do a French manicure yourself at home. All you have to do is be patient and not forget all the recommendations outlined above. But it’s not enough to know how to make French gel correctly. You also need to take care of good materials. Our online store offers a range of quality materials and tools at affordable prices.
26.02.2019