Every young lady strives to be fashionable and look beautiful, and well-groomed hands and a neat manicure play a very important role in this case. Masters of the nail industry offer many ideas for designing nails, and modern beauties devote a lot of time to the process of choosing a design. Today we offer a closer look at a stunning example of a manicure with bows, because its various variations are increasingly gaining momentum in popularity. You will find out exactly how such an offer can be made, and which ideas are considered the most stylish, right now.
Design Features
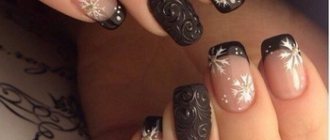
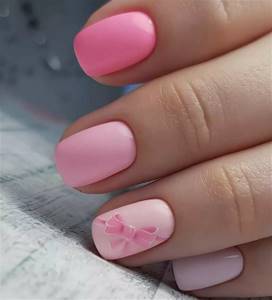
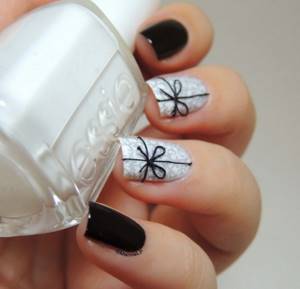
A manicure with bows can be called universal. It looks attractive on nails of any length and shape, and is also performed in different techniques and colors. Images of bows can be pasted on, made using stencils or painted with a brush, which we will talk about below in the material. Such designs always look very gentle, light, and complement any image with feminine notes. A variety of bows can decorate a ready-made design and combine in a very original way on the nails with shiny decor and other images.
Tape drawings
Scotch tape is another universal tool that we use everywhere in the household. So it is not surprising that over time our women have found use for it in creating designs.
When starting to do a manicure using tape, prepare polishes of two different shades and a clear coat. Nail designs for beginners are performed step by step using the following technology:
- The first step is to apply the base coat.
- After it has completely dried, a stencil of the desired shape, cut from tape, is glued.
- Next, apply a varnish of a different shade and wait for it to dry completely.
- Finally, apply a transparent base.
What’s interesting is that girls prefer to do manicures in the “geometry” style this way. But for French in all its interpretations, this method may well be useful.
Execution techniques
The number of manicure techniques with bows that are offered to beautiful ladies today is countless. Therefore, as promised, we propose to discuss the most popular design options, including hand-painting, stamping techniques, as well as the use of ready-made stickers and sliders:
- Drawings made with a fine brush have a special charm, because the images are unique. Bows can be plain, have openwork patterns, or be additionally decorated with shiny details, your choice.
- The fashionable stamping technique using special stencils and a stamp will help you place the selected designs on any part of the nail and use varnish of any shade. Carefully executed drawings look very beautiful and often act as a basis for subsequent design.
- Using ready-made stickers and sliders is considered the easiest way to apply images, and the variety of options allows you to create an equally beautiful and stylish manicure.
Creation methods
Before a manicure, you need to get your hands and nails in order.
To do this, you need to give the desired shape to the nail plate, clean them of dirt and dust (using a salt bath) and remove the cuticle.
After completing all these operations and applying the design itself, your hands need to be lubricated with oil.
Don't forget to remove the sticky finish layer.
Gel polish
The artist will need a regular thin brush and thick texture gel polish.
To draw a bow on your nails, you need to follow these steps step by step:
- First you need to apply a drop of varnish using a dot, it will be the center of the future bow.
- From this point two symmetrical triangles are drawn in different directions.
- Then the edges of these figures are slightly rounded and painted over with varnish.
- At the end, 2 ribbons are drawn, and folds are painted on with white varnish using a thin tool.
As an option, you can first make a black outline with a thin brush, and then paint it.
Each layer is dried in a special lamp to avoid the print from spreading, and at the end it is covered with a finishing base.
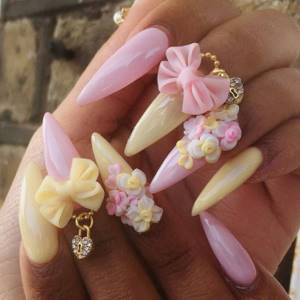
3D modeling
Pre-made bow models are used, which can be bought in special stores, or made independently from 3D gel.
It is recommended to use volumetric elements only on a few fingers to avoid clutter.
First, you need to place the bow using acrylic on nails coated with gel polish, and then dry it in an ultraviolet lamp for 2 minutes.
When adjusting the shape of the bow, a stamp and orange sticks are used.
Stickers
This is the easiest way. You can even buy a rhinestone bow that you simply glue to your nails.
Nowadays they produce various sliders depending on the technique of their application.
- Water-based - immerse in warm water, hold for a while, remove the design from the paper and glue it onto a sticky layer, then cover it with a finishing varnish.
- With an adhesive base it is much simpler: you need to peel off the bow from the common plate and transfer it to the nail.
Before applying the selected design, you need to polish and degrease the plate, and then apply the base and main coatings. After applying the stickers, they should be secured with a finishing layer and dried in a lamp.
Stamping
To perform this you will need a special metal disk with embossed designs, a scraper and a silicone stamp.
First, all standard actions are performed, and at the end, gel polish of the selected color is applied to the metal coating, then all excess is removed with a scraper and a stamp is pressed into this surface. The remaining design on the stamp is transferred to the nail plate in the desired location.
After this, you need to dry the nail under ultraviolet light and cover it with a finishing layer.
This technique is quite simple, it is especially suitable for beginners, because... with its help you can perfectly draw the selected pattern.
French with bows
Classic French design, thanks to its remarkable ability to look universally beautiful with many techniques, always remains at the peak of popularity and fits perfectly with any image. Various ideas for a French jacket with bows allow you to slightly smooth out the severity and restraint of French design, and make it lighter and even playful. If you like small designs, then they can be placed on each nail, beautifully emphasizing the smile line. For larger images, it is better to highlight one or two accent fingers. The drawings can be additionally drawn in darker tones, strokes of glitter, and decorated with stones or pearls if desired.
Artist Tips
- To make the activity enjoyable, purchase a minimal set of pencil drawing tools:
- White thick paper, preferably not smooth, but grainy.
- A couple of simple pencils of different hardness. It is better to buy more expensive pencils.
- Soft eraser.
- Exercise every day. Start with something easy, like how to draw a bow. Further complicate the tasks. The master's lessons will help you easily master step-by-step drawings of animals, plants, buildings, and people.
- Once you feel confident, move away from drawing “step by step.” Learn to create from nature. At this stage, you can already sketch almost any object: a still life, a tree, a sparrow on the street or a domestic cat, a portrait of a neighbor.
Good luck!
Polka dot design
Marigolds with bows and polka dots look incredibly delicate, and such a proposal is very popular this season. Shades of varnishes for design can be varied. The main rule is the compatibility of colors with each other. Polka dots and bows can be of different sizes, appear in a manicure as a duet on one nail, or decorate each finger in turn, located on any part of the nail plate. The shades of the drawings can duplicate the base or each other. Additions in the form of shiny varnishes or decor are welcome.
Classics of the genre
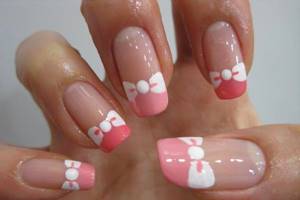
The combination of French manicure and bow pattern has become a true classic of the genre in nail art today. Combining white, pastel pink and black, this design is feminine and graceful. The bows on the nails in this case are located strictly on the “smile” line.
First, a thin strip is applied over the “smile” line with black acrylic paint or varnish; this will be the ribbon of the future bow. Then, placing the design on the left side of the nail, draw a miniature bow consisting of 2 triangles. You can harmoniously complement the image by gluing transparent rhinestones to the centers of the bows.
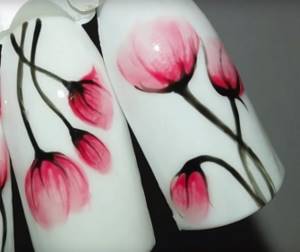
Floral design
An equally interesting example of design could be a combination of fashionable bows on nails with a floral theme. Stylish designs can be combined into wonderful compositions or decorate each of the fingers separately.
The choice of shades when decorating is not limited, since the world of colors in reality amazes with its versatility.
Drawings can be interestingly played out using the French technique, and a plain or transparent base can be beautifully decorated with them. Imagine! And the result will definitely please you. Images can remain in color or be additionally drawn with black varnish along the outline. Neat decorative elements or three-dimensional 3D drawings look gorgeous in this design.
How to learn to draw flowers on nails step by step
- Apply the base color to your nails.
- Dip the brush in the varnish and paint the stems.
- Place a small drop at the base of the stems and draw thin lines from it.
- Dry.
- Draw the petals by placing the flower buds in the tendrils drawn in the previous step.
- At the base of the buds, apply a drop of a color more saturated than the base of the bud, then use a brush to stretch the drop, making a smooth transition between shades.
- Dry.
- In the center of the bud, place a drop of a rich shade to match the tone of the buds, stretch it, simulating the petals.
- Dry.
- Draw the outline of the sepals and stems. Dry. Apply topcoat.
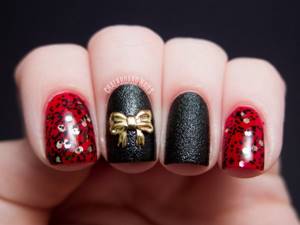
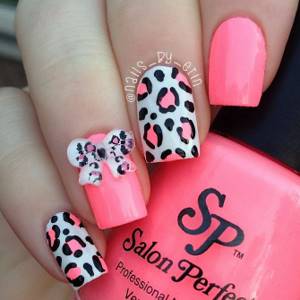
Animal print
The bold tandem of a bow and animalistic patterns, which, despite their opposites, uniquely complement each other, looks original and unusual on the nails. Delicate bows soften the predatory notes and can turn a wild cat into an affectionate pet. Such compositions very beautifully decorate accent fingers and allow you to combine several techniques in one design. Combine a plain cover, animal print and bow on one hand. It's just incredibly beautiful! The addition of shiny details will only enhance this effect.
Stylish geometry
A variety of geometric shapes are effectively combined with many techniques, designs and decorations. Therefore, our fashionable bows fit perfectly on nails with lines, zigzags, diamonds, triangles and other shapes. You can beautifully decorate your fingers with bows that turn into French stripes, combine designs into one composition, or place individual details on each nail. Stylists recommend using contrasting varnish colors in this case, for example, making the designs dark on a light coating, and vice versa.
Painting with acrylic paints
Another popular method used to create simple but extremely beautiful patterns is painting with acrylic paints. This method of creating nail designs for beginners is no more difficult than painting with varnish. And for some it’s even easier and more convenient. And to make sure of this, we offer you schemes for creating a pattern with acrylic.
- Apply any varnish, the desired “delicate” color.
- From the bottom to the top corner, paint two curved stripes (branches) with rich yellow acrylic paint.
- Use the same color to paint small leaves on each branch.
- Paint the middle of each leaf with a lighter shade of paint.
- Apply clear polish to seal the design on your nails.
"Floral" manicure:
- Cover the nail with a base shade (pearl color will be very useful).
- Using pink acrylic paint, paint the petals using the dot method, as shown in the figure.
- Using green paint you need to make leaves and small branches.
- Add a little white to the pink petals to add dimension to the design.
- Apply clear coat.
When creating drawings with acrylic paints, it is very important to use a transparent coating, which will not only level the surface, but also consolidate the result. Painting without a fixative will be very short-lived, since acrylic paints tend to be washed off with warm water
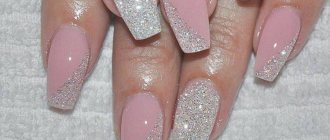
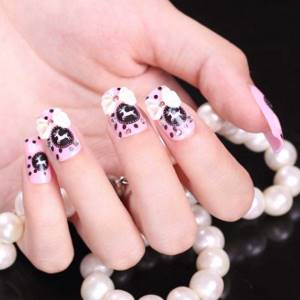
Bows and rhinestones
It is simply impossible to imagine at least one fashionable nail design idea without the magical shine of rhinestones. Thanks to the variety of shapes, sizes and colors, such decorative elements elegantly decorate any manicure style. Rhinestones can directly participate in the design process or complement an already finished design. In our example of a manicure with bows, shiny decor can wonderfully repeat the shape of the design, participate in the accentuation of a pair of nails, or emphasize the boundaries of a combination of shades.
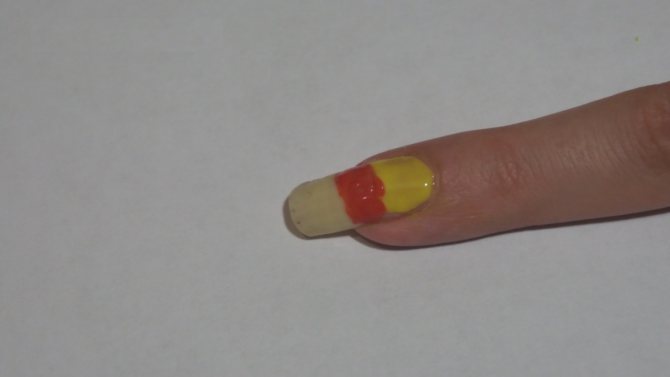
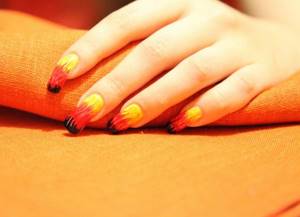
How to draw fire on your nails
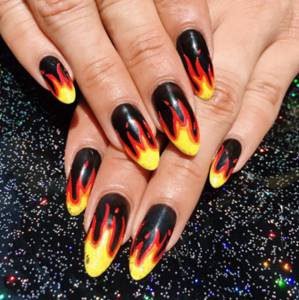
Such an extravagant manicure, of course, is not suitable for every day, but you can experiment for a party or for the weekend.
We suggest you try repeating a manicure with fire as a design according to this scheme:
Divide your nail into 4 parts. Paint the lowest part at the base with yellow varnish:
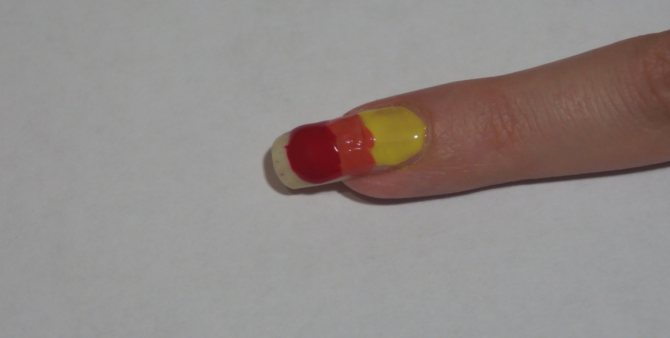
Paint the second part of the nail above the yellow with orange:
You need to apply red varnish over the orange color:
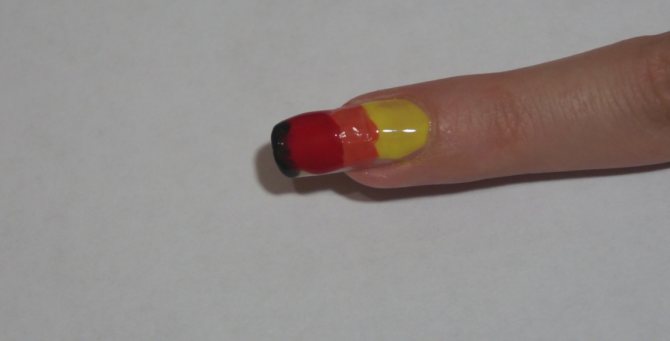
Paint the last part of the nail, which should be the narrowest of all, with black varnish:
Take a brush and make streaks over the entire surface of the nail. They don’t have to be smooth; you can give them curved shapes:
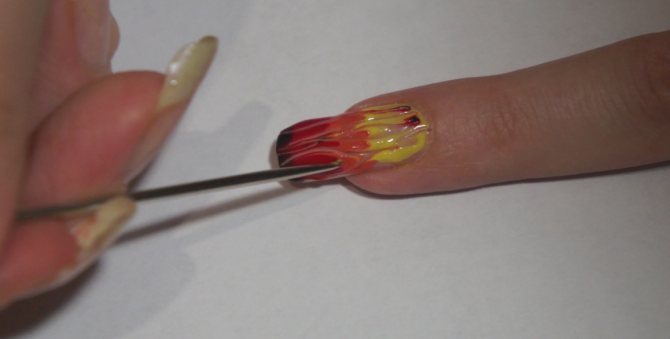
Cover the finished drawing with clear varnish to secure the result:
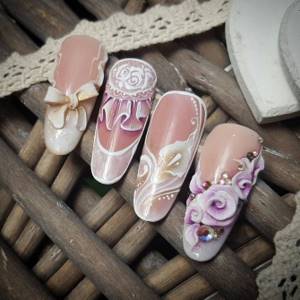
Wedding manicure
The design of marigolds with bows may well complete the bride’s wedding outfit, especially if you use light shades of varnish or colors found in the overall design of the wedding ceremony. With similar designs you can beautifully diversify a French manicure or decorate plain nails. Three-dimensional images look interesting when combined with decor and allow you to create incredibly chic compositions. Shiny bows in the form of ready-made jewelry or patterns decorated with rhinestones also look attractive on the bride’s fingers.
As you can see, there are a lot of variations in the design of nails with bows today. Each option is unique and attractive in its own way. A manicure with similar designs can be gentle and romantic, bright or discreet. It all depends on your imagination and mood.
Little masterpiece
Quite often, bows on nails appear in the form of not just a one-color silhouette, but a real author’s design. It takes quite a lot of time to depict it, as well as artistic experience. First, draw the outline of a large bow against the background of the nail and paint over it inside. Then, after waiting for the base of the bow to dry completely, light, shadow and halftones are carefully drawn. Thanks to this technique, the bow looks very voluminous.
As a rule, such a manicure involves the image of one element (for example, on the ring finger), while the rest of the nails are simply covered with background varnish.