All girls want to stand out and attract the attention of others, which is why they pay such close attention to beauty issues. This includes facial, body, hair care and, of course, a flawless manicure, which is not complete without a color coating!
From the article “What is gel polish?” We have already learned how many advantages this material has! No wonder he was loved by millions of girls all over the world. But what if a girl doesn’t want to spend money and go to a beauty salon or a manicurist? How to apply color coating at home? What will you need for this?
Before applying gel polish, it is necessary to carry out preparatory procedures: do a manicure and properly prepare the nail plate for coating. And after applying a colored coating, you can complement it with a simple design and carry out care procedures that will help preserve the beauty and youth of your hand skin.
Conventionally, the entire procedure can be divided into the following stages:
- manicure;
- preparing the nail plate for coating;
- coating of the nail plate;
- design;
- hand skin care.
We will analyze the materials and tools needed for each stage, and the technology for applying gel polish at home.
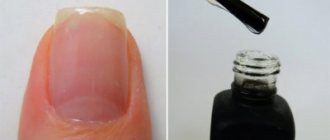
What is nail base
Nail base is a special one-color transparent coating that is applied to the nail before the main shade. This is a must for manicure. The base helps hide surface irregularities and protects the plate from color pigments. Available not only for gel polishes.
There are several types:
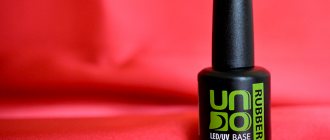
- rubber (makes the base thicker, improves the process of leveling the plate);
- acrylic (contains acrylic powder, which strengthens the nail structure);
- silicone (seals all microcracks and is easily removed);
- camouflage (combines base, top and colored varnish);
- water-based (ideal for people with increased allergic reactions);
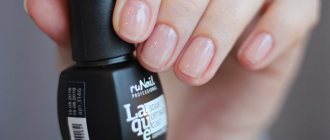
Also, bases can differ in color, be light beige, nude, colorless.
How to protect the cuticle and skin during a manicure?
In addition to following a special manicure technology using gel polish, you also need to take into account the specifics of its application in order to carefully paint the entire surface of the nail, but not to get on the skin and cuticle.
Note! Many girls know that such skill is only possible with experience, because doing a manicure on your own is inconvenient. However, there are several secrets that can improve the quality of varnish application and the overall result.
While working, you need to remember the following nuances:
- Before starting the nail care procedure, you need to trim the keratinized layer of the cuticle. To do this, you need to soften the skin in warm water and use an orange stick to push the cuticle as far as possible.
- Before directly applying varnish to one nail, you should try to push back the cuticle with your free finger so that the varnish lies as close to the skin as possible. Then the manicure will look fresh longer.
- Along the edge of the nail, you can apply a special protective agent or any greasy cream to the skin and cuticle, which will prevent the polish from being absorbed. It will be much easier to erase it later.
- You need to start painting the nail from the sides, and then brush along the center. This will provide the most even coverage. In this case, it is better to start with the little fingers, and paint the thumbnail last.
Of course, the main secret of a beautiful manicure is accuracy in the process. All girls know that haste when applying and drying nail polish will definitely lead to painted skin, scratches and unevenness on its surface. Therefore, you need to choose the time for a manicure so as not to rush anywhere. Then even drawings and complex designs can be made beautifully and attractively.
Why do you need a nail base?
The base is a necessary component of a manicure; it is used to protect the nail from paints. But its functions don’t end there:
- The base coat for nails provides the best adhesion to the surface and prolongs the durability of the manicure.
- Strengthens thinned and weak nails, protects them from brittleness.
- Levels the surface, removes bumps and irregularities.
- Gives manicure shine.
- Prevents chipping in the area of the free edge of the nail and peeling.
- Speeds up the drying process of subsequent layers.
Types of shellac coating
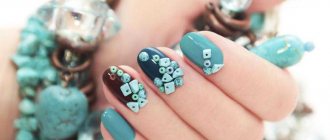
You can do shellac coating correctly and beautifully at home. The beauty industry is constantly evolving, with interesting new products appearing. The plain matte manicure is boring, I want to experiment. For example:
- Use accessories: glitter, slider stickers, stamping, foil.
- Cover with Bluesky gel from the “Cat's Eye” collection.
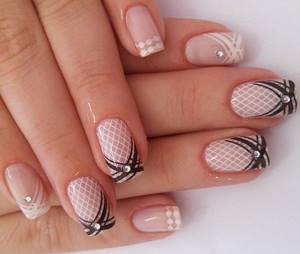
- To make a French jacket is not simple, but colorful.
- Cover with mirror gel polish.
Even for short nails you can come up with and apply interesting designs, patterns, and ornaments.
You won’t be able to make such beauty right away at home, but it’s not difficult to learn.
Composition of the gel polish base
Manufacturers can add both natural and synthetic ingredients to the gel base for nails:
- Photoinitiator. That component that interacts with ultraviolet radiation and allows the varnish to harden when dried. It is harmless to the body and non-toxic. It is because of the amount of photoinitiator that a burning sensation may be felt during drying. The more of this component in the composition, the faster the coating dries.
- Film former. A substance that reacts with ultraviolet radiation. With this reaction, a durable film is formed on the surface, preventing the varnish from quickly erasing. The product is also resistant to household chemicals and acetone.
- Silicon chloride. This component is added to add shine and pearl.
- Silica. A substance that prevents the gel from separating into fractional components.
- Methacrylates. A product responsible for the thickness and consistency of varnish. Depending on its amount, gels are divided into more watery and thick ones.
- Vitamins. A vitamin complex is often added to the base, which nourishes the nail plate and preserves its condition.
General recommendations
The main features of gel polish, thanks to which it is gaining popularity every day, are hidden in its physical properties:
- durability, stays on the nail plate for 2-3 weeks;
- resistance to external damage. Gel polish does not fade, does not fade, does not scratch, does not crack, and is resistant to any chemical influences.
- Safe for health.
When choosing a color, in addition to the client’s tastes, it is necessary to take into account the length of his nails, skin tone, time of year, and situation. In addition, it should be remembered that depending on the consistency and texture of the gel polish, shades of the same color may look different.
Different colors of gel polishes, like hair, can give the skin an unpleasant yellowness, pallor, and redness. To avoid mistakes, you should apply the varnish to the transparent tip in two or three layers, and then apply it to the nail.
Each color has many shades, they are divided into scales. You should be wary of pink and beige tones. For dark-skinned women, shades without yellowness are suitable; for pale skin, cool colors: pink and grayish-beige. For girls with golden skin, it is better to choose a delicate cream palette or red shades.
Dark colors make the nail appear longer. Therefore, dark glossy gels are ideal for short nails. For example, dark blue, purple, cherry, chocolate, black.
On long plates, dark and bright colors will look too provocative and vulgar. Pastel and light colors will elevate long nails.
Bright colors, catchy patterns or pictures are ideal for medium-length nails. Matte, holographic, sand, glitter, magnetic, thermovarnishes look impressive at standard lengths. Classic French manicure suits both a formal business style and a gentle romantic look.
The time of year undoubtedly influences the choice of color and pattern of gel polish. For outdoor activities and summer parties, feel free to choose acidic shades, holographic patterns, catchy inscriptions and pictures. In autumn, colors that are in harmony with nature are suitable. Winter is the time for light and classic polishes, and in spring delicate floral tones will look just right.
Is it necessary to apply a base before gel polish?
Experts note that it is important to apply a base under the gel for several reasons, including:
- Extending the service life of the coating.
- Strength of nails that do not develop cracks or chips.
- There is no harm to the nail plate.
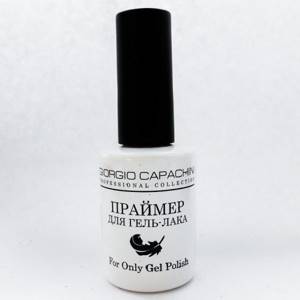
Before applying the base to the nail, you need to prepare it, namely sand it with a special file and degrease the nail plate with a cleaner. When working, you can use a special product called a primer. This will allow the base gel to bond better with the nail.
The main task of the gel base top coat is to increase the percentage of adhesion of the plate to the colored gel itself, ensuring long-term wear. Also, the base for gel polish no less effectively protects nails from staining them in the color of the varnish, since the stratum corneum easily absorbs it, which can lead to increased fragility and other negative factors.
The significance of the base gel layer also lies in the aesthetic side - it forms the correct and beautiful architecture of the nail plate, adapting to the anatomy, smoothing out natural dips and irregularities. Strengthens and thickens the surface, fills formed microcracks. Correct application is the key to creating a glossy second layer.
Applying the base is a mandatory and key step in the 3-step gel nail coating procedure. If you do not apply this layer, the coating will be very short-lived. The maximum service life will be 2-3 days.
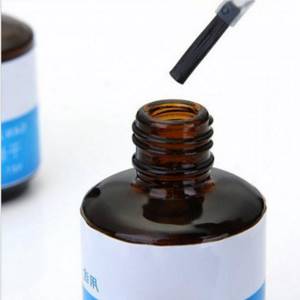
Bonder and primer: the difference
Difference:
- As described above, bonder cannot be replaced with a primer, because the composition of these substances is different. Bonder is a direct gel mixture that is rubbed into the surface of the nail. It is applied not like a base, but with a flat brush, previously wrung out, using rubbing movements.
- This is done so that the product penetrates between all scales, detachments, and irregularities, and fills them with a monolithic layer. So that later these microcracks or scales do not cause detachments. The primer is applied immediately before the bonder.
- It mainly contains acid and organic solvents that remove moisture, fat, and microbial residues on the nails. That is, the nail is immediately covered with a degreaser, then a primer, and only after that a bonder is applied, on which a layer of base and gel polish is applied.
Primer
Which base is better to use for gel polish?
The main task of the first stage of the entire procedure for using the gel is to ensure durability of the color coating, make the nail smooth, and cover the scales.
Important! There are several types of base coats for gel polish, and each of them has its own positive and negative sides.
- The rubber gel base has a dense consistency. Its pliability allows you to remove and make less noticeable all the natural irregularities of the nail. Manicurists recommend this particular type of coating for the reasons that it bonds well with the plate. Durability allows you to increase the duration of wear and maintains the aesthetics of the manicure. Used as a strengthening base for nails.
- Leveling, thick. It has a transparent consistency, suitable for imparting evenness. Creates an absolutely smooth coating that is easy to apply colored gel to. May vary in density and appearance.
- The base is silicone, comes in the form of a nail, which is applied to your own. Easy to remove, fills microcracks.
- Acrylic. It has a synthetic composition that differs in color. There are natural shades or color variations. The best option for extensions.
- Camouflage base. Suitable for novice craftsmen, as its advantage is ease of application, however, its single-phase nature significantly reduces its service life.
- With vitamin complexes. This base is often used for problematic, brittle, damaged nails. The composition includes vitamins E and D, which stimulate regeneration and strengthening.
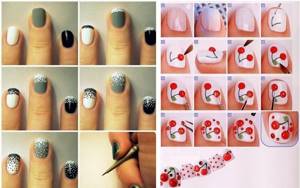
Master class with simple patterns and drawings
To make an original pattern, you can use any ordinary objects: masking tape, sewing needles, foil, sponge, toothpick. Stickers were invented long ago for drawings. And more complex patterns are made using special brushes, stencils, and tools.
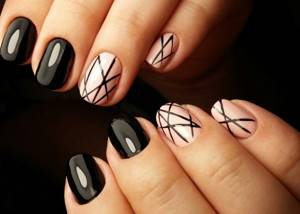
The simplest pattern is geometric. From straight lines, triangles and circles you can depict winter patterns (snowflakes, snowmen, Christmas trees), spring flowers, and autumn thaw. Simple lines in a chaotic order can also look stylish, the main thing is to choose the right colors and not to overdo it.
Patterns and designs are applied to the gel polish before the final coating. Smooth lines are easy to apply using masking tape. It will prevent colors from mixing, does not harm the gel polish and peels off easily. This is how you can make a two-color manicure: stick a piece of tape onto the colored layer, and cover the rest with another varnish.
It is more convenient to apply dots with a toothpick or needle. Ethnic patterns can be made from straight lines and dots. They will perfectly dilute a monochromatic manicure and create a unique image.
You can place pieces of foil on a colored nail and paint over it with white polish. If you remove the foil, you will be left with colored stripes on a white background.
Gradient manicure is done using a sponge or sponge. Dry shadows of various shades are applied to the base and secured with a top coat. It's quite easy to draw flowers. Thick gel polish is dripped onto the base or color layer. This drop is then pulled out with a needle or toothpick, taking the shape of a petal.
How to prepare the nail plate before applying base
Preparing your hands for applying varnish is the most important step. After all, the further quality of the coating, its cleanliness and duration of wear will depend on this.
First, the surface is carefully processed: the pterygium is removed, the cuticle, all hangnails, and excess skin on the side ridges are trimmed. They give the required shape, and the edges are sanded with a buff.
All dust, skin residues and debris are carefully removed with a brush or brush. Afterwards, the nail must be degreased. Acid and acid-free primers or alcohol are suitable for this. The primer is applied in a minimal amount to the plate and rubbed into it with your finger. Afterwards, take a break to allow the surface to dry. You don't need a lamp for this. Only after this is it possible to apply the base.
Using Accessories
Having glitter for manicure, a couple of stencils and professional foil at home, you can gradually create real masterpieces on your hands. Put glitter on top of the main color, so the manicure will look more original.
Water stickers (slider) or photo stickers are also very good. They need to be applied to the main color or base. Photo design is afraid of water, and slider stickers need to be wet first. In order for the design to stick well, you need to apply a top coat on top.
Stamping is a modern trend in nail design. You can perform this procedure at home. You will need:
- metal plate with engraved designs;
- stamp;
- scraper.
You select a pattern on the plate, cover it with varnish, and then remove the excess with a scraper. Use the stamp to transfer the pattern onto the nail. With the help of such a device you will make the finest openwork designs. Stamping is easy to use even for a beginner.
Applying such a design is actually not difficult - just master the stamping technique
Foil is a real lifesaver. You can create a mirror design, or you can tear the foil and make original designs. Or stick a slider picture on one nail.
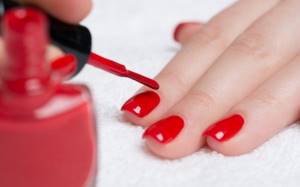
How to apply base on nails
Once the surface is completely ready for the application of the gel, the coating stage begins. Take a small drop onto the brush and apply it to the plate, slightly short of the cuticle. After this, with a spread brush, the drop is brought to the cuticle and down to the side rollers.
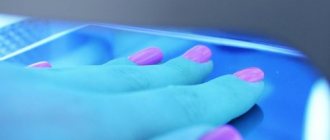
Then a drop of base is brought to the edge. The last movement of the brush seals the edge of the nail. The next step is drying in a lamp. If the nail surface is uneven and there are dips or bumps on it, then a second layer is needed. Moreover, a drop of varnish is again collected on the brush, applied to the middle and with the slightest movement of the brush it is stretched up and down.
The brush practically does not lie on the nail. After this, for self-leveling, the nail is turned down parallel to the table surface. The last step is a UV lamp.
Equipment
To apply gel polish at home you will need the following equipment:
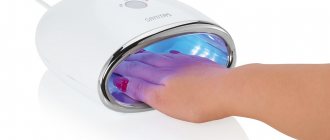
• Hybrid, LED or UV nail lamp. Without it, there is no way to dry the gel polish. UV lamps are currently fading into the background, and users are increasingly giving preference to hybrid lamps when purchasing. For personal use, you can buy cheaper equipment, for example, a Sun 5 48w hybrid lamp. To work with clients, you will need more powerful equipment.
• Machines for hardware manicure and pedicure. If you decide to master hardware technology, you need to buy a router. The power of the machine is determined by the number of revolutions of the cutter. Simple devices for home use usually perform 20,000 revolutions, the strongest ones - about 45,000. However, when choosing a router, other criteria are no less important, but this is the topic of a separate article.
• Desk lamp. Even when applying gel polish at home, you need to have good lighting. So if you don't already have a desk lamp on your desk, it's definitely worth getting one.
The equipment also includes devices for sterilization. These are an ultrasonic washer VGT 2000, glasperlen devices, ultraviolet cabinets and dry heaters for manicure instruments. Expensive disinfecting equipment is usually not purchased for personal use. However, if you are going to do a manicure with the same tools not only for yourself, but also for others, then be sure to take care of good disinfection.
Review of sterilizers
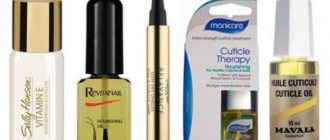
The best bases and tops for gel polish
The modern market for nail products is oversaturated with brands of bases and tops; among them it is quite difficult to find a good and high-quality product.
The most famous bases:
- Kodi Rubber Base. A well-known brand that produces rubber base. The thick base for gel polish has proven itself among buyers with good durability. It has no specific odor and is absolutely colorless. An allergic reaction to the composition is unlikely, the base is quite viscous and easily self-levels. Compatible with varnishes of other brands.
- CNB Base Coat. An expensive brand that produces quality products. There may be fakes on the market. This is a leveling base for nails. Due to the soft and wide brush, it ensures quick and uniform application, does not chip off the edges, and is compatible with varnishes of other brands.
- Gelish Basegelfoyndation. A popular manufacturer among professional craftsmen. The best base for gel polish, thick in consistency, does not spread over the nail and does not sag. Easily removed from the surface. Dries quickly in a UV lamp.
- Blueskyrubberbasecover. A budget option for a manicure base, suitable for beginners in this field. It has the properties of a camouflage base; its thickness allows you to create the perfect highlight.
Highest quality tops:
- Canni. The new manufacturer of nail materials quickly established itself. The top is absolutely transparent, has a light chemical fragrance, and does not cause an allergic reaction. The bottle contains a short but convenient brush for application.
- Lovely. European brand of manicure products. It belongs to the premium class and has a high price category. The product is economical to use, provides long-lasting quality manicure, and does not damage the nail when removed.
- Oxxi Professional. The company produces professional coating for manicure. Their bases and tops are durable when worn; thanks to the vitamins in their composition, they strengthen the nail and protect it from damage.
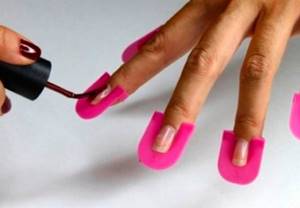
other methods
There are a number of other tricks with which you can carefully paint your nails with gel polish. Among them is the use of manicure or masking tape. Prepare thin strips of tape in advance, stick them on your fingers as close to your nails as possible (pictured) and apply the coating. When the polish is dry, remove the tape.
You can also use regular PVA glue. Before applying the polish, take the glue and spread it around the area around the nail. After the glue has dried, paint your nails and remove the adhesive film.
With these simple techniques, you can paint your nails correctly and beautifully, and your manicure will be as good as a salon one. And to get a visual idea of the intricacies of applying gel polish, watch this interesting training video.
How can I replace the base for gel polish?
Due to an allergic reaction to the gel polish base, an alternative replacement for such a coating is sometimes necessary. This can be done with the following materials:
- acrylic or acrylic powder;
- vinyllux;
- biogel;
- bio-mix.
It is possible to apply colored varnish without prior coating with a shellac base, but this may affect the durability of the coating. But if a primer was applied before, then this scheme will not work. Since the gel protects the nail from the effects of the primer, even without it the structure of the plate may deteriorate.
Application under the cuticle
This is a complex method of applying gel polish that requires skill.
- Treat your nails thoroughly.
- Use an orange stick or pusher to push back and lift the cuticle as much as possible.
- Using a thin brush, paint over the vacated space and paint over the rest of the nail.
The method of applying varnish under the cuticle will prolong the freshness of the manicure, since as the nail grows, the boundary between the coating and the natural surface will become noticeable later.
Reviews of nail bases
Valentina Sergina, 32 years old, Stavropol
For me, the best gel base is Haruyama Base, as it optimally combines such important components as price and quality, it is ideal for any type of lamp and lasts at least 3 weeks! The price is pleasantly surprising - only 250 rubles for high quality. The only drawback of this base is that it does not tolerate Chinese-made gel polishes very well.
Irina Bezukhova, 27 years old, Moscow
CND BaseCoat is not a cheap pleasure, on average the price reaches 2000 rubles, but the highest level of quality compensates for the costs! Almost all luxury salons use this American base for nail polish, since the consumption is minimal, and the first layer already provides an even coating. A comfortable brush complements the pleasant experience of the gel!
Olesya Ivanova, 46 years old, Yalta
Vogue Nails Rubber is a real find among the mass of camouflage bases; it is produced in Russia and has a relatively low price - 500 rubles per bottle. With it, a French manicure will acquire an irresistible charm, while the gel strengthens brittle nails and smoothes out all problems. The only drawback is the very small volume - 10 ml.
Lamp selection
For a manicure with gel polish, you will definitely need a lamp. Read about how to choose the right one here. And in this article we will give brief recommendations: choose a UV lamp with a power of 36 W or more (in which you can dry 5 fingers at once), as well as with a removable bottom, which allows for high-quality disinfection necessary for pedicures. If your choice falls on an LED lamp, then keep in mind that it costs more, but significantly saves energy and drying time.
We wish you a flawless manicure! We hope the article was useful and you learned how to apply gel polish correctly!

Mirror manicure
I created a wonderful mirror gel polish. Stunning molten metal effect finish. This manicure can be done in stages using foil, but Bluesky gels are much easier to use. To make a mirror manicure step by step, you need to purchase a Bluesky metallic base and a stained glass coating.
A metallic base coat is applied to the regular base coat, followed by a stained glass finish. If you cover the Bluesky mirror varnish immediately with a top coat, without a stained glass layer, then the entire effect of molten metal will disappear.
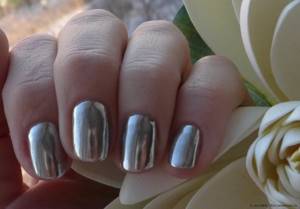
Mirror gel polish will suit ideal nails
Highlight the mirror design using glitter or slider stickers. You can gradually combine the use of Bluesky varnishes and stamping. Or use foil as an extra.