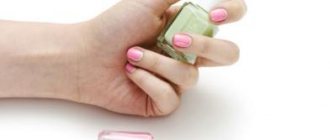
To perform a “bunny manicure” you will need: a clean and smooth nail surface, transparent gel polish with glitter, white gel polish, a special brush for creating nail designs, pink gel polish and black gel polish, dots.
The first step of performing a manicure is to clean the nail from excess dirt that could interfere with the work process, apply transparent gel polish with glitter to the nail, and wait for the nail surface to dry completely.
The second step is to take white gel polish and, as it were, make an arc at the beginning of the nail, apply the gel in a thick layer so that you can work with it later. The third step - we take a design brush and begin to draw a line, taking a little gel from the finished arc, draw one vertical line on the left side, retreating from the middle, draw the same one on the right side, as if drawing the initial image of the rabbit's ears.
The fourth step is to make the ears more voluminous and, using additional white gel polish, apply them to the vertical stripes, the blank of which is already ready, and fill in the gaps, turning them into an elongated oval shape of the ears.
Fifth step - now we move on to the pink gel polish, apply it to a nail design brush and apply another vertically elongated oval in the middle of the finished white ears, distribute it well so that it is exactly in the middle, and its edges do not go too far for the white shape of the ears. Sixth step - using dots, apply dots with black gel polish that will symbolize the rabbit's eyes.
The seventh step - at the end, apply a transparent gel polish over the dried nail application, which will completely fix the manicure and give it a well-groomed appearance.
The soul requires experiments, but there are no ideas? Practice on bunnies! Images of these cute animals can organically complement both a delicate, laconic manicure and bright nail art.
It will take 5 minutes to read
Text: Victoria Volkova Updated February 5, 2019
- When is a bunny manicure appropriate?
- Step-by-step photo instructions
- Photo ideas for manicure with a bunny for short nails
- Ideas for long nails
- What manicure techniques go with a bunny design?
Do you consider some nail art options childish and therefore have never tried them? These are prejudices. A cute manicure with a bunny on one or more fingers will lift your spirits and won’t look childish if you choose the right design and place the right accents.
When is a bunny manicure appropriate?
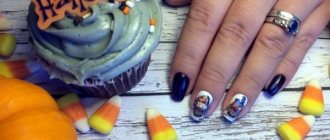
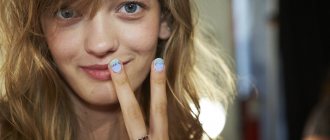
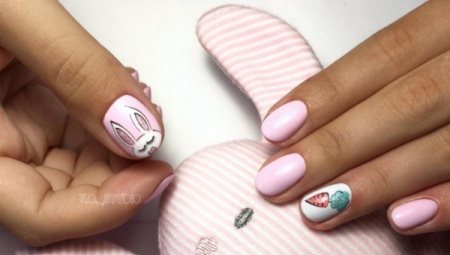
Nail design with a bunny is a gentle and cute manicure option that can be done on nails of any length. For short nails, pastel colors and a “close-up” image of a hare’s face are more suitable. If the length allows, you can draw a full-length bunny on your nails.
The hare can also be accompanied by other animals - such a manicure is unlikely to leave anyone indifferent.
Manicure is an area in which chasing two birds with one stone is not forbidden. There can be as many hares as you like, as long as it does not disturb the harmony of the image. We will tell you about the winning options for this design in this material.
But first, make sure you know the basics. A video tutorial will help you refresh your memory of the basic stages of manicure.
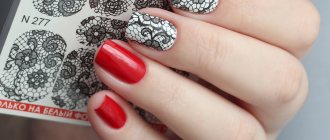
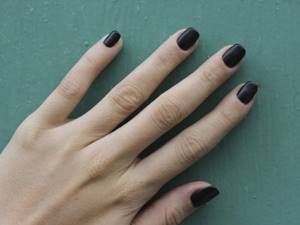
How to make shellac with black design
Here's what you need to get started:
- UV or LED lamp.
- Gelish base, black gel polish (for example, Harmony Gelish, color No. 01348 Black Shadow or Harmony Gelish, color No. 01424 Welcome to the Masquerade) and topcoat. These are the 3 basic items to create a black shellac design.
- 99% isopropyl alcohol or a special cleaner to remove the sticky layer. Typically, the salon uses Gelish Cleanser, following all safety and sanitation procedures. However, most likely, if you are creating a manicure at home, you use affordable and inexpensive products. If this is the case, then isopropyl alcohol is perfectly acceptable to use as a replacement for a professional product.
- Lint-free cloth. Regular cotton towels or paper napkins are not recommended.
- Sunscreen (if using a UV lamp). If you are using LED, you can skip this step.
- Stick and cuticle oil.
- File for 180 units.
- Nail buffer.
- Table lamp or additional light. You will need good lighting to apply the gel properly.
Take a table lamp and make sure your hand is directly under the light while you apply the polish. You should be able to clearly see each nail from every possible angle.
Before starting work, find a comfortable, spacious place.
Remember that the manicure will take at least half an hour to create, so make sure you have enough space to stretch your arms and legs without knocking over the gel.
Before you start work, tie your hair up so it doesn't get in your eyes, go to the restroom, eat a snack, drink a cold drink, and put away your phone. You won't be able to use your hands in any way, no matter how "careful" you are. This also means not touching your face, hair, etc.
Photo ideas for manicure with a bunny for short nails
Don’t think that designs are contraindicated for short nails. If you choose the right color scheme and design, a manicure with a bunny, even on short nails, will not look out of place. As a base, use, for example, a soft pink polish, and decorate only the nails on your thumbs with designs. Draw a muzzle on one, and a tail on the other. It is better to leave the rest of the nails plain or decorate them with small details.
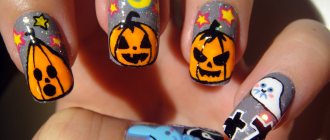
You can cover all your nails with different designs. The bunny can be accompanied by other animals and birds, as well as other cuteness in the form of sweets, stars and hearts.
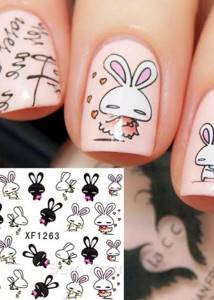
Don't try to create a masterpiece with lots of small details. Especially if you decide to do your own manicure. Start with simple drawings - for example, a silhouette of a hare in the style of anime cartoons (such a manicure, by the way, will be much more original than the version with a traditional image of a hare).
If you decide to draw animals on each nail, choose your favorite cartoon characters - complement the bunny with an image of Piglet, Stitch or characters from the cartoon “Monsters, Inc.” “Familiar Faces” will look great against a nude base coat.
We make shellac designs with rhinestones at home
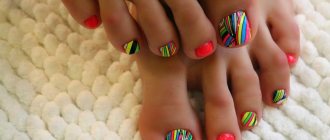
For a simple and, at the same time, original “striped” shellac design with rhinestones, you will need:
- Ultraviolet lamp.
- 99% isopropyl alcohol and a lint-free cloth.
- Shellac base.
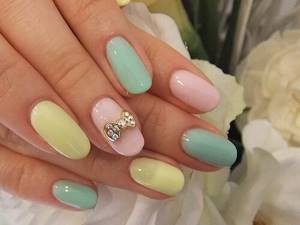
- Shellac 4 different colors. As an example, the colors will be cream, yellow, green and pink.
- Rhinestones.
- Toothpick.
- Finish coating.
Stages of manicure:
- Use alcohol and a tissue to wipe your nails to remove dirt and oil from their surface.
- Apply a thin layer of base coat and cure in a UV lamp for 45 seconds.
- Apply two thin coats of cream-colored shellac and let each coat dry for two minutes.
- Dip the tip of a flat oval brush into the yellow shellac and paint thin vertical stripes along the right and left edges of the nail.
- Use the green gel polish to draw a thick vertical stripe next to (right next to) the left yellow stripe.
- Apply a thin layer of top coat and dry for two minutes. Do not remove the sticky layer.
- Draw two thin pink stripes along the right and left sides of the nail. One of them will be like a dividing line between the yellow and green stripes on the left, the other - between cream and yellow on the right. Dry for two minutes.
- Attach rhinestones in the form of a “snake” to the pink stripes using a toothpick.
- Place a small drop of topcoat on the side of the rhinestone to secure it. Dry your nails in a UV lamp for 10-15 seconds.
- Apply top coat to nails, around and over rhinestones, and dry for two minutes.
- Wipe the nail with 99% isopropyl alcohol to remove the sticky layer.
We recommend: Manicure with gel polish at home step by step: technique
Your shellac design with rhinestones is ready.
What manicure techniques are combined with a bunny design on nails?
In addition to the classic French or lunar manicure, which are “friendly” with almost any design, there are a couple of techniques and prints that are organic for a manicure with hares.
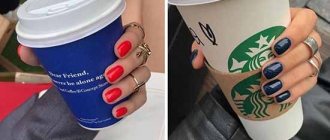
Foil and glitter
If you choose gold glitter or foil instead of a classic monochromatic coating, your manicure will look much brighter and more festive. Why not an option for a party?
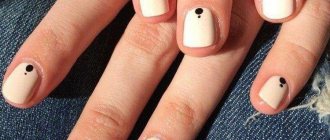
Polka dots and other small prints
The pea print will not distract attention from the drawings, successfully complementing them. This delicate manicure goes well with a romantic flowy dress and jeans.
Stickers and stamping
Haven't learned how to create beautiful designs on your nails yourself yet? Special stamps and stickers will come to the rescue! You can read more about the latter here.
Do you like manicures with animals? Would you make one like this? Or do you prefer other design options? We are waiting for your answers in the comments.
join the discussion
Share with your friends
Marshmallow designs with fluffy bunnies allow you to add cuteness to your manicure. Today they are especially in demand among young people, since they convey the mood of young fashionistas better than other themes. Let's find out why these designs are so attractive, what they should be, according to the fashion trends of the new season, and also what are the ideas for the best manicure designs.
Execution techniques
Most often, animals are depicted on nails using hand painting and acrylic paints, but gel polishes and regular varnishes can also be used, but they are more difficult to paint with because they dry quickly.
Bunnies look great on any shape and length of nails, and in addition, with the help of animal images you can hide certain unevenness of the nail plate.
The simplest, safest and most effective option for creating a design is to use ready-made stickers and sliders with a variety of animal images. If you have a stamping kit and the necessary “bunny” stencils, then using this technique you can easily place them on your nails.
It is also very popular to make bunnies, complementing them with a French or moonlight manicure. But it is not necessary to make animals on every nail. If your design is pronounced and voluminous, then it is better to place it on one or two fingers, but animal silhouettes are quite suitable for drawing on each nail. The main thing is not to forget about harmony and a sense of proportion.
Of course, these are not all execution techniques and styles. If you like several design options, you can easily combine them and get great results.
Color solutions
For manicures with bunnies, pastel colors and neutral white colors are best suited. By itself, it does not have an emotional coloring, however, it acquires it together with color contrast. Therefore, sometimes the same white looks different in different designs. If we talk about the best shades of hybrid varnishes for delicate manicures, then it is worth highlighting the following tones:
- beige;
- lactic;
- mint;
- turquoise;
- caramel;
- creamy;
- peach;
- nude;
- pink;
- lilac;
- blue;
- light grey.
Often contrasting shades are mixed to give a marshmallow-like manicure. So, the design can combine pink with white and mint, lilac with white and blue, powder with light green.
Shape selection
Bunnies can decorate nails of different lengths and shapes. Depending on this, they can be designed on short and straight nail plates, as well as on long and oval shapes. However, such a design will not look beautiful on an overly sharp shape. You need to understand that the delicate design does not go well with aggressive “claws”. In addition, the pattern on such plates will be distorted due to the pointedness.
If the bunny will decorate the entire nail, a medium-length shape with a rounded edge will do. When you plan to depict it instead of the “smile” of a French man, you can take short marigolds as a basis. However, in this case, you need to understand that nail plates that are too short will have to be extended at least a little, otherwise the bunny will look more like a bear, because making long ears in this design is quite problematic.
Design ideas
There are three ways to decorate an accent nail plate with a cute bunny: hand-painting, stamping, and using a sticker. Each option has its own characteristics. For example, not everyone can paint on their nails. This technique requires painstakingness and accuracy, as well as certain artistic skills.
For it, special acrylic pigments are used, which are applied to the nails using thin brushes or nail art pens. It’s easier to draw with pens, and the drawing turns out less voluminous. A professional paints with a brush, since the lines must be confident and accurate.
The hand-drawing technique is convenient because it involves applying an image to any color of the main background.
If drawing seems like an overwhelming task, you can use stamps or so-called stamping. The finished design is transferred from the metal plate to the roller, and then onto the nail itself. If desired, the print can be painted using the same acrylic paints for nail art. The only bad thing about this method is the limited design. It is beautiful, accurate, neat, but if you want to decorate your nails another time with a new bunny, you will have to look for another template.
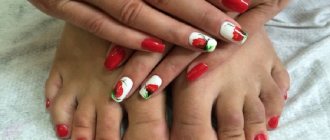
Shellac red marble: stages of design creation
To create a marble effect on your nails, just use a brush and a small amount of alcohol.
You will also need:
- Ultraviolet lamp.
- Alcohol.
- Shellac base.
- Light pink shellac.
- Red shellac.
- White shellac.
- Finish coating.
Here's how to make a red shellac design:
- Apply base coat and dry.
- Apply two coats of pink shellac and cure your nails in a UV lamp for 2 minutes (or less depending on the wattage of the lamp) after each coat.
- Apply dots of red and white on your nails, but do not dry them.
- Dip the brush into the alcohol and lightly “squeeze” it against the edges of the bottle so that the brush is not too wet.
- Slowly apply the brush to the dots to create a marbled look. Clean the brush before each nail.
- Dry your nails in a UV lamp for 2 minutes.
- To complete the shellac red design, apply a top coat of shellac. Dry for 2 minutes.
- Wipe your nails with a sticky layer remover.
Advice from the experts
Bunny designs on nails allow you to add a special “cuteness” to your look, which is in demand today among many modern fashionistas. However, in order for your nail design to look not only beautiful, but also expressive, it is worth considering several recommendations from experts in the field of nail art.
- Usually, accent nails of the design are decorated with bunnies to make the manicure look expressive. As a rule, there should not be many accent nails (often one finger is enough).
- You cannot decorate your manicure with the same bunnies, cloning the same image. This simplifies the look of the design.
- It is allowed to decorate nails with bunnies with all kinds of glitter. However, a scattering of rhinestones and crystals is a taboo for such a manicure.
- You can combine bunnies with other designs to create a compositional design. Balloons, dandelions, hearts, candies, and ice cream are suitable additions.
- Do not overload your manicure with an abundance of contrasts. Three or four tones along with the colors of the picture are enough.
- Pay attention to the design: if it is stylized, then the clothes should be more formal.
- Try to avoid drawings in the style of Disney cartoons. They look childish, which visually simplifies the design. Often, stylization looks much more interesting.
- Choose a matte or glossy base with good pigmentation for your design. In addition to the classic technique, this type of design can be done in French and gradient.
- Don’t complicate a simple theme with massive drawings. In addition to the bunny itself, a contrasting background should be visible.
- To avoid looking awkward with an unusual design, consider the location and occasion. This design is not suitable for evening outings.