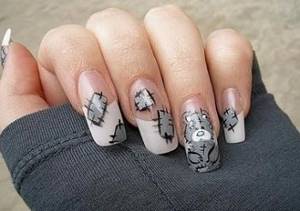
When you mention teddy bears, associations arise with something warm, sincere and pleasant. Perhaps that is why girls love various accessories depicting these charming creatures. Lately, manicures with Teddy bears have become increasingly popular: improvisation is welcome here, and the image of cute bears in nail design is relevant at any time of the year.
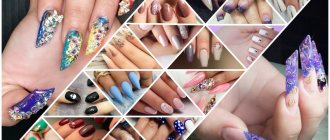
The combination of colors and decor in nail designs with bears
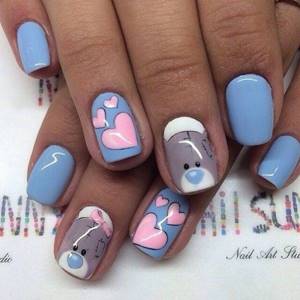
Nail design with a Teddy bear is good because the colors, their combination, as well as the choice of design composition depend only on the girl’s tastes and preferences. Usually cute Teddy is depicted in shades of gray. You can give a bouquet or a heart to the bear’s paws, and put a Santa Claus hat on his head.

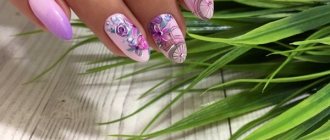
If you want to make nail art that matches the time of year, you can give the bear an umbrella or a beach ball in its paws. The design is complemented with snowflakes, rhinestones or beads. You can depict a Teddy bear on one finger, or another option is to decorate all the nail plates with cute fluffy animals.
The background for nail art is also chosen based on your wishes. For a calmer picture, you can depict a Teddy bear on a classic transparent background.

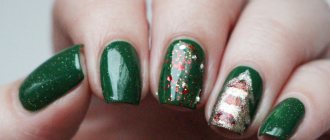
If you make a manicure with bear cubs in red hats, adding snowflakes and Christmas tree decorations to the design, then Teddy will be able to give a New Year's mood to both the owner of the manicure and those around him.
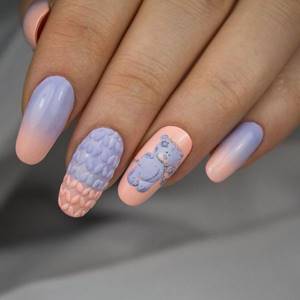
The combination of soft pink and white colors with a voluminous design that imitates a knitted fabric will make the manicure romantic.
Manicure color solutions
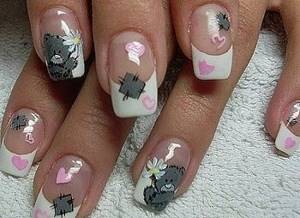
The drawing looks best on a light background
First, let's figure out what background our Teddy bears will be drawn against. For the background, colored varnishes of soft pink, white, blue or light yellow are perfect. You can also use regular clear varnish as a base.
You need to paint Teddy bears with a very thin manicure brush, which allows you to create complex designs on your nails.
You can use rhinestones and sparkles as additional manicure accessories; they will make the coating more festive and bright. Simply sprinkle your nails with sparkles or glitter around the Teddy design.
In order to draw the bears themselves, little is required.
| Varnish colors | Application |
| Black | Used to draw a clear outline |
| Grey | They draw the body of a bear cub |
| Blue | Necessary for drawing the nose and patch on the bear |
| White | The muzzle is drawn using white varnish |
| Pink | The area of the ears is drawn |
Varnishes for Teddy manicure
Do not use several decorative elements at once, because with their abundance, the manicure can easily turn into bad taste.
How to draw a Teddy bear on your nails
When depicting bears on nails, the length and shape of the nail plates does not matter. As with any manicure, it is important that the nails and cuticles are neat. It’s better to decide what style of bear you would like to draw in nail art at the very beginning of the process.
Reference! Teddy got his name in honor of Roosevelt. This is what the owner of a toy store called the bear in early 1900. According to legend, the president went on a bear hunt, and when the beast was caught, Roosevelt refused to kill it. Thanks to this, he earned people's trust.
Teddy bear stickers for nails
Not every girl has enough time to do a Teddy Bear manicure on her own. In addition, drawing requires skill. Therefore, the easiest way to depict bear cubs on your nails is to use stickers. Slider stickers are the easiest way to get the desired design. You can buy them at any store that sells manicure products. A wide range of such accessories allows you to create an interesting design every time. Making a design with sliders requires only a regular set of varnishes.
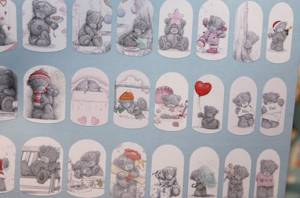
The sticker must be soaked in water, the slide film removed from the paper and transferred to the surface of the nail.
Important! Sliders do not affect the length of time you wear your manicure. The bear will remain on the surface of the nail as long as the final top coat allows.
Bear drawings on nails with a brush
A brush design on the nail plate will certainly be more unique than stickers. But this process is more labor-intensive and time-consuming. Nail art requires maximum skill and concentration on the task. For drawing you need:
- brushes for nail art (flat and thin);
- base, color and top coats;
- acrylic paints (gray, black and pink).
You can apply the design with regular manicure varnishes, but this is inconvenient and the image turns out unclear. If you have a special ultraviolet lamp, you can perform a manicure with gel polishes. If done carefully and pay attention to detail, Teddy manicure will give the image the desired charm.
Teddy bear nail design using stamping
Stamping in nail design is called imprinting technology. Specialized varnishes and devices are used for impressions. The printing technique is as follows: the varnish remains in a recess on a metal disk, which is subsequently transferred to the nail surface with a silicone imprint.
To create a bear using stamping you will need:
- a special metal plate with bear-shaped recesses;
- stamping varnishes;
- silicone impression device;
- scraper (it can be replaced with an unnecessary plastic card).
So, the first thing you need to do is select a bear on the plate with drawings, which needs to be transferred to the nail art composition. Next, apply contour varnish, and remove excess with a scraper. The varnish is then transferred from the recess to the silicone surface by the imprint. Now all that remains is to transfer the contours of the bear onto the treated surface. Then you can carefully paint the bear in the colors you want. After complete drying, the drawing must be secured with a top coat.
Creation methods
When deciding how to decorate your manicure with a pattern, evaluate your artistic abilities and the availability of the necessary materials. Perhaps a more suitable option for you would be to buy stickers or sliders than to select gel polishes of the desired colors, brushes and additional decorative elements.
Regardless of the method of applying the pattern, gel polish coating requires the following materials:
- buff;
- primer;
- base;
- top;
- brush;
- dots;
- napkins;
- de-sticking liquid.
We perform a coated manicure following the instructions:
- we shape the nail and remove the gloss using a buff;
- We perform manicure using the technique available to you (edged, hardware, combined or European);
- remove the sawn-off particles , apply degreaser and primer (the primer dries in air for 1 minute);
- We apply the base and, if necessary, perform alignment in compliance with the correct architecture of the nail. If you do not plan to cover it with color, then choose camouflage shades of the base. Dry in a lamp;
- Apply two layers of color coating , the first thinner, the second denser. Dry each layer in a lamp;
- we carry out design;
- fix the result with topcoat and dry it in a lamp.
Teddy gel polish
You have completed the necessary steps in the instructions for applying gel polish. Let's start using it to draw Teddy step by step:
- Using white gel polish we paint a base in the shape of our future hero and dry it;
- then we depict the head and torso in gray and hold it in the lamp;
- Draw the muzzle in white. If this is a winter manicure, you can add additional elements: a scarf, a heart, a ball - add them in the desired color and send the nails to dry;
- Using a thin brush and black gel polish, draw the bear along the contours and add eyes. Using the same brush or toothpick, we make Teddy more fluffy: we stretch the black color along the contours. Now we put the hand in the lamp for final drying.
Using stickers
Stickers are the easiest way to apply a design; it does not require any additional special or improvised means. Before creating a top coat, remove the sticky layer from the base or color and place the sticker on the nail, pressing it firmly. Then immediately cover with topcoat and dry in a lamp.

For greater durability, you can apply two layers of topcoat.
Using sliders
Many people are afraid to use sliders without prior practice, but rest assured, you will succeed, the main thing is to work carefully.

To transfer a design from a cardboard backing to a nail, first cut out the required element. Dip it in water for a few seconds (it’s better to use tweezers for this).
After pulling the slider out of the water, place it on a napkin, gently blot it and separate the film with the pattern from the cardboard backing. Then place it on the nail and gently straighten it. Fix with topcoat and dry in a lamp.
Please note: there is a special topcoat for slider designs and stickers; it will fix the design more reliably and prolong the durability of the manicure.
Teddy bear on nails: step-by-step master class
To depict a bear on your nails step by step, as in the photo, you will need to choose a polish for the background, preferably pastel colors, and prepare:
- gray acrylic paint;
- black and white paints for the outline and image of the muzzle;
- thin brushes;
- topcoat varnish.
Before applying the design, it is necessary to treat the cuticle and nail plate. Then the background varnish is applied, if necessary, in two layers. After thoroughly drying it, the head, ears and paws are painted with a thin brush of gray paint.
After the paint has dried, the muzzle is depicted in white. When everything hardens well, apply the contour, eyes and nose. You can add a flower, heart or bouquet. Once the image is complete, everything is sealed with a clear topcoat.
Color selection
To draw bears, you will need the following colors:
- white (for backing);
- gray (if you don’t have it, you can mix black and white);
- black (for drawing eyes and detailing the pattern);
- red or blue.
The main tone of the coating in this manicure can be your favorite color, but it will look most advantageous on white and pastel shades. You can limit yourself to a camouflage base - this way you will also reduce the time it takes to complete the coating.
Tips for the perfect manicure
- Before creating a design on your nails, it is best to practice on a palette, foil or a separate piece of paper. Especially if you are a beginner and painting with acrylic for the first time. Once you manage to create the perfect version, start painting on your nails.
- It is not necessary to decorate all your nails the same way. Most likely, you will not get a one-to-one exact image on all nails. You can create a new pattern on each individual surface. And if you are a beginner, try decorating just one nail.
- Use a UV lamp to dry. It will significantly speed up the manicure process, since there are quite a lot of details in the drawing.
- In the first stages, you can watch video tutorials on manicure to understand exactly how best to draw this or that detail of the picture.
- Don't be afraid to experiment and create designs that aren't already on the internet. Something new is always interesting, bright and stylish.
Manicure with a cute teddy bear
Try to diversify your manicure with Teddy bears, create a romantic look and improve your nail painting skills. This design will give your image additional zest, brightness and tenderness.
More interesting articles:
You can start designing after processing the nail plate. Here are the step-by-step instructions:
- First you need to remove the remnants of the old coating.
- Then process the edges of the nails: give them the desired shape and length.
- Remove cuticle.
- Then apply a base coat and a colored varnish on top.
- When the nails are dry, start designing.
- You should start with Teddy's head, choose gray acrylic for this.
- Then carefully draw the muzzle with white paint.
- Draw the eyes and nose with black (can be replaced with dark blue).
- Teddy needs a hat and scarf, make them pink or light blue.
- Now you can start tracing the outline; for this you will need black acrylic.
- At the end of the procedure, be sure to cover your nails with a fixative, so the picture will retain its original appearance longer.
Instead of acrylic paint, you can use regular varnish. But working with him is much more difficult, and even more so in the absence of relevant experience. If you have a UHF lamp in your arsenal, the drawing can also be done with a gel coating. To make your Teddy bear look more attractive, do not neglect small details. The more carefully you work them out, the more neat the manicure will look.
Who is it suitable for?
A manicure with bears from the “Me to you” series will suit romantic people. You can decorate short or long nails with it. This design is preferred by teenage girls and younger children. It is advisable to use stickers to decorate children's nails. It will be easier and faster this way. Not every baby can sit still for even 15 minutes. There is a large assortment of stickers in stores, so you should entrust the choice directly to the child.
Any of the options is suitable for creating a fun manicure. Teddy bears on your nails will help you remember your childhood, give you a feeling of celebration and help you create a unique look. You can come up with design ideas yourself or get them from fashion magazines, thematic websites and other resources. But it is not recommended to start modeling without first getting a manicure.
- Author: Author: Alena
Rate this article:
- 5
- 4
- 3
- 2
- 1
(0 votes, average: 0 out of 5)
Share with your friends!