Decorative nail decoration with gel is in great demand among girls. And this choice is easy to explain: re-application of the decorative coating will be required no earlier than after 2-3 weeks, the nails will look perfect all this time, they are unlikely to have chips and scratches, and their strength will increase significantly. Gel polish is a salvation for thin and brittle nails, which are so difficult to grow without special tricks. Plus, gel polish is beautiful. With it, your hands always look well-groomed and neat, and you don’t have to worry about their beauty “before going out.”
To create a gel polish manicure, different products are used. Experienced nail technicians can easily navigate the variety of varnishes, but it’s easy for beginners to make a mistake and buy something completely different from what they need for a home manicure. Let's try to figure out what a gel can be and what the differences are between different types.
How it works
Few people, except professionals, understand single-phase gel.
Therefore, it can be difficult for a beginner in nail design to navigate the choice of material. Beginners often overpay without understanding why, although high-quality extensions can be done much easier. There are three stages in the procedure. The first ensures the adhesion of the natural plate to the gel. The second helps to adjust the shape and length of the nail. At the third stage, the work is consolidated and a glossy shine is created. Some masters work with different gels at different stages. But a single-phase gel allows you to perform both extensions and design using one jar, since it includes priming, modeling, and fixing particles.
Which product should I choose?
When the question arises, which is better, you should decide what is your priority. Beginners prefer single-phase gels. They are attracted by ease of use and pricing. In addition, for those who like to frequently change their nail color, this option will come in very handy. This is an affordable way to have a manicure for any life situation: be it a wedding celebration, or an ordinary friendly party. With this product you can look your best without being a professional.
More experienced people believe that it is better to spend time and money, which will later pay off in the form of a durable and original manicure. This option is good for those who cannot afford to do their nails often for a number of reasons. It’s easier for them to go to the salon once a month and get the desired result. Or, after spending time, do the same at home, if your skills allow. In this case, a thorough choice of a three-phase agent would be more rational.
Pros and cons of single-phase gels
- A good result without unnecessary time expenditure.
- The application method excludes coating with a base and fixer. Therefore, you should not count on a long service life of such a manicure.
- During application, such varnish may drip, which causes difficulties when modeling nails.
- This product is not suitable for complex designs and decorations. The absence of a sticky layer does not allow you to show originality in the design of your manicure.
- Those with an elastic nail plate often experience cracking of the coating, so sometimes you have to additionally buy a fixer specifically for single-phase gels.
- Single-phase varnish does not dry out the nail plate and can be used even for weakened nails. However, this is not always good, because without the appropriate skills, nail modeling will not work.
- The finishing stage eliminates the formation of a sticky layer.
Types of gel
Different hairdressers are accustomed to different extension techniques. Some people prefer using a single-phase gel, while others are used to a three-phase system. What are they?
Single-phase gel nail extension system is a method in which the formation of an artificial nail occurs using one substance. It is at the same time a base, a builder gel, and a top coat for itself. This is convenient for the manicurist and allows you to spend less time on such a lengthy procedure as nail extensions.
A three-phase nail extension system is a system in which the formation of an artificial nail takes place in three stages: application of a base gel, application of a constructor gel and application of a top gel.

About technology in general
The extension procedure is carried out in stages. First, the first, or base, layer of the substance is applied to the prepared nail. It smoothes out existing unevenness and subsequently ensures a high-quality connection of the entire decorative coating with the base surface. At the second stage, using the gel, the nail plate is formed.
Three-phase gel
Three-phase gel requires a thoughtful, leisurely approach to decorating or extending nails. But at the same time it ensures high reliability and durability of the decor.
As the name implies, the structure of a three-phase gel includes three substances. The first is a bonding agent. It is applied directly to the nail plate and provides high adhesion to other materials. That is why the varnish lasts a very long time, and it is problematic to break it - unless, of course, it is applied in openwork patterns or does not lengthen the nail plate many times.
The second is modeling paste. It is characterized by increased viscosity and is intended directly for building up and creating a manicure shape. And finally, the third is decorative material. It is he who is painted in one color or another.
Three-phase gels are characterized not only by a relatively high complexity of application, but also by a long working time. But with them you can create a truly impressive manicure! Modeling paste in the hands of a master can take on absolutely any shape, it can be processed with a milling cutter and other tools, and the finished appearance depends on its tone - whether it will be colored uniformly or become opalescent.
However, the disadvantages of a three-phase gel are not limited to the difficulty of applying to the nail plate. It is also characterized by a high price! Therefore, this gel polish is not very suitable for home use - it is easier and cheaper to order its application at a manicure salon.
So, let's summarize.
Advantages
- High strength, reliability and durability. “Holds on” reliably and survives even strong mechanical impacts;
- Allows you to create truly complex and unique design solutions, including opalescent shades;
- Suitable for repeated lengthening of the nail plate - although, of course, the strength is somewhat reduced (due to the laws of mechanics, the “lever effect” and internal stresses).
Flaws
- Expensive compared to the alternative;
- Difficulty and duration of application;
- Requires highly qualified craftsmen and the use of special equipment.
Of course, the bonding agent and modeling paste are almost universal, and therefore suitable for use with various decorative varnishes, which somewhat reduces the price of the set. But at the same time, for many fans of home manicure, the cost of three-phase gels remains quite high.
For whom is it better?
Extensions are suitable for girls who are not satisfied with the shape of the plate or if it is short in length; the specialist will do the work, taking into account the client’s wishes. On long nails you can draw a pattern or design of varying complexity. It looks interesting and gives the manicure originality. Rhinestones and bottles will hold up well, and various compositions can also be created with them.
Artificial nails are durable and rarely chip or crack. An ideal option would be for girls whose gel polish quickly chips off the nail for physiological reasons. The extensions are worn unchanged for up to 4-5 weeks, but it is better to make the correction at the right time so that problems do not arise.
Gel polish is suitable for any nails. It looks quite natural and is suitable for young girls and older women. If you apply a natural shade to the coating, you may not immediately notice its presence. Correction of this method is required only after 2-3 weeks. Some people like to wear extremely short lengths, in which case gel polish is the only option.
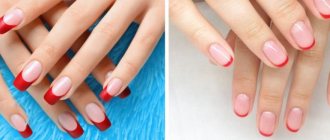
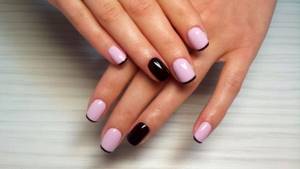
One of the most popular designs for medium length is French manicure or French manicure. In the nail service, this manicure is considered a classic and is in great demand.
The ability to do the procedure yourself at home. This is a big advantage compared to extensions. This allows you not only to save time and money and to be confident in the safety of the tools you use.
In general, these methods have almost the same technology. After analyzing the advantages and disadvantages of the methods, every girl will be able to choose exactly the manicure that is suitable for her nails.
Single-phase gel nail extension technology.
Before starting the procedure, it is necessary to thoroughly clean the hands of the master and the client using an antiseptic. Then you need to push back the cuticle with a special stick, carefully file the nails under the holes for tips, and carefully polish the nail plates to completely remove the oily top layer. These preparatory works are extremely important, since in the process of further work they will help you prevent the material from peeling off, and therefore create more neat and natural gel nails.
The selection of tips must be done individually for each nail, since a lot depends on the correct selection of tips. The tips are glued to the free edge of the nail using special nail glue. Then, using a special tip cutter, the master achieves the required length of the tips, after which they are given the desired shape using a nail file.
After this, it is necessary to clean the tip seam as carefully as possible, after which the nail is filed until the shine is completely removed. Then the nail must be smeared with a special substance - a primer, which must be allowed to evaporate. After the primer has completely evaporated, the first layer of single-phase gel is applied to the surface of the nail using a special brush. Then the gel-treated nail must be placed under an ultraviolet lamp for 1 minute.
After this (without removing the sticky top layer), a second layer of gel is applied to the nail, which must be laid more evenly and densely than the previous one. After applying the second layer of single-phase gel, the nails must be placed under an ultraviolet lamp again, only this time not for 1, but for 2 minutes. If the second layer of gel does not turn out perfectly smooth, do not be upset. It is necessary to carefully remove the sticky layer using a special product, then file the nail with a file, and once again carefully cover it with gel.
The final stage is filing the nails with a soft file and applying special cuticle oil to them. This concludes the single-phase gel nail extension technology, and your gel nails are ready for further processing. You can varnish them, apply a design - in short, do whatever you have enough imagination for.
It is worth understanding that the quality of the final result directly depends not only on the hands of the master, but also on the quality of the material, regardless of whether you chose a single-phase gel or a three-phase one. Therefore, the choice of a single-phase gel must be approached extremely carefully. This is no wonder, because the range of products offered to customers is so large that quite often it is not easy to make a choice. Therefore, let's try to figure out this issue.
A high-quality gel should have a fairly soft consistency in order to fit well on the nails. Also, the gel should not leave a brush mark, and should be plastic, so that it can be used to give your nails the desired shape as easily as possible. However, in addition to this, the choice of gel often depends on the preferences of the master, since most often different masters like different gels, and you can only decide which gel is best for you through experience.
Although we know almost everything about all modern nail extension gels, we cannot tell you exactly which gel you will be most comfortable working with. However, we will give you some recommendations that will help you make the right choice of single-phase gel for nail extensions. So, to begin with, you should carefully read the information about all manufacturers of extension gel, and look for reviews about their products on the Internet and in magazines. In addition, you can interview practicing hair extension specialists, since their personal experience will be extremely valuable to you.
In general, if you decide to find the best nail extension gel for you, then you should decide what exactly you expect from this material, and what goals you plan to achieve with it. Just think about whether you plan to use this gel for home or professional use, whether you are interested in complex designs, or whether you prefer nail extensions with French gel, or whether you simply need to increase the length of your nails. Having decided on these most important questions and found detailed information, choosing the ideal single-phase gel for nail extensions will not be difficult. Well, if you are completely confused by the variety of these products, then contact us, and we will try to help you in this matter.
Reinforcement technology
Single-phase gel nail extension technology is carried out using tips and forms. Tips are part of the resulting nails, which are made of synthetic material – plastic. The forms are a disposable product with a paper base, which is attached to the nails during extensions.
Each type of extension accessory requires its own specific pattern. In general, the application and use of single-phase gel in such cases is similar, but the resulting effect may differ. Nail extension using this method requires the use of one jar of gel, which will be used to apply all layers. When applying the base layer, keep in mind that the consistency of this product is liquid.
But you can see what thermal nail polishes look like in the photo.
How to apply to the mold correctly
When building up, the first thing to do is to substitute the shape. This is done in such a way that movement and wobbling of the plate is eliminated. That is why this version of the material is provided with special marks that will allow you to choose the most optimal length for all nails. The advantage of this type of extension is that after the procedure, the claws will look as natural as possible.
- Using a special brush, the gel is applied to the plate using trampling movements. After this, the composition is applied to the seam. The same layer is used to form the required length of the nail. Next, drying is carried out until complete polymerization (exposure time is usually indicated by the manufacturer). Make sure that the material does not spread onto the cuticle and sides of the rollers. But you can read here how horsepower nail polish is used and who it is suitable for.
- After the first layer has dried, apply the second, dry, and then file the nail with a file. The surface should be sanded with the softest possible abrasive - buff, and then get rid of dust with a stiff brush. You should also learn more about the most popular gel polish design for short nails.
- At the third stage, a thin application of the same product is carried out. Be sure to ensure that the ends are sealed. After final drying in the lamp, the cuticle is varnished.
Gel nails are not only beautiful, but also durable. A well-executed manicure allows you to have beautiful, well-groomed nails for up to four months. But you should understand that they need to be corrected periodically.
How to build on tips
This type of influence is no less simple than building up forms. An important aspect of this procedure is the correct selection of tips. The shape must completely match the shape of the nail.
The extension is carried out as follows:
- An antiseptic is applied;
- The surface of the nail is polished;
- Tips are glued (from half to 1/3 of the nail, no less);
- The length of the tips is adjusted (using a file);
- A transparent layer of gel is applied and then dried in a lamp until completely dry;
- A thicker layer is applied again and dried again, but until complete polymerization.
Strictly speaking, all actions are not very different from using forms. It is also necessary to adjust the length and shape, ensure that the ends are tightly sealed, and also prevent the composition from getting on the cuticle and nail folds.
Benefits of gel nail extensions.
Today, gel nail extensions are the most popular nail extension method. This is due, first of all, to the fact that nails extended using this technique look quite natural and incredibly aesthetically pleasing. In addition, these nails are very strong and durable. In addition, another important quality of the gel is its unique ability to self-level when applied to nails.
The gel used for nail extensions is a material that hardens when exposed to ultraviolet rays. Therefore, to create gel nails, you need a special ultraviolet lamp for drying. Gel is usually applied to nails in three stages:
- The first one ensures the connection of the gel with the nail.
- The second is modeling (creating the required length and giving shape).
- The third is the final strengthening of the gel and the creation of an attractive gloss.
Based on this, you might think that to create gel nails you need three different gels at once, but this is not entirely true. Today there are universal materials with which you can carry out all these stages. All modern gels are divided into single-phase, two-phase and three-phase. The three-phase nail extension system assumes that for each of the stages we have listed above, three separate components will be used, each of which plays its own role.
With two-phase extensions, not three, but two types of gel are used: the first is necessary for adhesion to the nail and modeling, and the second is needed to give the nail strength. And finally, there is a single-phase gel with which you can perform all three stages. Typically, this method is chosen by those who have recently begun to comprehend the art of extensions. However, this method is used not only by beginners, but also by professionals, since such gels are ideal for weak and thin nails, and they are recommended for use when the skin of the hands is highly sensitive.
Thus, when using a single-phase nail extension system, you will only need one jar of gel, instead of two or three, due to the fact that one type of gel can perform all the functions: adhesion of the gel to the nail, modeling the nail, and giving it strength.
Be sure to note that single-phase gel extensions do not mean that the gel should be applied in one layer. Gel nail extension technology, regardless of the type of gel, involves applying three layers
Single-phase gel is simply ideal for nail extensions using tips. It has a fairly liquid consistency, which is very important when applying the base layer, since the gel at this stage must “familiarize” with the nail in order to avoid peeling of the material. At the same time, this property of a single-phase gel can also cause some problems with modeling an artificial nail, since the gel is quite liquid. However, with a little practice, you can easily find your own methods of dealing with this inconvenience.
So, now let's move directly to the technology of nail extension with single-phase gel using tips.
How does a generator work?
The device works by converting rotational energy into electrical energy. The electric machine, using the rotation of the MP, generates electric current. At the moment when the wire winding (coil) rotates in the MF, the magnetic field lines penetrate the turns of the winding.
Attention! As a result of this process, electrons move towards the positive pole of the magnet. In this case, the current moves, on the contrary, towards the negative magnetic pole
It doesn’t matter what rotates under mechanical action, a winding or a magnetic field, the current will flow as long as the rotation is performed. Generators producing three-phase voltage may have:
Generators producing three-phase voltage may have:
- fixed magnets and a movable (rotating) armature;
- a stationary stator and magnetic poles that rotate.
In devices of the first design, there is a need to draw a large current at a high voltage. To do this, you have to use brushes (contacts sliding along slip rings).
The second generator structure is simpler and more in demand. Here the rotor is a moving element and consists of magnetic poles. The stator is a stationary part, assembled from a package of iron sheets insulated with each other and inserted into the grooves of the stator winding.
Information. The rotor has a body made of solid iron and has magnetic poles in the form of tips. Tips are assembled from separate sheets. Their shape is selected so that the generated current is close to a sinusoid in shape.
Pole cores have field coils. The coils are supplied with direct current. The feed is carried out through graphite brushes to the contact rings located on the shaft.
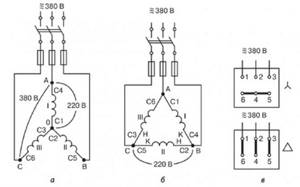
In the diagrams, a 3-phase generator is drawn as three windings, the angle between which is 1200.
There are several ways to excite generators, namely:
- independent - using a battery;
- from the exciter - using an additional generator mounted on one shaft;
- due to self-excitation - its own rectified current.
This also includes magnetic excitation supplied from permanent magnets.
Gel nail extensions - step-by-step instructions at Imkosmetik
Gel nail extensions - step by step! What are the differences between single-phase and three-phase extension systems? How to grow your nails yourself?
How to choose a gel for extensions?
Single-phase units are usually preferred by beginning craftsmen. But some remain faithful to them over many years of work. Grattol gels have a viscous structure and are convenient to distribute over the surface of tips or molds.
The pink opaque InGarden gel is perfect for a nude manicure; it is quite dense and does not show through.
Beige single-phase from Vogue Nails is also a great option for nude; it self-levels and perfectly models the nail.
With experience, masters, as a rule, switch to a three-phase extension system.
RuNail has perhaps the widest palette of building (modeling, sculpting) gels: the company has classic nude shades and bright raspberry, blue, green and purple.
For the base you can choose, for example, Kodi, and for the finish - Grattol with a sticky layer or Lianail, which is applied like a top coat and does not turn yellow after drying, which allows you to preserve the main color of the extended nails.
Gel nail extensions step by step
The technology for gel nail extensions in single-phase and three-phase systems is absolutely the same, only the gels themselves differ. Either you use a single phase gel for all three steps, or three different gels.
We carefully treat our hands with an antiseptic, paying special attention to the fingers and nail bed. We do a manicure in the usual way and polish the nail plates with a buff. We degrease the nails, then apply a bonder (dehydrator) and primer. We prepare tips or forms. We cut the tips to the required length with a tip cutter and sand them with a buff to get rid of the smooth surface, then glue them onto the nails
We secure the forms firmly under the nails; they should not move during the work. Apply the first base layer of gel. In a single-phase system it can be immediately colored, in a three-phase system it is usually transparent. We distribute using a brush into tips or shapes, creating the correct oval/rectangle, depending on the desired shape of artificial nails. Dry the layer in a lamp. Apply a modeling layer of gel. It should not be too thick and lumpy, you should strive for an even distribution. Dry it again in the lamp. We grind the surface of artificial nail plates, giving them the desired shape, length and arch. Remove dust with a nail brush or napkin. Then we apply the finishing gel and seal the ends of the nails. The last layer is also polymerized in a hybrid lamp.
Now you can complete the gel polish coating and design. If you decide to do without coating and nail art, you can apply softening oil to the cuticle.
PNB, Single-phase modeling gel
Single-phase and three-phase expansion system
| pros | Minuses |
| Single phase system |
|
| Three phase system |
|
Remember that the quality of work also depends on the skills and talents of the craftsman. Therefore, train and improve, and our tips for gel nail extensions will help you with this.
We wish you successful work!
Review from manunia_131:
It's a pleasure to work with him! It dries great in the lamp! The color is pleasant and delicate. Perfectly covers the transition (you can't see your nails). The regrowth is not very noticeable. When used correctly, detachments do not occur. There is no burning sensation when drying in the lamp. Full review here.
- manicure
- build-up
- gel extensions
- nails
- extension systems
Previous article Next article
The best single-phase gels for nail extensions
Single-phase transparent gel Jess Neil
- Self-leveling;
- When applied correctly, does not require filing;
- Easy to model due to its liquid consistency;
- Maximum polymerization time in a UV lamp is 3 minutes;
- Volume 15ml;
- Average price – 300 rubles.
Single-phase gel Masura
- A wide range of colored biogels with deep warm shades;
- Contains a vitamin complex, calcium and protein to strengthen the nail plate;
- Hypoallergenic;
- Volume 15 ml;
- Price from 670 rub.
Single-phase gel Runeil
- Available as a single-phase and three-phase camouflage agent;
- It has medium viscosity and is easy to level;
- Suitable for aquarium decoration;
- Maximum polymerization time in a UV lamp is 3 minutes;
- Volume 30 ml;
- Price from 550 rub.
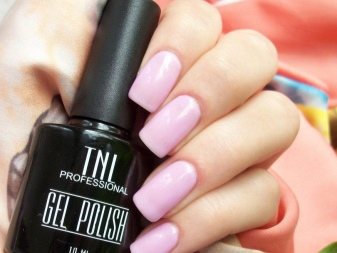
TNL extension gel
- Biogel, which strengthens the nail plate, adds shine to natural nails;
- A wide range of transparent and camouflage single-phase classic and premium gels;
- They have high wear resistance;
- Volume 15 or 18 ml;
- Price from 210 rub.
Global
- Strengthening inexpensive UV gel;
- Sheer or neutral pink or light pink shade;
- Average wear resistance;
- Requires leveling, filing;
- Volume 15 ml;
- Price 400 rub.
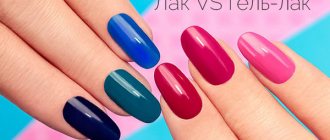
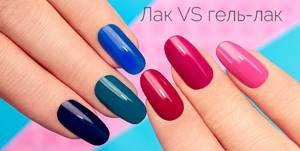
1-phase, 2-phase or 3-phase gel polishes?
Nowadays, you probably won’t surprise anyone with the word “gel polish,” since these products have become so popular that most women simply cannot imagine themselves without them. Indeed, they have a number of advantages that ordinary varnishes cannot compare to.
But you will probably be interested in learning about their types, features and application techniques, and also choosing the most optimal one for yourself, especially if you do a manicure at home.
Gel polishes are divided into three main groups - single-phase, two-phase and three-phase. Let's start with the last one.
Three-phase gel polishes
This is perhaps the most common and the only type that has remained since the appearance of these miracle coatings. The application technique consists of three products - base, color coating and top (finish). The base is designed to smooth the nail plate and create a special film that improves the adhesion of all layers. After we have dried the base in a UV lamp, we apply a colored coating behind it and dry it again. Here it is better to overexpose the nails under the rays than to underexpose them, since then “waves” may appear or the finishing coat will deform the previous layer. The top is also dried, and then the sticky layer is removed using a special product. That's all! It is three-phase varnishes that are considered professional and the most resistant to external factors. The most famous manufacturers are: Shellac, KODI, OPI, Jessica, Naomi, Gelish, etc.
Advantages:
- Creates a more reliable nail shield
- Lasts at least 14 days
- Not afraid of scratches and does not chip
- These gel polishes are the most affordable on sale and, as a rule, have a rich palette
Flaws:
- Labor intensity
- You need to have experience working with them
- Expensive procedure
Two-phase gel polishes
2-phase gel-based nail coatings are probably the rarest and not very popular. As you already understand, the system consists of two means. As a rule, this is a color coating and a fixer. It is even rarer to find a colored coating and only a base. Their advantage is that they are less labor intensive than 3-phase ones, but they also have a little worse wear and tear. The only most famous and well-proven one is VinyLux from CND, which lasts 7 days. Although it should be more classified as ordinary varnish, since it does not require a UV lamp, and the composition is far from related to gel varnish.
Single-phase gel polishes
They are a new product on the market, which in such a short time managed to acquire millions of fans. Now, to create a bright and durable manicure, you only need one product and, in fact, a UV lamp. As part of a single-phase gel polish, all three formulas are already mixed - a base, a color coating and a protective layer. It would seem that everything is fine, but there are several nuances here
By mixing “everything in one pile,” each of these formulas loses some percentage of its effectiveness, so it is especially important to follow every detail specified in the technology of use. And it’s definitely not worth saving on 1-phase gel polishes, otherwise you will get a “disgrace” on your nails that will peel off or crack after the first hit on something hard or contact with hot water
One of the best single-phase systems was created by the KOTO company, which also fruitfully worked on the palette itself
To recognize single-phase KOTO varnish, pay attention to the color numbers on the jars - they are written in red. The palette consists of more than 80 shades, both glossy and with light pearl, shimmer or glitter
Its moderately thick and not very viscous consistency evenly covers the nail and guarantees an incomparable color that will definitely last about two weeks.
But, like every product, single-phase gel polishes have both advantages and nuances (they cannot be called disadvantages).
Advantages:
- Simple and easy to use
- Affordable
- The procedure takes about 7-10 minutes
- Almost as strong as three-phase gel polishes
- Ideal for beginners or experts for “express manicure”
- Convenient to use on the go
- In salons they are much relatively cheap
Nuances:
- Due to the lack of a leveling base, it is not suitable for uneven or damaged nails
- Requires high-quality preliminary “grinding” of nails
- Even if the nails are healthy and smooth, you need to treat them with a buff to remove the glossy shine (for better adhesion to the gel polish).
- The uneven consistency sometimes makes it difficult to apply gel polish, so it is often necessary to apply 2 or even 3 layers
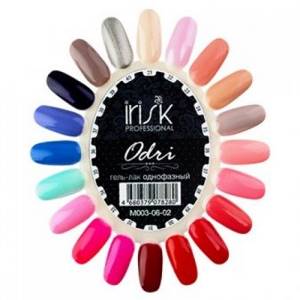
Review of manufacturing companies
On the modern market you can easily purchase gel polishes produced by companies such as:
- Irisk;
- TNL;
- Masura;
- Patrisa Nail;
- Khan;
- Bluesky.
The list goes on for a long time. Bluesky products are in unusually high demand. This option is supported by its reasonable cost and wide selection of shades offered.
The Korean brand TNL Professional is also quite popular. The optimal consistency of the product allows you to distribute it evenly and accurately over the entire surface of the nail. Consumers have the opportunity to choose from a variety of tones and colors. Representatives of the fair half of humanity often choose varnishes from the “Cat's Eye”, “Thermo”, “Morocco”, and “Mosaic” series.
Masura offers a wide range of single-phase and three-phase varnishes. You can use products produced under this brand at home and in the salon. The advantages of this manufacturer include the fact that the company produces formulations in small bottles. This is very convenient if you create a manicure at home.
Giorgio Capachini gel polishes are sold in 6 ml bottles. The consumption of the product is quite economical. The composition is enough to do a manicure 20-25 times. This is more than enough for home use. The varnish will not have time to get tired or dry out. To completely dry the layer, 1-3 minutes are usually enough, depending on the power of the device. You can remove the coating quickly and easily using a special liquid.
Irisk Professional gel polishes are distinguished by their affordable cost and high quality. The creator assures that they can last up to three weeks without cracks or chips. The company offers a wide range of colors.
How to apply single-phase gel at home
The system is applicable for modeling nails on forms or tips.
How to extend nails with single-phase gel using a form
- Treat the cuticle with special oil, remove it with a trimmer or push it back with a pusher.
- File the free edge of the nail, round off any existing irregularities so that they do not interfere with the installation of the form.
- Use a buff to create roughness on the glossy layer of the nail, moving it in the longitudinal direction from the pterygium to the free edge.
- Place the extension form under the free edge of the nail so that it fits snugly against the nail plate and serves as an extension of it.
- Degrease the nail, treat it with a primer to enhance the adhesive properties of the first layer of polymer.
- Apply a thin layer of single-phase gel using a brush along the entire nail plate, retreating 0.5-0.75 mm from the cuticle.
- Place it in the lamp. Wait for it to polymerize for 60 seconds.
- Using a modeling brush, apply a drop of gel to the form, create an artificial free edge, and spread evenly over the previous layer.
- Place in the lamp for 2-3 minutes.
- Remove the sticky layer, give the nail the desired length, align the side edges, cut off excess polymer. Remove sawdust with a brush.
- Degrease before applying the topcoat.
- Apply a final thin layer over the entire surface of the resulting nail.
- Place in the lamp for 60 seconds.
- Remove the sticky layer from the finished work.
Extension on tips
- Treat the cuticle with special oil, remove it with a trimmer or push it back with a pusher.
- Choose a tip that suits your shape and try it on. Make sure it follows the curve of the nail and is completely adjacent to it.
- File the free edge of the nail so that it follows the shape of the tip's hole.
- Treat the glossy layer of the nail with a buff, moving it in the longitudinal direction.
- Distribute a drop of special glue on the inside of the tip hole. Place it just below the mid-length of your natural nail. Press it onto the nail plate and wait until it sticks.
- Using special cutters, cut the material to the required length. File down the free edge of the tip.
- Using a buff or a soft file, process the seam of the tip and its surface to create roughness.
- Apply degreaser to the work surface, then primer.
- Apply a thin layer of single-phase polymer over the natural part of the nail. Place in the lamp for 60 seconds.
- Apply the 2nd layer of gel to the natural nail and tips along the entire length. Place in the lamp for 60 seconds.
- Remove the sticky layer.
- If the gel lays down unevenly, after removing the sticky layer, cut off the excess polymer. Apply the 3rd layer of gel, place the nail in the lamp for 60 seconds. Remove the final sticky layer.
Secrets of use
There are several secrets and subtleties in using polygels. By following them, you will certainly make it easier to work with the material and achieve excellent results in nail extensions and repairs. In general, extensions are not a simple process, since the master requires accuracy, attentiveness and dexterity. If desired, polygel is used not only in salons, but also at home, but the rules for use are strictly followed.
To get quality nail extensions with polygel, you will need:
- Carry out a manicure according to the standard scheme - classic, hardware. At the final stage of manicure, remove the pterygium.
- Treat the surface of the nail with degreasers.
- Apply a thin layer of base as this will act as an adhesive layer. Dry it and only after this stage lay out the acrylic.
- Wet the brush with clinser (alcohol) and wet it with a napkin. Squeeze the polygel onto the plate and distribute it according to the desired shape.
- Pull the remaining composition to the tip and remove with a brush. Knead the composition, stretch it as long as possible until it is fixed in the lamp.
Three-phase
The three-phase system differs from the two-phase system by the use of a final gel, which is necessary to remove the sticky layer. This gel speeds up the work process and performs a protective function against external aggressive factors.
In general, the sequence of working with three-phase gel polishes looks like this:
- We perform a manicure (shape the nails, remove and push back the cuticle), degrease the surface of the nails.
- Apply the base and dry it in an ultraviolet or LED lamp
- Apply the first layer of colored gel polish and dry it in a lamp. If necessary, repeat the application of colored layers, and do not forget to dry each of them well.
- Remove the sticky layer.
- Apply the top coat (finishing coat) and dry it again in the lamp.
The clear advantage of three-phase coating is its resistance to external influences and durability. You will need to update your manicure much less often. This effect is achieved by using a base and finish. They are the ones who hold together all the components of the coating with the nail plate as tightly as possible.
During the entire period of wear (and it lasts on average 3 weeks, and sometimes longer), the coating does not deform, and the original color does not fade.
And of course, all fashionistas will be pleased with the fact that when using multiphase systems, you can safely use all kinds of decorative elements in nail design; they will stick well, since they will be tightly sealed in the layers of coating.
The disadvantages of three-phase gel polishes include the financial side of the issue, since you will need to invest more money to purchase them. At one time you need to buy 3 bottles for coating instead of one.
It is also worth noting that only a professional master can cope with the manicure procedure using three-phase gel polishes, since its application is a very complex procedure that requires certain experience, knowledge and technique. If you are choosing gel polish for independent home use, it is best for these purposes to opt for single-phase products.
Please note that no matter which of the listed products you choose, you must pay attention to the quality of the material. And the easiest way to distinguish this is by smell - high-quality coatings do not have any sharp, unpleasant aroma
If there is no pungent odor, it means that the composition does not contain dangerous components that adversely affect human health.
After studying the information on the differences and features of single-phase and three-phase gel polishes, you can easily make a decision and choose one of the products.
General characteristics of coatings
Single-phase systems have a combined structure, which consists of a coloring pigment, base and finish. The coating has a liquid consistency.
Three-phase systems are sold in 3 separate bottles.
Each varnish performs its own separate function: the base ensures tight adhesion of the color coating to the nail plate, the transparent finish (top) gives strength and fixes the manicure.
The main difference between three-phase and single-phase gel polishes is that in the former, each layer has its own separate product for correct and high-quality manicure. In single-phase systems, the coating combines all these components at once.
You will learn more about what single-phase and two-phase gels are in the following video.
Let's take a closer look at each of the systems.
How is gel polish different from regular polish?
Regular nail polish is a colored coating that:
- It does not stay on the nails for long without chipping: from 3 to 5 days.
- Nail polish takes a long time to dry in the air: it is not advisable to touch anything for at least half an hour after applying it.
- Washable with nail polish remover.
Every girl has used regular nail polish at least once in her life and has a good idea of what it is and how to apply it. The variety of varnishes is simply huge: you can find special medicinal varnishes, and varnishes with various effects, for example, craquelure, matte, sand, magnetic and others, as well as varnishes with additions in the form of sparkles, shimmer, and so on.
Gel polish is a cross between regular nail polish and gel for extensions, which is why it has such a name. The main goal that was set during its development was to combine in it all the best properties of both coatings: that is, durability and color. And this, of course, was achieved!
- Externally, a bottle of gel polish differs from regular polish in that it is not transparent. The color is indicated either by a sticker or paint on the bottle. This is done so that the gel polish does not lose its properties when exposed to sunlight.
- For the gel polish to dry, you need to hold it for 2-3 minutes in an ultraviolet lamp or 30 seconds - 1 minute in an LED lamp.
- Due to the properties obtained from the gel, the wear time of the gel polish coating increases to 3 weeks.
- The technique of applying gel polish requires additional nail preparation: degreasing the surface, removing the gloss with a buff, and the mandatory use of a base and top coat for gel polish. Additionally, liquid may be required to remove the sticky layer, if any.
- The presence of additional materials and a lamp for applying gel polish makes this procedure more expensive, so many people prefer to have it done in a salon or by a specialist at home.
- Removing gel polish from nails is also more difficult; regular gel polish is not enough. It must either be soaked with a special agent or removed mechanically using a hard file or cutters.
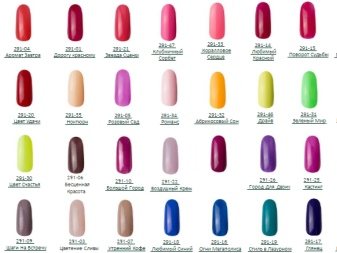
Palette
Each manufacturing company offers a wide selection of colors. The assortment includes the following colors and their shades:
- red;
- green;
- blue;
- violet;
- white;
- black.
It will not be possible to list all the options available on the nail industry market, since there are countless shades. Taking into account the wishes of the most demanding consumers, companies offer various collections containing unusual tones.
The “Precious Stones” line is in particular demand. Like pearls, these gel polishes shimmer in the sun, creating an amazing and mesmerizing effect.
It is worth paying attention to the “Thermo” line. It is represented by almost all companies
The products can change shade depending on the ambient temperature.

The Cat's Eye series is also offered by most manufacturers. To achieve the desired effect you will need a magnet. In the palette you can find green, blue, purple, brown shades. Each girl will choose a suitable option for herself.
You can find interesting gel polishes in the line of any company. For example, the “Morocco” series, produced by the Korean company TNL. The coating shimmers on the nails with all the colors of the rainbow. The effect is similar to that obtained as a result of applying compositions from the “Precious Stones” collection.
How does the nail extension procedure work?
There are several nail extension techniques. This applies to both the materials used and the methods of their application. For example, some masters still use nail extensions using tips - when a plastic overlay is glued to a natural nail, on top of which a builder gel is applied. in most cases, masters have already moved away from this method, since it can seriously injure the nail plate. But nevertheless, you have to resort to extensions using tips in cases where your own nail does not have a free edge, that is, it is too short, or has an irregular shape (deformed, broken).
The most common extension technique is extension on forms. With this method, a rigid form is placed under the natural nail, on top of which a gel is applied, which, when hardened, forms the shape of an artificial nail.
Typically, growth occurs in several stages:
- Manicure and nail preparation. At this stage, the master removes the cuticle, hangnails, pterygium, trims the shape of the natural nail, and shortens its length, if necessary. Then the master removes the glossy film of the natural nail with a soft file to ensure maximum adhesion of the gel coating to the natural nail.
- Degreasing. At this stage, the surface of each nail is treated with a special degreasing agent (sometimes nail polish remover or alcohol is used). Then the nail is treated with a primer (primer) to hold the gel on the nail plate.
- Direct extension.
About technology in general
The extension procedure occurs step by step. First, the first, or base, layer of the substance is applied to the prepared nail.
It smooths out inherent unevenness and subsequently ensures a strong connection of the entire decorative coating with the base surface. In the second step, the nail plate is formed using gel.
All work ends with the application of the last layer, which performs a fixing function and makes it possible to create the desired optical effect, for example, to give the coating an intense shine. The gradually applied material hardens under the light of a specialized lamp.
What is good about single-phase gel?
Beginners learning the basics of extensions are often interested in how a single-phase gel works. Some people think that it is of lower quality than two or three-phase material. This is not true, it’s just that a single-phase gel makes the job easier.
The consistency of this product is quite liquid, which makes it easier to model the shape of an artificial nail. In addition, this product provides strong adhesion to the natural plate, which guarantees long-term wearing of extended nails without peeling off the material.
It is believed that single-phase gel extensions are more gentle and are indicated even for weakened, damaged and brittle nails. By the way, it also does not cause allergies and can be used for extensions even by pregnant women.