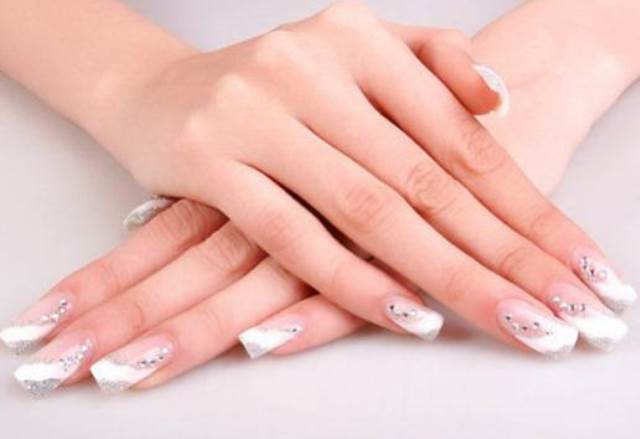
A beautiful and long-lasting manicure is every girl’s dream. It can be implemented with gel polish. It lasts up to three weeks, delighting the owner with unique design patterns, the shine of rhinestones or the impeccable elegance of a single-color coating. The master has many techniques and materials in his arsenal. A manicure base helps him achieve a lasting effect. This article describes its unique properties and selection rules.
Why do you need a nail base?
There is a protective layer between the decorative finishing coat and the nail. This is the base. It is relevant for performing operations using three-phase gel polishes. The main task of this layer is to ensure adhesion of the colored layer and the plate itself.
Gel polish from any manufacturer has an unnatural composition. In terms of physical and chemical properties, it is quite aggressive. The base layer softens its impact.
It is also designed to solve the following tasks:
- restore the architecture of the plate;
- prevent the negative effects of coloring pigments;
- level, mask existing defects, smooth out scales;
- strengthen thin nails (usually, if they are brittle, even the gel coating does not last long).
- slightly thicken the free edge and make it denser.
The gel polish lays down in an even, silky layer after pre-treatment. Thanks to it, the surface acquires a glossy effect.
In addition, it is impossible to perform additional nail extensions without a base. This is a multifunctional product. Essentially, a “working tool” that should be present in the master’s collection of available materials.
Since the base is in direct contact with the “native” nail, it must be of good quality. Cheap products from dubious manufacturers can cause allergic reactions or damage the plate itself.
Execution Rules
The technology for gel nail extensions is not too complicated, but it has a number of features that you need to know. Just a little practice and you can perform the procedure yourself.
The first thing you need to do before you start working on your nails is to disinfect your hands and tools. Inspect your nails - if you see fungal infections, applying extensions is strictly prohibited.
If there is polish or any other coating on your nails, it must be removed. Then use a pusher to push back the cuticle, without pressing too hard. Before extensions, you should not do a classic trimmed manicure, there is a risk of damaging the skin.
Gel nail extensions. Rainbow French
Using a natural nail file, we carefully file the surface of the plate, making movements towards ourselves. We carefully clean the area near the cuticle, there is a pterygium that must be completely removed. If you don't clean it well, the extended nail may peel off. Next, we file the free edge so that it is convenient to place the form.
We treat the prepared nails with prime. When applying, make sure that the layer is not thick. When working with a brush, we try not to catch the cuticle. Let dry for two minutes.
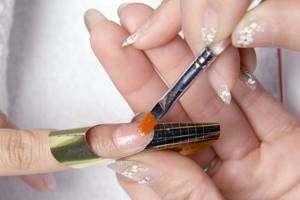
At the next stage, we put on a uniform; it is better to take a disposable one. Before use, you need to slightly bend it lengthwise, giving it a roundness. Glue the ears to the finger and look at the side view, the shape should continue the natural growth line of the nail. Make sure there is no bending. If there is a gap between the nail, then the shape should be trimmed.
Once the form is established, we can proceed directly to extensions. To lay out the free edge of an artificial nail, you need to use a not very viscous transparent building gel. Apply the desired length with a brush. Let dry for two minutes. When the gel has polymerized, carefully remove the mold downward.
We use a thick, transparent gel to build the architecture of the nail. Apply it in a thin strip near the cuticle without touching the skin. In the stress zone, we make the required thickness with gel. Let dry for two minutes.
Remove the sticky layer with a napkin soaked in cleanser. Using an artificial nail file, we file down the free edge of the plate to correct and even out the shape. The transition from a natural nail to an artificial material should not be noticeable. We polish the surface with a buff to smooth out the unevenness left by the nail file.
We complete the treatment by applying the finishing gel. Do not go beyond the edges of the artificial nail and do not touch the cuticle. Lubricate the cuticle itself with nail oil.
Gel nail extension on form
If the nail extension technology is done correctly step by step, then you can wear your nails for up to three weeks or more. And timely correction will help keep them in perfect condition.
Nail base - types
Selection requires certain knowledge and experience. The same product cannot be used for all cases. Some of the girls have strong nails, while others have them too flexible.
So, experts classify base coatings as follows:
- Solid.
- Elastic.
- Camouflage.
The quality of the service as a whole depends on the right choice. A mistake can lead to peeling and cracks.
Solid
This type is recommended for experienced craftsmen. It is not suitable for extensions because it has a liquid consistency. The minimum amount of time is allotted to complete the operation. Otherwise, unaesthetic streaks appear.
The peculiarity is the complete lack of elasticity after polymerization. The name speaks for itself: the solid base practically does not bend. This product can be used if a woman has strong and healthy nails.
Elastic
This option is addressed to beginners. Due to its thick consistency, it is very easy to operate. It does not spread, it is easily leveled to an ideal state. The master has time to make adjustments. After polymerization, elastic bases bend precisely because of their plasticity.
Extension is easy. This type of base is suitable for soft plates. But you can’t work with it on long nails - they just sag there.
If you can't tell from the product label whether the base is elastic or hard, you can do a simple test. You need to apply a small amount of it to a plastic bag and see if the drop can be “rolled” after polymerization. Hold the bag in the lamp and try to bend the strip. If it becomes cracked during bending, it means you have a solid option. And the elastic analogue will withstand the test.
Camouflage
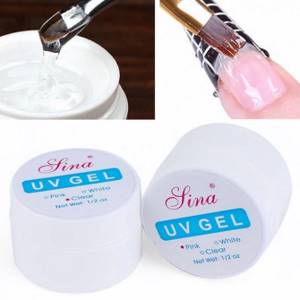
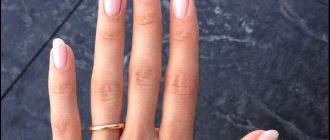
The main difference from previous options is the lack of transparency. The color is close to natural. Light beige, pinkish or milky shades are allowed. Manufacturers add shimmer to some samples. Reflective microscopic sparkles enhance the aesthetics of the master's work. For example, RUNAIL UV gel comes to the market in two versions. It can only be transparent or with glitter.
A camouflage base is the only possible option for employees of those companies where multi-colored nails are generally unacceptable due to a particularly strict dress code. It is also good for French manicure.
So, knowledge of the intricacies of the profession and the ability to analyze the condition of the plate will allow you to make the right choice.
Common questions and answers
Most often, beginners wonder whether it is possible to use products of a three-phase system as a single-phase gel. Unfortunately this is not possible. But a single-phase one is suitable instead of a modeling or finishing coating.
It is highly undesirable to use this material for French lay-outs. In any case, you will need at least two gels of different colors, so what is the point of using a single-phase one? It is much easier to use a three-phase system.
Doubts are often raised about the possibility of using a single-phase gel to strengthen nails without extensions. The material is excellent for these purposes. It can be used as a base for gel polish and for repairing broken nails.
How to apply base on nails correctly
Ideally, the topcoat should be perfectly smooth.
This can be achieved in several steps. And the first one is applying a transparent base coat. The purpose of the operation is to level the surface and provide preparation for applying the finishing layer. But it is preceded by preparatory activities.
The nail plate is pre-treated with a buff. The second name of the tool is a grinder. The buff is designed to provide the desired degree of smoothness. In terms of the degree of impact, it is more delicate than a file. There is less abrasive on its surface, so the nail is practically not injured.
All four sides of the buff have a specific purpose. Before applying the protective layer, the master works with the wide side. It makes it possible to simultaneously process almost the entire surface.
After sanding, degreasing is performed with a cleaner to remove the natural oily sheen from the surface. Primer treatment (drying) is not always performed. Whether it is possible to do without it, the master decides.
Finally the base is applied. For classic varnish and gel manicure, different compositions are selected. But they have the same goal - to fill the existing unevenness.
Mandatory rules:
- application with a brush should be as thin as possible and (more importantly) absolutely even;
- the ends and edges are literally sealed;
- Drying is performed in an LED or UV lamp.
It is not necessary to achieve perfect drying; a little stickiness will work for high-quality adhesion. In established practice, one of four application methods is used: “Tango”, “Hairpin”, “Snake” or “Line”.
Sometimes beginners ask what is applied first - top or base?
According to the nail art protocol, there is a standard sequence of layers:
- base;
- pigmentary;
- decorative;
- top
That is, it is the base that is applied directly after degreasing. Top completes the process. The order cannot be changed!
Tools and materials
Let's consider what tools and materials are needed for gel nail extensions. It is worth mentioning that the final result directly depends on their quality, so you should not buy cheap gels and tools.
There are only two ways to create gel nails, using tips or an extension form. Tips are plastic extensions that imitate a natural nail and are used to increase the required length. The tips are secured with special glue. The form is a template with marks for increasing the required length. Depending on the material, you can buy disposable (paper) and reusable (metal).
Gel extensions, “Square” shape: laying out, sawdust - video tutorial by Natalia Golokh
The primer is used before applying the gel to the nail. It removes excess moisture and fatty film from the surface of the nail. After using it, the nail plate becomes white. Thanks to him, the artificial material holds well. The primer prevents peeling and prolongs the life of the extended nail.
Brush for applying gel. You need to take a flat one, with a beveled or rounded edge. It can be made from natural or synthetic fibers. Natural ones are more expensive, but they will also last longer than synthetic ones.
Gels for extensions are single-phase and three-phase. The three-phase gel consists of a base, sculpting and protective layer, they are applied in turn. For beginners, a single-phase gel is more suitable, since all three components are mixed and are in one package.
A product for removing the sticky layer that forms after polymerization of the gel under the influence of ultraviolet radiation. It is problematic to remove this layer with any other means.
Files for artificial nails with a high degree of abrasiveness. One should be for working on the upper surface of the extended nail. The second is to give the desired shape to the free edge and at the base of the plate. A thin artificial nail file is good for this.
A soft brush will be needed to remove sawdust from the skin of your hands. A stiff brush is suitable for cleaning filed nails.
Building up
Is it possible to extend nails with a base? There is no clear answer to this question. It all depends on the goal. You definitely won't be able to make a long nail. It's better to use acrylic. The base is suitable either for building up just a few millimeters, or for restoring a damaged plate.
Algorithm of the wizard’s actions:
- Perform a mechanical or hardware manicure.
- Give the plate an unnecessary configuration.
- Attach the extension forms to your fingers. The use of types is allowed.
- Apply the product with a flat brush to the border of the form and the nail. Movements should not be spreading, but pointed. Quickly spread the drops over the surface and let dry a little. Then repeat the manipulation over the entire plate. However, pay special attention to the joint line during subsequent applications.
- Dry until hardened.
- Apply a final coat of product and dry again.
It must be remembered that water-based compositions are absolutely not suitable for this. Combined camouflage agents are also not recommended, since their structure does not become solid even after drying. If such a goal is nevertheless set, then acrylic or enamel-based products are suitable for this operation. For example, the transparent base gel ARTEX has proven itself well in a professional environment. For modeling on forms and tips, KODI, BASE UV GEL is also recommended.
Advantages and disadvantages of the procedure
Before agreeing to any nail manipulation, be sure to weigh the pros and cons. It is necessary to find out what contraindications and side effects there are. The following factors speak in favor of gel extensions:
- By spending no more than two hours of your time, you will become the happy owner of beautiful long nails. And this does not depend on what the original length of the nails was.
- Durability is another advantage of gel nails. Even acrylic is inferior to them in this regard. The service life of such a manicure is at least three weeks.
- Easily amenable to correction. If you manage to break your nail, damage it, or don’t like the shape, then any experienced nail technician will spend no more than an hour fixing these problems. You can wear gel nails for a long time. It is enough to carry out the correction regularly and in a timely manner.
- The gel does not have a sharp, unpleasant odor. If you've ever had acrylic nails done, you know how bad they smell. After undergoing the gel extension procedure, your nails will not have a specific smell.
- Not subject to deformation, safe. Nails are strong and elastic. Even if you work physically and there is a possibility of damaging your nail, you will have to put in a lot of effort to break it. If you do this, only the artificial material will burst, and the natural nail will not be damaged.
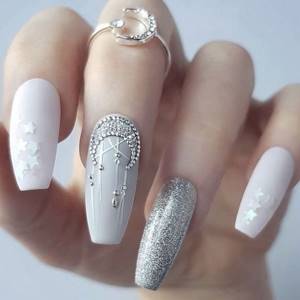
Gel nail extension with design The disadvantages of the procedure include the following factors:
- Since before applying the gel the master is forced to file off the top layer of the nail, the plate becomes thinner. Because of this, when you dry the gel under the lamp, an unpleasant burning sensation will occur.
- A broken nail cannot be repaired; it will have to be completely removed and re-grown. It is impossible to glue a cracked plate.
- If you have never worn gel nails, it is recommended to start with a short length. Otherwise, there is a risk of snagging and breaking the nail.
- When you decide to get rid of your nail extensions, you won’t be able to do it yourself. All you need is a master. DIY can be expensive - the surface of the nail will be damaged, and you will need to wait at least 4 months to grow the damaged plate.
Compound
The chemical composition of the gel polish base is focused on efficiency and safety at the same time. In this regard, it is recommended to use rubber compounds. They act most sparingly.
Rubber base is the same product that is applied under colored gel polish in a three-phase system. But it has a set of operational advantages. To give it a thicker consistency, manufacturers introduce rubber into the formula.
This gives the product unique properties:
- Comfortable application. There is no spreading, so you can treat 4 nails at once and start drying.
- More noticeable alignment. Important when there are creases and grooves.
- Strengthening fragility.
- Completely eliminates the appearance of cracks due to elasticity.
- Effective protection against coloring pigments.
- No shrinking effect at the edges.
- High-quality drying without bald spots.
Wearability is approximately the same for bases with any composition: from 3 to 4 weeks. The polymerization time is also the same: LED lamp - 30-60 seconds; UV lamp - 2 minutes.
The difference lies in the operational nuances. For example, rubber products tend to bubble. Therefore, the bottle cannot be left open. The brush must be very carefully immersed in and pulled out, otherwise the bristles will bend. The application itself is performed in 3 touches - from the center to the cuticle and then to the edges.
What is the base for gel polish: main types and recommendations for choosing
The base for gel polish can be liquid, thick in consistency and medium in texture. This indicator depends on the purpose of the product - whether it was created to strengthen, more firmly fix the flower garden, hide defects, level, etc. There are the following types of bases for gel polish of different thicknesses:
- regular or gel, liquid texture, it has the designation base coat;
- rubber rubber base, thicker, laying down in a noticeable layer;
- self-leveling, that is, it does not require much effort to distribute on the plate;
- camouflage – hiding defects and the free edge of the nail;
- silicone, necessary for uneven plates, is gentle on them and can be easily removed;
- acrylic, that is, intended for nail extensions with gel or used for soft ones that are prone to breaking off.
They all have pros and cons regarding both applying and wearing manicure. You should choose according to the characteristics of your nails. For example, silicone is suitable for leveling out bumps and pits on them; it is also hypoallergenic. Rubber will help with short, chewed plates, “springboards”, and will not bake in a lamp. The regular one is good for healthy and even nails, but it spreads and causes discomfort when drying.
Watch this video for a review of base coats for gel polish:
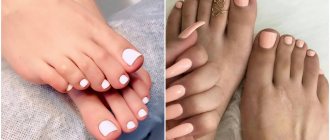
Dairy
The milk base belongs to the category of camouflage, that is, it reliably covers stains on the plates and gives them a fashionable shade. Therefore, it can be used without subsequent coating with gel polish, and also as a base color for a nude manicure. Usually it is rubber. Therefore, to improve adhesion under the base, a substrate is often made from a regular base.
This type of product can be hard, soft, or flexible. The first subtype includes:
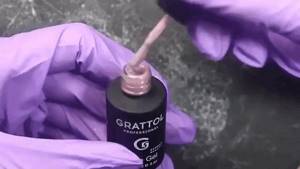
- Grattol Base 01,
- Envy Base 04,
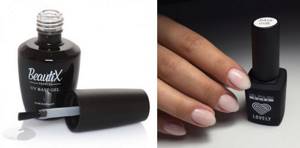
- Beautix Milk,
- One Nail White.
Softer and more elastic:
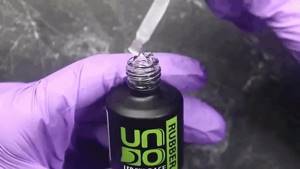
- UNO R7,
- Klio Natural White,
- Nail Passion,
- Ju. Biley White.
Nail Passion Ju. Biley White Klio Natural White
Camouflage
The camouflage base can be one-, two- and three-phase, respectively thick, medium and liquid texture. Its difference from other types is that the product contains a tint, so it:
- perfectly masks stains on nails;
- closes the boundary between its base and the free edge.
Camouflage base
Therefore, the colored base for gel polish can be used independently without a second tint layer. This material is beige, pink, latte, peach, very delicate tones and translucent. It can be used to create a French or nude manicure, and is also used as a substrate for light-colored flower beds. Thanks to the base they become brighter.
Acidic
The acid base means that the gel polish is firmly fixed on the nails, even without the use of a primer, but in the absence of length. This occurs due to drying the surface of the plates and loosening. After all, the composition contains a large percentage of methacrylic acid, which gives the product a pronounced smell.
This base is not suitable for damaged and fragile nails. It is suitable for healthy and short ones, since with long ones the free edge will “walk” under it. After all, this product is elastic. Another disadvantage of high acidity is the rapid loss of brightness of the shade of the varnish. Acid types include:
- Tartiso Base Coat,
- NeoNail,
- In Graden Ideal Nails,
- Diva Rubber Base.

Thick
The thick base is usually rubber, it can be hard, soft or elastic, that is, among this type you can find a product for any type of nails. This texture is good because it does not spread. But there is a danger of laying it in too thick a layer, and the nails will be “potbellied.” In such cases, the solid base can be partially sawed off. There are two more problems - it can bubble and take longer to polymerize. Among the thick foundations of different companies, the following deserve attention:
- Extra Clio,
- Supernail Arnelle,
- Kodi Ruber Base,
- Rubber Diva,
- Rubber UNO.
Kodi Ruber Base Supernail Arnelle Rubber UNO
Solid
A solid base is needed if your nails are long or break frequently. It will come in handy short and soft, thin. Do not use the product if there are uneven surfaces on the plates. Hard bases are acrylic or rubber:
- UNO Rubber Base,
- Rio Profi,
- Oxxi Ruber base coat,
- Proffessional Nail Boutique from PNB (biogel).
Solid Base
This type of product may be labeled structure or builder.
Liquid
Liquid foundation or base coat:
- applied in a thin layer, that is, there will be no “pies” on the nails;
- does not sag during polymerization;
- dries quickly in a lamp.
Liquid base for gel polish
Usually it does not have any special qualities; it is applied only for adhesion of the plate and varnish. But it also helps strengthen the coating, allowing you to wear your manicure longer. This type of product is suitable for problem-free nails, short or short in length. It can be difficult to apply; you have to do it quickly, otherwise the product will spread. Most popular in category:
- Bluesky,
- CosmoLac
- Dia D'oro.
Silicone
The silicone base is intended for brittle, thin nails; they do not need special preparation for its use. It is a viscous liquid that dries in air in a couple of minutes. The surface is thus protected from any negative influence; the base does not even need to be dried in a lamp.
Gel polish is applied over it and polymerized. The design will last up to 2 weeks. And you can remove everything in one motion: pick up the film with tweezers and pull it off the nail. The following product brands are used:
- Irisk Peel off base,
- Kodi Easy off base,
- Naomi Silicone base,
- Fresh Prof Silicone base.
Irisk Peel off base Naomi Silicone base Kodi Easy off base
Matte
A matte base for manicure design has not yet been invented. All bases give a glossy effect, some to a greater extent, others less noticeable. The top coat gives the nails a matte finish. This is for example:
- Bluesky Top Coat Matte,
- TNL Top Coat Matte without sticky layer,
- Rio Profi Matte Top,
- Lianail Matte Top.
Self-leveling
The self-leveling base is easy to apply, effortlessly models the smooth surface of the nail plates, but does not spread. It's important not to use too much of it. Among these products there are also caring ones, that is, containing vitamins, therefore suitable for weakened nails and easy to remove.
Self-leveling bases usually have a thick or medium-density texture because they contain rubber. Popular:
- UNO Rubber Base,
- Nano Profassional NANLAC Gum,
- Runail Elastic Rubber Base,
- In'garden Base gel Super easy off,
- TNL Rubber Gel Polish.

Hypoallergenic base and top
Hypoallergenic base and top are necessary for those who are intolerant to formaldehyde, toluene, dibutyl phthalate and other rather aggressive components found in the composition of the products. They must be marked 3-Free or 5-Free, 7-Free, 9-Free, indicating the absence of allergens. The properties of the products are different: they can be thick or liquid, strengthening, elastic, hard. Allergies are not caused by the following bases:
- UNO Lux,
- Rio Profi Hypoallergenic,
- Grattol IQ Rubber Base Gel,
- CND Base Coat
- ONIQ Odissey Strong adhesion base,
- ONIQ Grand Strong adhesion base.
CND Base Coat Rio Profi Hypoallergenic Grattol IQ Rubber Base Gel
Hypoallergenic tops:
- CND Creative Top Coat,
- Grattol No Wipe UV Filter Top Gel,
- Rubber gel finish option.
- PUF Base Coat.
For problematic nails, for thin and brittle nails
For problematic, thin and brittle nails, rubber bases should be used, possibly with a backing made from a fortified similar product. They will strengthen the plate, make it visually thicker and denser. Among rubber bases, it is better to choose those that harden to form a durable frame:
- TNL Rubber Gel Polish,
- In'Garden "Perfect Nails"
- Patrisa Nail Kautschuk-Basis.
Patrisa Nail Kautschuk-Basis TNL Rubber Gel Polish In'Garden “Ideal Nails”
You can apply one of the following products under them in a thin layer:
- TARTISO Vitamin Base Gel,
- MASURA Vitamin Base,
- In'garden Base-Hybrid So Naturally.
Acidity
The golden mean of base acidity is pH=6. Since the nail is porous, all elements applied to it end up in the growth zone. Exceeding this parameter of the product used can result in a chemical burn.
Moreover, the consequences become noticeable not immediately, but as they accumulate. Over time, the nail splits, becomes thinner, or becomes loose. The gel practically stops sticking. Often these phenomena are mistakenly considered an allergy. But in reality it is the effects of acids.
In order not to lose clientele due to illiterate selection of products, it is recommended to check the acidity of the products used in advance.
To do this you need to follow the steps:
- wet the indicator strip;
- Apply a drop of the test product to the wet end;
- visually compare the color of the strip and the tone on the reference scale.
The conclusion about the safety of the acidity level of the nail base will be obvious.
But even by choosing the right product and setting the pH, you can cause a burn. After all, this parameter is very flexible. It may change as it dries and hardens. The entry of the composition into chemical reactions with other agents also plays a role.
To avoid unpleasant consequences, it is recommended to use an acid-free primer. It will work on the principle of “double-sided tape”, providing a strong adhesion with delicate impact.
With the base, the operation is performed as follows: the first layer is applied with rubbing movements and dried for half a minute. Then a little product is dripped into the center of the plate and distributed as carefully as possible, without touching the skin of the finger.
Conclusion
Which base is best for nails is determined by the master himself. The choice is focused on the condition of the girl’s nails. Trainee masters develop an individual style in their work over time. Even the speed of operations is different for each of them.
However, there are general rules that will improve the quality of alignment:
- The more liquid the consistency of the composition, the less quantity is required.
- There should be quite a lot of thick base, and it takes time to distribute it evenly (spreading).
- You can't overdo it with primer. Otherwise, a glass effect will form and the base will drain.
- When distributing a drop, the brush does not touch the plate! She remains “in the air.” That is, it is immersed in a drop without allowing it to come into contact with the surface. This requires a fair amount of skill and dexterity.
- After polymerization, the base can be adjusted. For this you need the softest buff. Literally a few movements will be enough to smooth out the defect.
- During the procedure, it is necessary to adhere to the established algorithm and follow the sequence of application of layers. You can improvise when choosing decor and color. But the main manipulations are performed technically - according to the rules.
- The first layer is considered a primer. The second, when distributed over the surface, disappears at the side rollers. The base is not applied under the cuticle.
- Colorless compounds polymerize very quickly. In the absence of pigment, the rays will take less time to penetrate the structure of the material.
- If the lamp burns, then pull out your hand with the material facing up. This will prevent the material from spreading. To relieve pain, the fingertips should be pressed against the table for a few seconds. Sometimes reducing the heating power is enough.
The most common cause of delamination is illiterate selection of the base without taking into account the individual characteristics of the plate. This is followed by thinning due to harsh removal of the coating. Seeing the unsatisfactory condition of the nails, a good master will conduct a consultation and advise the girl to take a time out. She will appreciate your participation and will definitely return to you in the future.
Polymerization time
Always pay close attention to the manufacturer's recommendations if you have purchased a new single-phase nail extension gel. How to use the material, how long to dry the layers and other recommendations - all this is usually indicated on the packaging. On average, it takes 1-3 minutes to dry the gel in a hybrid lamp for each layer.