Lamps for selfie manicure have become, perhaps, the most desirable and sought-after gadget for any modern girl. Nail industry professionals who have relied on promotion on social networks have already appreciated the power of high-quality photographs. The ability to demonstrate a model with realistic photos of a trendy design at any time of the day is very important for any competent PR specialist. As, indeed, for a young lady who cannot imagine a minute of her busy life without a spectacular photo of her next varnish or gel-varnish masterpiece, “like in a glossy magazine.”
However, not all models of smartphones and phones are equipped with a high-quality front camera, as well as a built-in backlight, sufficient to capture the attractiveness of a particular resident of your lakodomy. This is where all the inhabitants of Instagram needed knowledge about light, lamps and the art of professional photography. We will discuss the main important points of creating high-quality nail photos using selfie lamps in this article.
What is the “ring light” of selfie lamps and what does it do for manicure photos?
In a truly good photo of professional nail design, we are attracted by good composition, high-quality color rendering, and the right balance of light and shadow. Trying to aesthetically photograph handles with a phone (even the coolest model) in evening street lighting or in a room with low lighting, of course, you won’t get such photos. Therefore, to be able to capture decorated fingers in all their beauty at any second, lighting manufacturers have created ring-shaped LED portable mini lamps. They play the role of a powerful lighting device, a diffuser, and even partly a light cube - three components of a professional photo studio. Thanks to these useful photo accessories, shots of manicurist and pedicurists work without stains, unnecessary glare, unnecessary shades, unwanted shadows, bright and juicy.
How to photograph nails with highlights
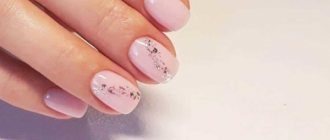
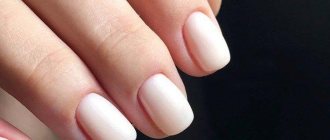
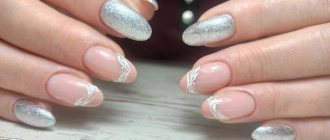
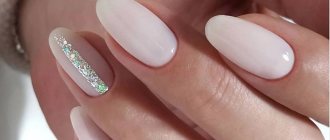
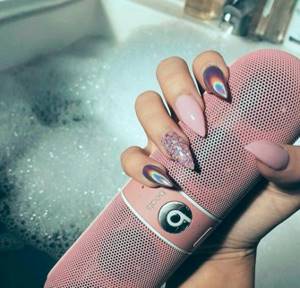
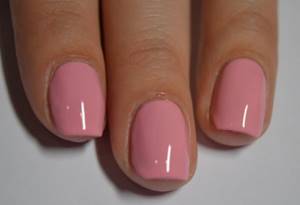
You've probably come across beautiful photos with natural highlights more than once while scrolling through your social media feed. They stand out from the crowd of cards and always attract attention. This effect is easy to achieve if you follow these rules:
- Pre-polish the nail plates thoroughly, removing all roughness with a special buff. This is the only way that gel polish or acrylic paint will lie smoothly, forming a mirror surface;
- use artificial light, but better - sun rays. Just not straight, but scattered. Lack of light will never allow you to create a soft glow;
- It's cloudy outside, but you still want to photograph your next manicure masterpiece? Then try the pro technique by taking a lamp and bouncing its light using a reflector. This role can be played by a thick snow-white sheet of paper or foil. The result will definitely please you;
- Elegant highlights can also be easily “finished” in classic Photoshop or any other similar program for a smartphone. Simply select the pen or gradient tool and highlight a specific area to achieve the desired result.
Knowing these tricks, you can even photograph your nails for advertising, creating a visually attractive picture that demonstrates your skills in all its glory. By the way, such photos can be uploaded to stocks and you can even make money from them by selling them to clients.
The secret to perfect insta photos: selfie ring light and ring lamp.
Selfies with a manicure that are ideal in all respects are almost a 100% guarantee of popularity, no matter what you do and for what purpose you maintain accounts on social networks. How can you learn to take iconic photographs that follow the trend of a particular manicure technique? Simple devices that are easy to use even for ladies who are far from the world of catwalk photography will help - ring lamps for selfies. The secret of their irreplaceability is rich, bright light that does not whiten the skin of your hands, unlike flashes, and works throughout the entire photo shoot. Lightweight, durable and aesthetic ring light will certainly become your constant companion if you want to take photos of your nails not only professionally, but also with pleasure. A mobile, convenient, modern mini-lamp does not require any particularly powerful batteries. Its functionality is quite enough to correctly highlight a frame with a nail design and get rid of shadows. The LEDs in the lamp do not heat up and the light does not flicker, so it can be used at any distance from your fingers.
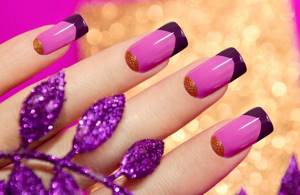
Nails with highlights: photo rules
How to take beautiful photos of flawlessly glossy nails? How to arrange the light correctly so that the highlight looks amazing?
Firstly, the surface of the nail should be perfectly flat on its own. Secondly, avoid harsh lighting, choose diffused light. A fluorescent lamp with a reflector is perfect.
Types of selfie lamps. Functional features and characteristics of Irisk selfie ring.
According to their technical capabilities, ring selfie lamps are divided by the number of LEDs, operating mode options, and the possibility of additional effects during the photography process. As well as charging features (built-in battery, USB charging or use of AA batteries). A common property for all models is the creation of an expressive glare effect, similar to coatings with the “cat eye” effect. This additional interesting feature of selfie lamps visually attracts attention when viewing photos of your manicure.
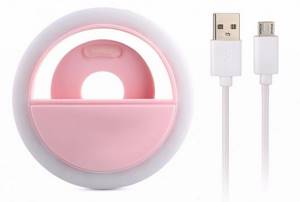
Among selfie lamps aimed at the level of amateur nail photography, products from the Irisk brand take pride of place. What are the advantages and characteristics of the Irisk selfie ring that make it so indispensable when shooting?
- The device consists of 36 LEDs with a high color rendering index (95%), providing soft and natural lighting.
- When secured, there is a special anti-slip protection, so you won't scratch your phone or accidentally drop the lamp.
- The continuous glow time at full power (45 minutes) is enough for a full photo shoot.
- The ability to charge via a USB port will be especially convenient if you usually charge your gadgets at work or on the road/business trip via a laptop.
- The accessory is very compact (85x27 mm) and lightweight (only 42 grams), and will not take up too much space even in the smallest handbag.
- The lamp produces light that spreads evenly across the entire frame range. Thanks to this, the maximum quality of the photo is achieved: the colors become more saturated, the photo in the dark is obtained with a clear outline and without haze.
- Irisk selfie ring has 3 backlight brightness modes (from light backlight to bright light, which can be switched with just one click of a button.
Are you still wondering if you need a compact mini lamp for perfect nail selfies? We have collected for you the TOP 5 reasons to answer this question positively. So…
What background to photograph your nails on: minimalist delights
The background for photographs of nails seems to many to be a trifle that should not be paid attention to. Let us allow ourselves to disagree with such judgments. The background is the mood of the entire frame, and often even a whole story, harmoniously built around manicured fingers. To take a masterpiece photo, it is not enough to just have a beautiful manicure; you also need to pay attention to the background, removing everything unnecessary from there. The question is still relevant for you - what to photograph your nails on? Then you should carefully read the following lines:
- The easiest way is to use a large white Whatman paper as a background. This opens up limitless space for imagination and the implementation of the most intricate ideas. Also, nails for portfolios are most often photographed on a white background, because this style of cards requires minimalism and conciseness;
- Do you think that a snow-white profile is too boring? Then literally add some color there. You can decorate whatman paper with picturesque watercolor strokes, gouache blots, or simply take photographs against the background of colored sheets of paper for scrapbooking or origami;
- wooden background. A simple and attractive option for both a business profile and a personal account. There are now a million online stores selling similar accessories;
- marble background. Marble or wood look very impressive in the frame due to their unusual texture. Of course, you can look for locations with these materials right on the street, but we suggest doing the wiser thing by simply buying a self-adhesive film with the necessary color accent at a hardware store;
- carpet, blanket or bedspread. Lacy, openwork, woven, knitted or fluffy carpets, rugs and bedspreads can also play the role of a professional background. The main thing is to add a couple of details to the frame besides your fingers;
- earth, sky, sun, sea or grass. Nature is the best background, always complementing any photo and creating the right atmosphere.
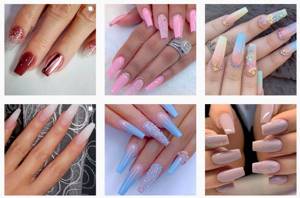
A small gallery of examples will help you decide on your personal favorite backgrounds. Watch and get inspired.
Selfie ring on your phone – all the advantages of an ideal gift.
- This device has a universal mount that allows you to attach your lamp to anything (including a tablet, laptop, any touch phone).
- The selfie lamp advantageously illuminates your manicure at the time of taking a photo, producing high-quality images and unusually realistic color rendering in accordance with the highest requirements and at any time of the day.
- When working with it, you get photographs with clearly defined shadows and voluminous soft light.
- It helps to capture the most imaginative manicure without losing a single shade.
- This is an ideal budget option for photographic examples of the work of manicurists for a personal portfolio - all those who so value high-quality photos and beautiful light.
So, with the help of this wonderful invention, every photo memory dear to your heart will become more vivid with a professional ring light. Buy a selfie lamp for your Irisk selfie ring and enjoy creativity!
Ideas for maintaining Instagram
Idea No. 1 – manicure and nothing more
The essence of the idea is to regularly post photos of your works, which are implemented in various techniques. The advantages of this method include the fact that you do not need to waste time on writing posts, besides, most clients pay attention only to the quality of the work performed, this will be quite enough.
Among the disadvantages - there is no individualization + there should only be good quality of work. With this approach, you should publish photos in the same style, with the same color and lighting. We also suggest using watermarks, which can be created using the Snapseed application.
Idea #2 – divide and conquer
The essence of the idea is to post two photos with examples of work, and then one information block. The advantages of the method are that you can embed informational and advertising posts in a high-quality and beautiful manner, the engagement of subscribers will be higher, and you will also show your expertise in the matter of work.
The method is proven and has never failed. Among the disadvantages, we note that you will be constantly squeezed within the “2/1” framework, and if you break the scheme even once, then everything will be ugly. To maintain an account using this scheme, you will have to first prepare several dozen ideas for blocks, which is sometimes boring, and also use tools for creating watermarks, processing and designing text inside blocks.
Idea No. 3 – uniqueness
The essence of the tactic is to immediately set an original visual style for the account, which will be consistent in logic, color and lighting. Among the advantages, it should be noted that by improving the visual style, you can increase the check, as well as fall out of the general competition and be always one step ahead.
To create a style you will need to take good photography courses, as well as have a sense of beauty. In addition, you cannot do without good photographic equipment.
Recommendations for general account management
It is also worth designing your profile header correctly - for example, indicating your work experience, metro station/stop that is closer to your salon, contact information so that the person has a choice - write to you in Direct, WhatsApp, Viber or just call.
To make your manicure popular on Instagram and perhaps even reach the TOP, follow the recommendations:
1.
Choose the best hashtags and mark geolocations - this will make it easier for you to be found.
2.
Look at the account like a client. When working, it’s worth asking what people consider most important when going to a specialist. It would be a sin not to take advantage of the opportunity while you devote several hours to one client. This is a great way to get feedback and build your personal positioning from it.
3.
If you have your own idols in the beauty world, watch their accounts. What do you like best? Figure out how to adapt these ideas for your profile.
4.
Check your username. It should not be long, memorable, so as not to get lost among competitors.
5.
Don’t be lazy and create pinned stories, where you can create several categories – “price”, “reviews”.
6.
Switch your account to a business profile so that you can view post statistics, add communication methods, and be able to launch paid promotion of posts.
By following these guidelines, you will be able to create a stunning profile that will attract attention.
How to use photo nail design
1. The first step is to manicure all nails, then apply the base coat and the polish itself in one or two layers and wait for it to dry completely. Important: the film for photo design is not transparent, but slightly matte, so for a clearer appearance of the design it is better to use light colors of nail polish.
2. Further actions depend on whether you are using photo design on the entire nail or on part of it. In the first case, you need to carefully cut out a fragment of the image that fits the size of the nail plate with a small margin at the edges. If you need a separate element of the design, then it is simply cut out from the set. This is exactly the method I used in my set:
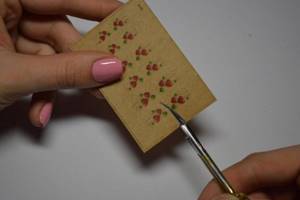
3. Now, using tweezers or your hands, whichever is convenient, we separate the film with the pattern from the cardboard backing. It should peel off easily.

4. We paste the photo design onto the nail. If you used a design on the entire nail, then the remains are folded under it. In this case, you can also make several cuts along the edges of the sticker so that the design fits well with the curve of the nail plate and does not create unnecessary folds. Gently smooth the photo design with an orange stick or fingers, removing excess bubbles, if any. We file off the extra millimeters of photo design bent under the nail with a nail file. To make the sticker lie evenly on the nail and prevent bubbles from forming, small cuts can be made on the sides.
Common mistakes
In order for a portfolio posted on the Internet to attract clients, it is necessary to avoid mistakes that often spoil the reputation of even good professionals:
- too strong correction of pictures, due to which colors and shades become completely different from real ones;
- the oily sheen of a heavily oiled cuticle looks sloppy;
- a cloudy camera lens from which dust has not been erased, greasy fingerprints.
Models are selected without damage to the skin and nails, with well-groomed hands.