You can get an original manicure using nail design tape. In this article we will tell you what design tape is, how to make a simple and stylish manicure using this wonderful decoration tool, how to use it, what tools and materials are needed for this, as well as where you can buy tape and how to choose it correctly.
Application options for nail tape
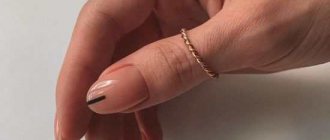
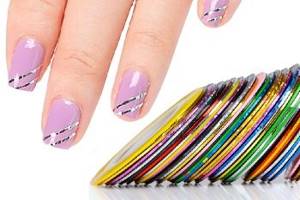
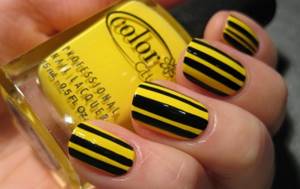
Nail tape is a self-adhesive strip of different colors, always shiny . Available in different widths, but in nail design they usually prefer thin ones.
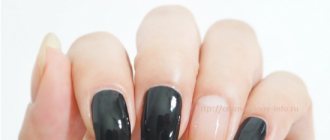
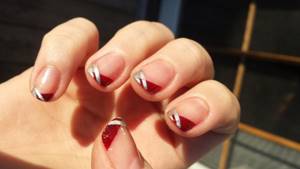
First option: the ribbon acts as a design element
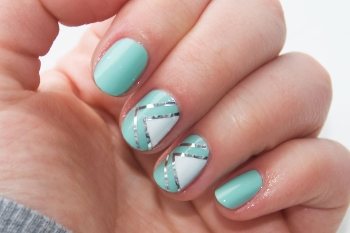
Ribbon as a design element
In such cases, it is not removed after the work is completed. You can use adhesive strips of different widths and several colors, and combine them with other decorations, such as rhinestones.
Create a simple design step by step:
- We remove the cuticle and do a regular manicure, giving the desired shape to the nail.
- If you use one color of varnish, cover your nails in 2 layers. If several colors are used, tape can be used to cover the transition of one color to another at the junction. The strip is also glued to gel polish.
- After complete drying, we take strips of the required length and glue them according to the intended pattern. If the strip protrudes beyond the edges, it can be carefully cut off with nail scissors.
- When the strip is finally and perfectly fixed, one or two layers of varnish are applied on top.
Silver or gold stripes look perfect on almost any surface.
When applying the tape, move away from the cuticle and edges of the nail plate. If you stick it too close, it can easily get caught and come off.
Check out how to quickly make a simple ribbon design:
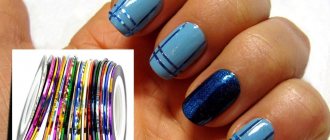
Second option: tape - auxiliary material for applying the pattern
Ribbon - an auxiliary material in design
In this type of nail design, there is no need to select strips to match the color of the coating: any tape will do, even the most unnecessary one, because after the work it will be removed.
At home, for such decoration, adhesive tape can easily be replaced with tape, technical tape, or even medical tape.
Design creation procedure:
- We apply varnish.
- Next, you need to stick the strips on top to achieve the desired pattern.
- We cover the top with another layer of varnish, after it dries, carefully remove the strips and get the desired result.
- We secure the entire pattern with a finish to level the surface.
The tape should only be applied to completely dry varnish, so that after removing it there will be no traces left.
Try making a nautical design using duct tape:
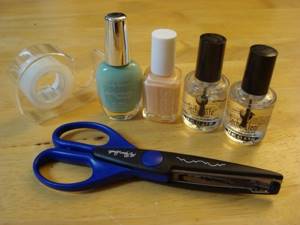
What is a manicure tape?
The modern beauty industry offers fashionistas many interesting accessories that are designed to make their manicure unique and inimitable. One of them is a special tape, somewhat reminiscent of adhesive tape. This tape is characterized by a beautiful decorative surface - matte or glossy, metallized or holographic - and an adhesive base. It is very easy to use, and the result is spectacular and inimitable.
Shellac with tape
Modern manufacturers offer such tape in various lengths and widths, as well as in a wide variety of colors. For nail design, it is recommended to choose a tape with the smallest thickness - gluing it is much easier and more convenient, and besides, it looks prettier. Thanks to the high-quality adhesive composition applied to its base, it guarantees perfect adhesion to the surface of any nail coating, be it regular manicure polish, acrylic, gel or shellac.
In any case, it is necessary to glue the tape only after the nail coating is completely dry. And at the end, a final transparent coating must be applied. This way, shellac with design tape will hold tighter, more durable and more securely. The best way to figure out how to do such a manicure step by step is to take a master class.
Stylish manicure ideas step by step
Triangular Moon
- Cover the nails with base and dry.
- We cut two pieces from a thin ribbon and attach them at the base in the form of a triangle.
- We cover the nails with gel polish of a contrasting color (white, red, pink), skipping the triangle.
- Carefully remove the strips from the nail that is not yet completely dry and apply a fixative on top of everything.
This beautiful manicure looks great on short nails.
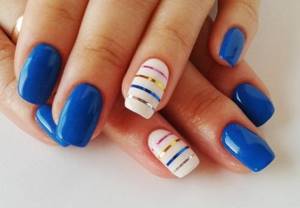
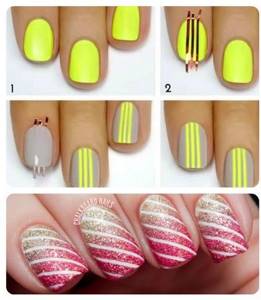
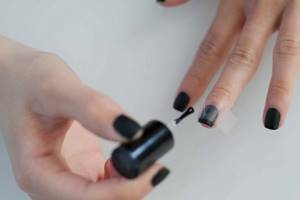
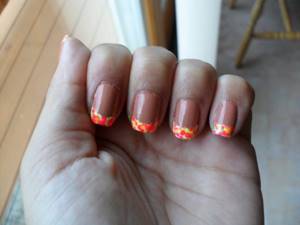
Bright manicure with colored stripes
- You will need neon Shellac, for example yellow. We paint our nails.
- We cut three thin strips of adhesive foil and glue them lengthwise directly from the cuticles.
- After everything is dry, paint the top with a different color.
- Without waiting for complete drying, remove the strips by grasping the bottom edge.
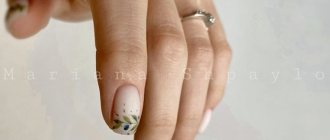
- Instead of a ribbon, you can place a picture on one of the nails.
- We apply the fixative.
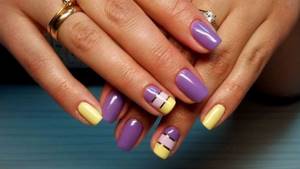
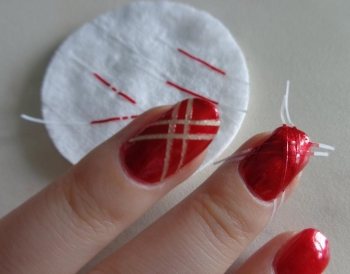
Geometric manicure
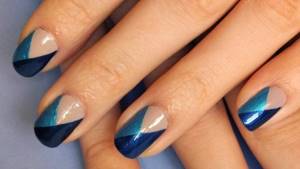
- Paint your nails with one color in two layers and let them dry completely.
- We glue the strips crosswise. It is necessary that they look a little beyond the nail.
- We paint the selected areas with other colors and dry them completely. Remove the stripes.
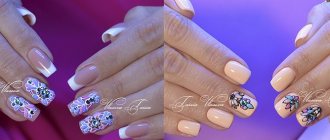
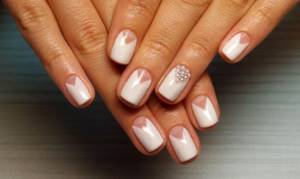
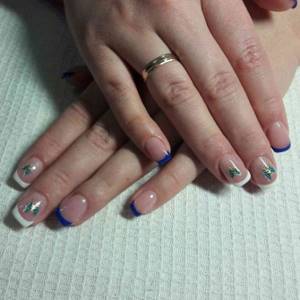
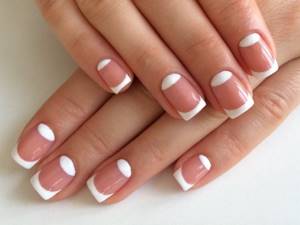
Examples of using tape in French manicure
Combination with other types of design solutions
A nail design made with decorative tape will look great with a solid outfit in one or two colors. In this case, it is enough to maintain harmony in the combinations of the colors of the manicure and your outfit, but we want to offer you a few more design solutions for manicure with a graphic design made from ribbons.
- Stripes, checks and graphic combinations of several shades in clothes can be repeated in manicure using the same color scheme.

- If you have already reached a certain level of skill in working with tapes for nail decoration, then repeat the checkered pattern of your favorite shirt in a manicure It won't be difficult for you.

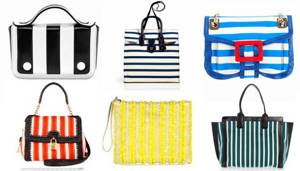
- Idea for decorating nails with ribbons your striped handbag can tell you. You can repeat this pattern using multi-colored thin or wide adhesive tapes.
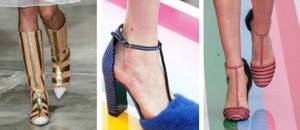
- Use the ornament of your shoes when decorating your manicure. In this case your outfit should be monochromatic. This technique will create a bright and harmonious image.
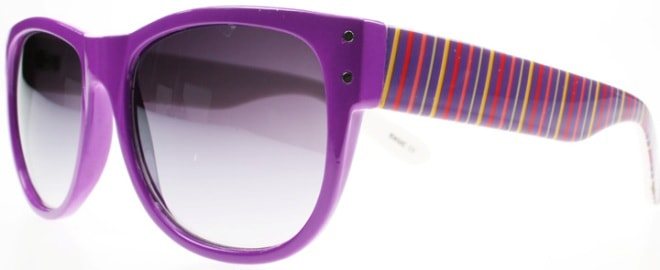
- It is impossible to imagine a summer look without such an accessory as glasses. Lately bright frames with ornaments are in fashion, which can easily be repeated in a manicure design using ribbons.
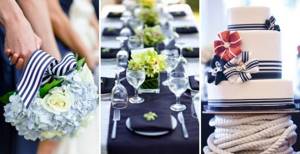
- At the peak of popularity non-standard stylistic solutions for wedding ceremonies. If your wedding is in a nautical style, then a manicure with stripes of ribbons will be very relevant.
You have already seen that stylish and fashionable nail designs using tape are not so difficult. Using our recommendations, you can create your own unique manicure designs. Share your stylistic finds in the comments.
To prevent the tape from coming off
We glue the tape correctly
- You can glue the strips only on dry and grease-free nails ; you can use a UV lamp for drying.
- Do not glue the strips too close to the edge of the nail and cuticle , in which case the tape will touch foreign objects and come off.
- The tape should not gather wrinkles or form folds.
To remove a decorative strip from a nail, you do not need to make any additional effort. It peels off easily or can be removed with nail polish remover.
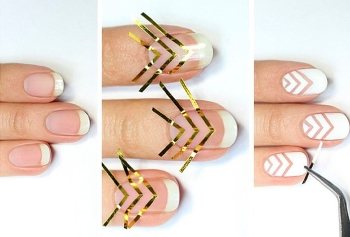
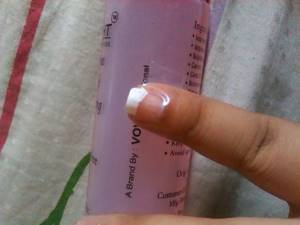
Life hack for creating a French manicure using tape
Classic French manicure involves drawing smooth, neat smiles that give the nails naturalness and sophistication. Special adhesive tapes are sold everywhere. But what if you suddenly don’t have them, and you need a manicure urgently? Scotch tape comes to the rescue.
Classic French manicure involves drawing smooth, neat smiles that give the nails naturalness and sophistication.

Please note that the French design requires rounded edges, but they cannot be achieved with adhesive tape.
Special adhesive tapes are sold everywhere
Please note that French requires rounded edges, but they cannot be achieved with tape. Therefore, it is best to do a manicure on a short nail plate. A thin edging of the nail looks harmonious and appropriate, even if it is straight. The advantage of this edging is that the tape fits tightly to the plate, preventing the varnish from flowing under the sticky layer.
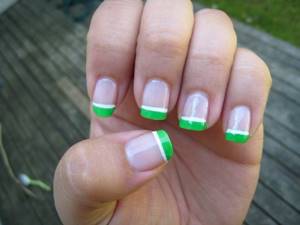
It is best to do a manicure on a short nail plate.
A thin edging of the nail looks harmonious and appropriate, even if it is straight

The advantage of this edging is that the tape fits tightly to the plate, preventing the varnish from flowing under the sticky layer
So let's get started:
- Choose polishes of two colors you like for a French manicure. Today, classic white and nude shades are not as popular as before. For everyday interesting looks, give preference to a combination of different shades. For example, beige with wine, silver with black, gold with red, cream with dark green look good. The color combination depends on your imagination and fashion catwalk trends.
Choose polishes of two colors you like for a French manicure
For everyday interesting looks, give preference to a combination of different shades
Today, classic white and nude shades are not as popular as before.
- Apply the base coat and wait for it to dry. With its help you will even out the surface of the plate and hide minor imperfections.
Apply base coat and wait for it to dry
- Paint your nails with the base color and also let it dry well.
- Wrap each finger with a pre-prepared narrow tape of tape so that a strip remains at the very edge. The second option involves taping the smile and painting the main part.
Wrap each finger with a pre-prepared narrow strip of tape so that a strip remains at the very edge
- Paint over the resulting stripes with varnish of a different color. Watch the layer thickness. If you cover it several times, the line will protrude above the main line, which looks sloppy.
- Dry your nails well and remove the tape.
- To even out the edges, coat the nail with clear polish. If unevenness is visible somewhere, use decorative elements in the form of rhinestones, stickers, stones.
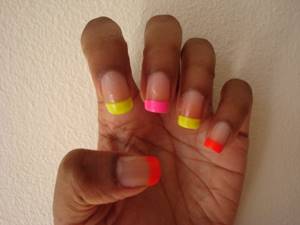
Apply tape to all nails at once, otherwise the risk of smearing the borders of a nail that has recently been treated increases.
Advice! Apply the tape to all nails at once, otherwise the risk of smearing the borders of the nail that has recently been treated increases.
Liquid tape
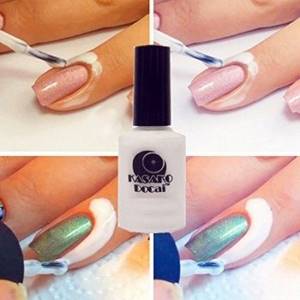
Liquid tape for manicure
Used as the most effective means of protecting against varnish getting on the skin when creating nail designs. It is a quick-drying product that, when dried, forms a protective film on the skin .
You no longer have to worry about staining the side rollers with nail polish and having to scrub them off with cotton swabs and nail polish remover. Using liquid tape, you are guaranteed to ensure clean skin while working. As a rule, craftsmen use this method of protection when performing a complex design, which is guaranteed to stain the cuticles or side ridges.
Learn to use liquid tape with a manicurist:
How to use liquid tape
- Get your nails done. Give your nails the desired shape, then degrease them.
- Apply the product to the areas of skin that need to be protected, wait until it dries completely and a protective film forms.
- Apply a base coat and wait until completely dry.
- Take a cotton pad, moisten it with remover, then take a different color of nail polish and apply several strips on the pad, close to each other. Stamp onto your nails to achieve the desired pattern and depth of color.
- Use tweezers to remove the film with any varnish on it.
See how you can use liquid tape when performing water, gradient and stamping manicures:
What is it for?

The tape makes the process of creating complex designs easier. An ordinary coating with an unusual finish looks much more interesting and not boring. The adhesive base allows you to use the material without much difficulty. If you want to complement your design with clear, even lines, you won’t find a better option.
To make your work look neat, you need to follow some rules for using decor:
- When gluing the strips, you should not reach the edges of the cuticle 1-1.5 mm. A tape fixed tightly or overlapping will quickly break.
- When applying the topcoat, carefully seal the ends.
- To trim the material, it is better to use sharp scissors , because the accuracy of the manicure will depend on the quality of the cut.
- The main assistant in attaching strips is tweezers. The pointed ends of the tool make it easier to pry and secure the material.