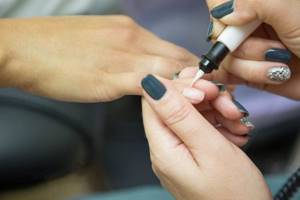
Gel polish is a modern coating, very durable and quite easy to use. Professionals successfully work with gel polishes from various manufacturers and never tire of admiring their versatility, beauty and excellent properties during wear. However, many representatives of the fair sex want to learn how to perform such a manicure on their own, which, in principle, is not without meaning and is quite logical. At the same time, not knowing many specific nuances, amateur craftsmen, when applying gel polish, encounter a number of problems and often associate them with the fact that the purchased decorative product is of low quality.
This may be true if the product was purchased anywhere, was stored in violation of the necessary conditions, is expired, has strange-looking packaging, or is simply passed off as an original by an unscrupulous seller, being just a third-rate counterfeit. Branded gel polish, as a rule, fits perfectly, and its wear life corresponds to that stated by the manufacturer. If nuances do arise, they are usually associated with a number of very real and easily explainable reasons. So, here is the TOP 10 most common problems that you may encounter when working with gel polishes.
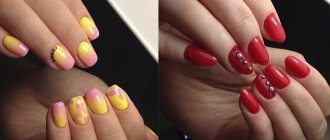
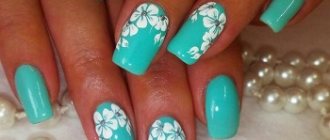
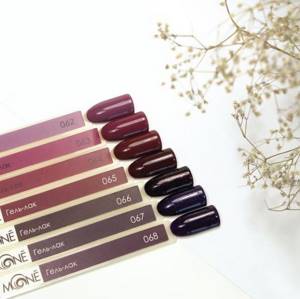
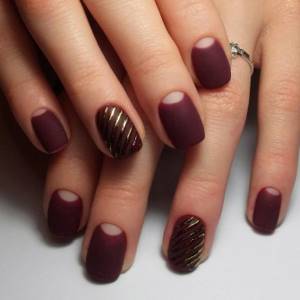
Manicure with gel polish
Mistake #1: Trying to remove gel polish from your nails
Despite the fact that coating with gel polish will give your nails a well-groomed look for a time that will last longer than coating with regular polish, nothing lasts forever. After 2 weeks, the beauty begins to ask for renewal, the gel polish may chip somewhere, and even peel off somewhere.
It is not surprising that many impatient girls strive to tear off what is left. It doesn’t matter whether they do it with an orange stick or a device with a less poetic name, the fact remains.
This absolutely cannot be done. In this way, you further damage your nail plate, which is already thinned by well-known chemical manipulations. If you don’t have time for correction, then the only sure way to remove gel polish is to “soak” your nails in nail polish remover. To do this, you need to use cotton pads generously soaked in acetone (don’t forget that there is one pad per nail). Each nail must be packed in foil and kept for 10 to 40 minutes. Therefore, be patient and do not try to do everything quickly.
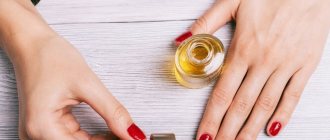
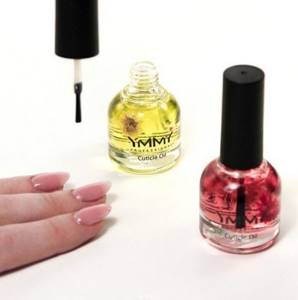
Mistake #2: Not using oils
Many girls believe that oil-based nail care products, especially for the cuticles, will significantly shorten the lifespan of their manicure. The reality is different. For long-term service of gel polish coating, the nail plate should not be too dry.
Poor removal of old coating
If the previous gel polish was not removed well enough, this will immediately affect the condition of the new design. The base will begin to lay down with sagging and streaks, which will subsequently spoil the whole picture. To avoid such a situation, remove gel polish according to the instructions, using a special product.
A regular “wash” will not help in this situation. The polish itself will either swell or not change at all, and the additional impact of a file or orange stick will worsen the nail plates, making them rough and covered with cracks.
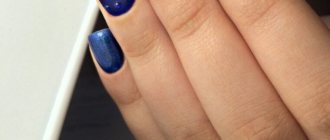
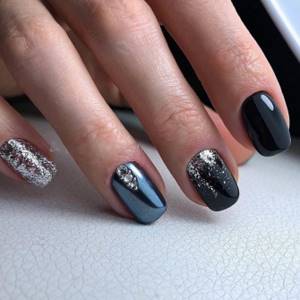
Nails manicure gel polish
Mistake #3: nail biting habit
It's a disgusting habit. If you have such a sin and you don’t know how to control yourself, then experts recommend not even taking this path, because even the most resistant coating will not withstand the pressure of your jaw and will be damaged. Among other things, you are putting your health at risk because there is a possibility that you may ingest a chemical that is difficult to digest. So first, get rid of this terrible, unaesthetic habit.
Mistake #4: Using outdated drying lamps
Not long ago, one of the main steps in the process of creating a manicure with gel polish was drying it in a UV lamp. However, time has shown that this technology is ineffective. For many women, the polish came off after just a few days, instead of a few weeks, and their nails suffered severe damage.
Improper handling of the cuticle
If you cover the cuticle with oil before starting a manicure, then a spoiling fatty layer will form between the coating and the plate. The same applies to hand cream. A negative effect can also occur if the cuticle is not completely removed. In this case, baking will lead to the appearance of voids and bubbles that will be visible to the naked eye. Gaps, in turn, will reduce the durability of the manicure and its longevity. In addition, the growing cuticle may begin to displace the applied gel polish.
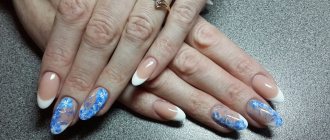
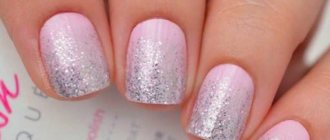
Shellac manicure
Mistake #5: Mixing products from different manufacturers
We are talking about manicure products created by different brands. Despite the fact that many masters do not take this rule into account, celebrity stylists argue that in this case it is important to use the entire line of products from one manufacturer.
Products in one line of one brand are designed to ultimately achieve lasting results through effective teamwork. Therefore, you should not hesitate to ask your master questions and ask him to complete the entire cycle of work with products of one brand. Do the same when you do something at home.
The coating is not removed on time
There are several reasons not to wear this manicure for a long time. Firstly, almost all masters now straighten nails, and when the nail grows, the leveling point moves and pulls it down, giving additional stress. This may cause the nail to break.
Secondly, due to overuse of the material, onycholysis can occur - a disease in which the nail moves away from the skin and a void appears in which bacteria can very quickly develop.
Thirdly, there is a possibility of a detachment in which dirt and moisture will accumulate.
Experts recommend changing your manicure every 2-3 weeks.
What products do cosmetologists recommend using?
To ensure that shellac lasts as long as it should and does not lose its coating, cosmetologists advise using the same brand of manicure products for all three stages.
To ensure that shellac lasts as long as it should and does not lose its coating, cosmetologists advise using manicure products of the same brand for all three stages when applying nail polish. Why this is important is because the components interact differently on the nail, which will lead to peeling and chipping.
Also, fashion experts do not recommend choosing “2-in-1” coatings , which are both the base and top of the nail design. Of course, this is economical, but the quality of such a hybrid is much worse than special coatings intended for application separately.
Cosmetologists do not recommend wearing shellac on your nails for more than two weeks. A durable coating deprives the nail plate of the ability to breathe. In addition, under an artificial thick layer of varnish, the nail does not produce its own substances that strengthen it.
Therefore, often after removing shellac, the nail looks thinned and weakened. The break between removing the previous coating and applying a new one should be at least a week , and during this time the nails are nourished with vitamins and strengthening procedures.
Insufficient nail preparation
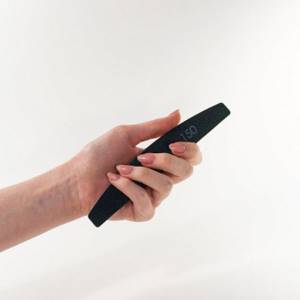
Before applying the coating, the surface of the nail should be carefully prepared, because the slightest unevenness will later be noticeable. After removing the previous coating, each nail should be sanded twice using a special buff. This must be done carefully, without being too zealous, so as not to damage the record.
The buff should follow from the cuticle to the wide edge. Under no circumstances is it recommended to replace the buff with a polisher, as this can significantly ruin the entire subsequent technology. Since the polisher smoothes the surface even more, adhesion of the gel polish and the nail itself will be impossible. Preparation always ends with degreasing the surface.
Top 10 mistakes in manicure for beginners
Have you ever thought about how to properly file your nails? Or why does the coating keep peeling off and bubbling? Almost everyone who is just taking their first steps in this area makes mistakes in manicure. We have collected 10 of the most common ones and are ready to tell you how to avoid them.
Mistake #1
The first rule that beginners often break is adherence to a strict sequence of actions. It seems that if you don’t degrease the surface of the nail, apply a top coat instead of a base, or trim off any hangnails after applying the coating, then nothing bad will happen. This misconception leads to gel polish peeling, sloppy manicure, infections and other problems. You shouldn’t experiment with the beauty and health of your nails, so stick to the order: manicure-base-coat-top.
Mistake #2
Have your new tools quickly become dull, worn out, or rusted? Buying low-quality cutters and scissors in the hope of saving money is the second main mistake. The main criterion in choosing tools is their quality. After all, the price consists of the strength of the steel, production technology and functionality of a particular device.
The same can be said about removers - first of all, pay attention to the composition, which should not contain any harmful substances.
Mistake #3
Covering without manicure is one of the customer requests that many manicurists have heard at least once. However, in this case, the gel polish, firstly, will lie unevenly and, as a result, will not last long. Secondly, the nails will look sloppy: overgrown cuticles, hangnails... Well-groomed nails without coating, which have become a trend in the last couple of seasons, look much neater.
Mistake #4
We never tire of repeating how important it is to take care of your cuticles! And take care of it correctly - perhaps a classic manicure is not suitable for you or you should change the tool (we have already told you how to choose the right nippers, scissors and pushers). There are an incredible number of nuances, so do not risk the safety of your nails and approach this issue responsibly.
Mistake #5
“Why use a base, I’ll apply it like this,” is one of the most popular misconceptions. The same goes for the top. You can avoid using these coatings only if you have a single-phase 3-in-1 gel polish; in all other cases, the coating will not last even two days on its own, and the colored pigment will harm the nail plate.
In addition, the base should be suitable for your nail type so that the gel polish does not spread and have a negative effect on the nail. The top, in turn, may or may not have a sticky layer, be matte or shimmery - read the characteristics carefully so as not to get a surprise at the end.
Mistake #6
The more, the better - the principle that beginners follow when applying several thick layers of gel polish. Unfortunately, this will not make the color more saturated. But bubbles, smudges and the risk of not drying the coating are guaranteed. This manicure will have to be redone, spending twice as much time. It is much more economical to apply 2-3 thin layers, if one is not enough - the varnish consumption is less and the result is more reliable.
Mistake #7
Bubbles on the surface of a nail coated with a layer of gel polish may also appear from shaking the bottle. It seems that this way the consistency will become more liquid and easier to apply, but if your goal is not an uneven layer with tubercles, then it’s better to roll the bottle in your hands for a couple of minutes - this way you’ll most likely achieve the desired result.
Mistake #8
How do you file your nails? Yes, yes, and such a seemingly elementary process has its pitfalls. Professionals strongly do not recommend working with a file in two directions “back and forth”, as this causes the nails to be injured, become thin and brittle, and microcracks appear on them. It would be more correct to cut in the same direction: it will be slower, but more harmless.
Mistake #9
Unsterilized instruments can introduce infections and fungus into the nail and cause suppuration. Avoiding this key step after every manicure means risking the health of your nails or your clients' nails. Today there are many methods of disinfection: from dry-heat ovens to compact sterilizers, among which everyone will find a suitable device.
Mistake #10
Manicure does not end with treatment and coating once a month. If you want to walk around with beautiful nails without burrs for a long time, we recommend getting cuticle oil and hand cream, and don’t forget about gloves - these are the basic rules for home care.
To summarize: follow the sequence and technique of all stages of manicure, do not skimp on tools and remember about care. Then your nails will always be healthy and beautiful!
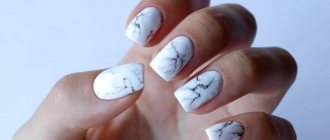
How to make a design on your nails?
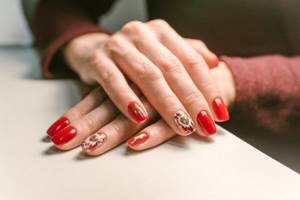
Plain shellac coating can quickly become boring. If you are a lover of bright and original nail designs, then you can diversify your manicure. For this purpose the following is used:
- Drawings - prepared, or drawing with a thin brush;
- A combination of shellac of different colors;
- Using figures, stickers, glitter, stripes.
Today, two techniques for creating designs on nails are especially popular: casting and dotting.
A beautiful design with shellac on nails can be done using an unusual, but very popular casting technique . To do this, you will need to purchase transfer foil, black gel paint and a thin brush.
The design is made with a thin brush and then dried in an ultraviolet lamp. Next, a shiny layer of foil is printed onto the sticky layer of gel paint. You can decorate your nails this way on both a matte and glossy finish.
When performing a manicure using the casting technique, you should adhere to a number of tips:
- When imprinting the foil, you need to press it smoothly and firmly, then tear it away from the nail with a sharp movement. Repeat the movements until you get the desired result;
- Dark paint should be used as a base for casting. This will add depth to the color;
- Cover the molded nails with a topcoat or clear varnish to protect the design from abrasion.
You can diversify a plain manicure with shellac using dots.
Dots (from the English dots - points) are a double-sided tool with two balls at the ends, the size of which can be very different. Using dots you can create drawings in the form of:
- Pea;
- Dots;
- Stripes;
- Commas.
If you don't have a professional tool, you can replace it with a hairpin, pen, orange manicure stick or toothpick.
One of the easiest ways to use dots at home is to draw dots. To do this, apply a few drops of varnish with a brush to the palette. Dip the tip of the tool into the varnish and lightly transfer the varnish to the nail plate. You will receive different sized circles.
With dots you can draw straight lines or curls. To do this, also dip the tip of the tool into the varnish and draw on the nail, drawing the pattern into the required shapes and lines. Draw smoothly, stretching a drop of varnish into the desired pattern.
How exactly should shellac be applied?
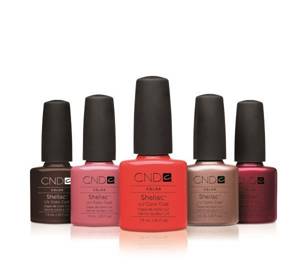
When using Shellac by CND gel coating, the listed operations can be neglected, but when manicure with any other gel polish, this must be done.
Application of gel polish includes 4 stages:
Poor execution of the first stage is most often the reason why shellac does not stick to the nails. It includes preliminary leveling of the nail plate with a buff and degreasing it with a special product.
When using Shellac by CND gel coating, the listed operations can be neglected, but when manicure with any other gel polish, this must be done.
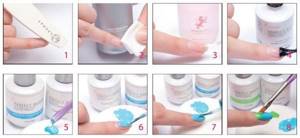
Applying gel polish includes 4 stages.
The base coat is applied to the prepared nail in a thin layer - this will allow the shellac to stay on the nails for as long as possible. Then it is dried in a UV or LED lamp for the required amount of time. The sticky layer is not removed. If for some reason it is damaged, this will lead to the fact that all subsequent layers will be fragile.
Colored shellac is applied two to three times, each layer is dried in a lamp, there is no need to remove the sticky coating. The layers should also not be made too thick, otherwise they will not polymerize well.
It is better to add another layer for brightness and dry it properly. However, too many coats of color will make the nail stiff , which can cause the shellac to chip quickly.
The last stage is coating with a top coat and sealing the tip of the nail with a thin layer. After drying in the device, the sticky layer is removed with an alcohol-containing substance, which makes the nail appear delightfully smooth and shiny. The shellac manicure is completed and is ready to delight its owner with durability and beauty.
Mistake 3: Cleaning up after the procedure
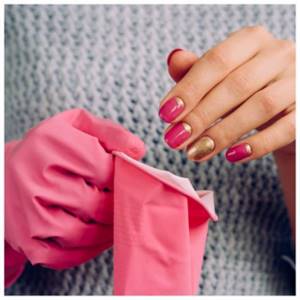
What do most women do immediately after a visit to a beauty salon? - That's right, they start wet cleaning, and without gloves.
Which is correct?
After applying a durable coating, it is recommended not to wet your hands at all for 4-6 hours, and many manage to do wet cleaning and do laundry. This leads to deterioration of the adhesion between the nail plate and gel polish. The latter “flakes off” ahead of schedule due to moisture getting into the cracks.
Recycling

At first, you will be full of emotions and energy, which will affect your work time. You will be able to “nag” for 12 hours a day, or even more, but this is not a plus, since overwork is followed by emotional “burnout.” Working hard will make you hate what you love and your clients.
You need to plan your schedule and make time for rest. If you work around the clock, then clients will be ready to sit on your neck; they will make appointments late in the evening and early in the morning. Calculate the optimal number of clients per week, choose the time for weekends/holidays and training. To correctly calculate the cost of an hour of work and materials, read this article.