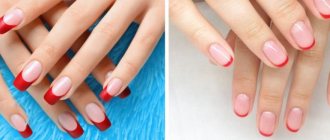
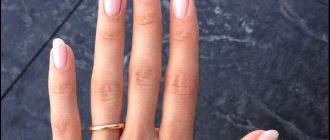
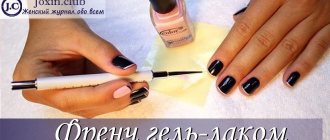
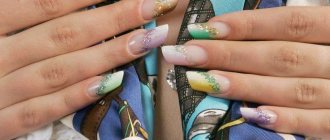
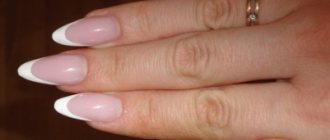
A French manicure with gel polish is done using a camouflage base or a nude flower bed and a white topcoat for the free edge of the nails. Classic French gives them a natural and healthy look, enhancing their brightness. There are many types of it: twist, triangular, beveled, ombre, reverse, millennium, custom.
French is more convenient to paint hair with a brush, but you can use stencils and also decorate with stamping, sliders, fimo, and glitter. For the base, varnishes in natural shades (KODI 20 CN, PNB 004, MY Nail 003, 005, 007) or bases (KOTO 840, OXXI Professional 1 and 3, POLE, Monami) are suitable.
The “smile” is painted with double-layer gels Monami Luxury Light gold, Bluesky 80501, Neonail 2696, Lunail 61, Klio 52 or single-layer Tartiso TCL -32, Tartiso FR-01, Tartiso TRV-01, Arnelle 001, Haruyama 001, Ju. bilej B1. They can be mixed with gel paint for greater color density and texture.
What you need to do a French manicure with gel polish
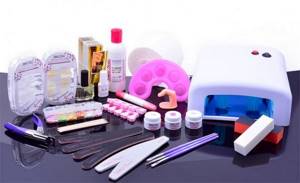
French manicure with gel polish is made from the main shade of flesh or pink, beige and white, which is used for the free edge of the nails. This is the classic French style. There are manicure modifications in which other colors are acceptable. That is, you need nail covering products of at least two shades. In addition to the pigmented and snow-white composition for the French gel polish, you need to prepare:
- a thin brush to draw a “smile”;
- stencils (optional, but better for beginners);
- buff for preparing the plate, that is, a soft polishing file or block;
- degreaser;
- sometimes a leveling base;
- lint-free wipes;
- lamp for drying the base, varnish and topcoat (UV or LED);
- glossy top;
- dots for attaching rhinestones and glue or gel for extensions;
- orange stick to remove polish from skin.
Stencil, stripes
French stencils are used to more evenly define the white tip of the nail, the “smile” line, or to draw a hole at the base. One side of the device is sticky. It is glued onto the nail so that the top edge outlines the “smile” line. Part of the plate is protected, the varnish will not get on it, and the open part is covered with a white flower bed.
There are several types of strips:
- Disposable. Made from paper or vinyl. They are glued on, manicured, removed and thrown away.
- Reusable. Their material is soft plastic or silicone. The principle of operation is the same as in the previous case, but can be used repeatedly.
Stencils also differ in shape. The most common are actually arched wide stripes. There are also circles with holes inside, intended for drawing holes. And also triangles, checkmarks, hearts, with which the “smile” line will turn out to be unusual.
These devices allow you to quickly create a neat manicure without errors, but the sticky side can remove some of the base product. To avoid this, you need to touch it with your finger several times. The sticky layer will become less durable. The device glued to the nail will stick, but not so tightly. And the camouflage base will remain in place.
Brush, what to paint with
There is more than one brush for a French brush; the following types are used:
- Hair. Very thin, as if sharp. With this tool it is convenient to draw a smile line by hand even on short nails; you can also draw patterns. The optimal length of the hair pile is 7-9 mm.
- Cat's tongue. It is also a narrow brush, with a thin tip, but wider at the base than the previous one. More suitable for long nails.
- Liner. This is a tool with a medium width of the fleecy part and a slightly narrowed tip. With some dexterity, you can also outline the line of a smile with a liner, but it is more convenient to paint over the free edge of the nail. Especially if they are long. You can apply a base, but then there should be two liners.
- With beveled edge. Also used to draw a “smile” line. But you can also correct coating defects and paint over the tip of the nail.
Liner With a Beveled Edge
It is more convenient to paint French with a natural bristle brush, especially if you use a liner and a tool with a beveled edge. This type of material is softer, varnish picks up well on it and does not run off, and the coating is easier to level. The hair can also be made from artificial bristles. But it should still be quite soft. In a word, you can paint French on gel polish with different types of tools, they are all miniature.
The best option for a beginner is a hair or a cat's tongue. Their quality is more important - the fibers should not fall out or curl when moving.
The basis
The base for a classic French jacket is chosen in pale pink, peach, flesh, milky, light beige colors. These are camouflage bases, which are also translucent or dense. Every manufacturer has them. The product gives the nail a healthy and natural shade. It is applied first after preparing the plate with a degreaser on the entire nail or on the primer, from base to tip.
Gel polishes in nude shades can also be used as base polishes. As a rule, they are brighter than camouflage agents.
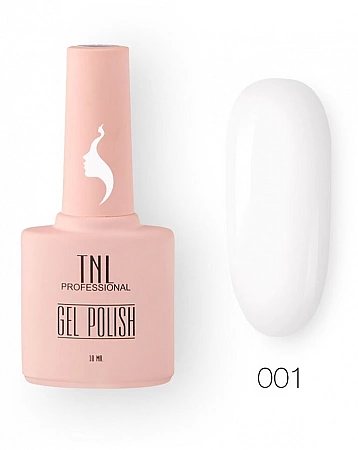
Top 8. TNL Professional 8 Senses, No. 001
Rating (2021): 4.60
112 reviews from resources were taken into account: Yandex.Market, IRecommend, Ozon, Wildberries, Tnlpro
Bright pigment The shade will definitely appeal to those who love the brightest colors possible. The white color from TNL Professional literally glows in the dark.
The thickest texture Some artists prefer thick textures, others only medium ones. In any case, this feature of TNL white gel polish should be taken into account when purchasing.
- Characteristics
Average price: 259 rub.
- Country: South Korea
- Volume: 10 ml
- Curing in LED lamp and UV lamp: 60 s, 120 s
- Texture: thick
- Effect: glossy
- Application: 1-2 layers
The TNL brand has long established itself as a high-quality manufacturer of gel polishes. The 8 Senses line includes 350 shades, including white. Tone 001 is distinguished by its bright pigment, smooth application and dense texture. This is a pure white color, without creamy or nude impurities. It looks very bright and attracts attention. When applied, the gel polish self-levels and does not spread onto the cuticle. The texture is applied in 1 dense layer or 2 thin ones. It is worth noting that the texture of the gel polish is quite thick. For professional artists this will not be a problem, but for beginners or amateurs the application may seem complicated. For the same reason, varnish is not suitable for French.
Advantages and disadvantages
- Bright pigment
- Lays down evenly
- Doesn't streak
- Beautiful glossy shine
- Swells if not dried well
- The white color is very thick
- May not be suitable for beginners
Which gel polish is better
It’s hard to say which gel polish is best for French polish, there are many of them, for every taste, but the following are popular:
- KODI 20 CN. This is a translucent tea rose shade. The product is usually applied in 2 layers, then it looks denser. The enamel texture makes work easier and avoids smearing on the skin.
- PNB 004. It is light beige, in two layers it has a milky undertone. The varnish retains its shine and tint for a long time.
- MY Nail 003. Lovers of peach color will like it. The shade is unobtrusive, but noticeable.
- MY Nail 005. Similar to the previous color, but lighter and cooler.
- MY Nail 007. This is a coffee with milk shade, also delicate and at the same time juicy.
KODI 20 CN MY Nail 007 PNB 004
The last three varnishes are characterized by ease of use, low consumption and durability.
As a base you can use KOTO 840 (camouflage), OXXI Professional 1 and 3, POLE, Monami bases. They not only add gloss and tint, but also smooth out the surface of the nails.
KOTO 840 OXXI Professional 1 OXXI Professional 3
For a French coat, white varnish is of great importance, which should be applied in a dense layer, without bald spots. This requirement is met by two-layer ones, sold for 250-350 rubles. per bottle of 10-12 ml:
- Monami Luxury Light gold,
- Bluesky 80501,
- Neonail 2696,
- Lunail 61,
- Klio 52,
- TNL #28.
TNL No. 28 Monami Luxury Light gold Lunail 61
It’s easier to work with thick consistency single-layers that cost 500-600 rubles. per bottle 7-10 ml:
- Tartiso TCL-32,
- Tartiso FR-01,
- Tartiso TRV-01,
- Arnelle 001,
- Haruyama 001,
- Ju. bilej B1,
- Bagheera Nails BN-04,
- Kodi 33,
- Lianail Snow Maiden,
- Neonail 5059,
- Alena Caprice 104 and 300.
Neonail 5059 Tartiso TRV-01 Lianail Snow Maiden Kodi 33 Haruyama 001, Arnelle 001
Top 9. Vogue Nails Classic Snow Avalanche
Rating (2021): 4.62
130 reviews from resources were taken into account: Yandex.Market, IRecommend, Krasotkapro, Nogtishop
The most popular The price-quality ratio of Vogue Nails gel polish suits buyers quite well. Therefore, it can be found in the list of top sellers.
- Characteristics
Average price: 350 rub.
- Country Russia
- Volume: 10 ml
- Polymerization in LED lamp and UV lamp: 30-60 s, 120 s
- Texture: medium
- Effect: light glossy
- Application: 1-2 layers
The most popular gel polish in our rating. First of all, users liked it because of its bright, rich pigments. The white color here is beautiful and effective. Also, the composition of the varnish is considered more gentle. Compared to analogues, it contains more hypoallergenic components. Therefore, it is often used for weakened and problematic nails. As for applying varnish, the situation with it is ambiguous. On the one hand, a wide short brush is very convenient for painting the cuticle line. But on the other hand, the texture does not even out on its own and streaks a little. To make the coating smooth and uniform, you need to try. But the result will be worth it, since the varnish lasts a very long time.
Advantages and disadvantages
- Short wide brush
- Hypoallergenic components
- Stays on nails for a long time
- Doesn't run behind the cuticle
- Alignment may be difficult
- Texture is a little streaky
- Not for beginners
Types of French gel polish
The classic French gel polish is an improved look for natural nails, but more expressive - with a pink main part of the plate and a snow-white free edge. And yet, French manicure is much more diverse; among its types there are:
- Twist . This is a classic, but also the use of colors other than white and nude. The free edge is painted with any bright varnish, sometimes several, and the main part of the plate is painted with pink, peach, or another nude shade. And between them there is a clear boundary, which is a smooth arc.
- Triangular . The smile line is an acute angle. Shades are used as in a classic French jacket or a twist.
- Beveled . Only one corner of the free part of the nail is painted over. This design looks especially good with a square shape.
- Ombre . The transition from the base of the nail to the edge is smooth, without a sharp border. The colors used are the same as for the classics.
1 of 2
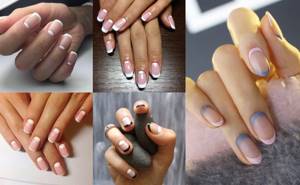
- Reverse . The free edge of the plate is painted over with a flesh tone, and the holes are highlighted with white. Markings are drawn in semicircular or triangular shapes.
- Millennium . The free edge is separated from the main shade with shiny decor or shimmering gold, silver varnishes, rubs.
- Non-standard . To highlight the free zone of nails, ornaments, drawings, dots, and asymmetrical figures are used. They are made white or colored.
- Fan . In addition to varnish of a different color, the base of the plate is separated from the edge by decor. It can be in the form of strips of foil, rhinestones, fimo, sliders.
Features of the laid-out jacket
The laid-out French also has the name “joint to joint” and characterizes this design with a very neat nail architecture. The essence of the French manicure technique is to model and lengthen the nail bed using special materials and then create an even smile line with a nail file or a router. The camouflage gel, paste or powder used in the process perfectly hides all flaws in the form of cracks, bumps and deformed areas of the surface. The shape of the nail and the line of the smile are selected individually to suit the thickness and length of each lady’s finger, which makes this type of manicure universal.
How to make a classic French gel polish
Classic French gel polish can be done as follows:
- First, perform a hygienic manicure, that is, give the nails a shape, the same length, clean the pterygium, cut off the keratinized part of the cuticle, and degrease the plate.
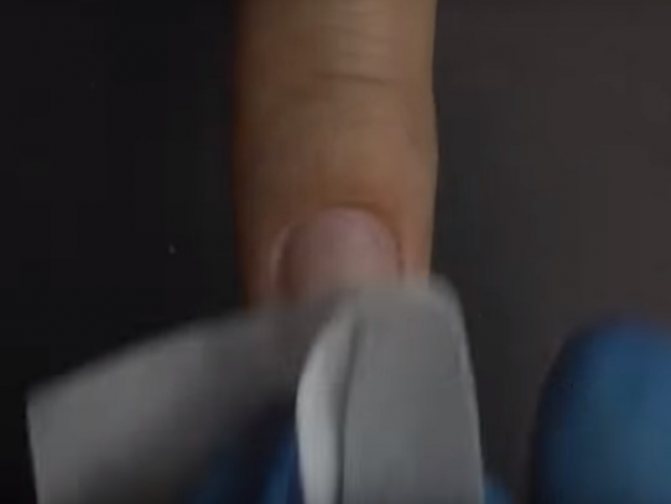
- Next, apply the dehydrator until the nail becomes whiter.
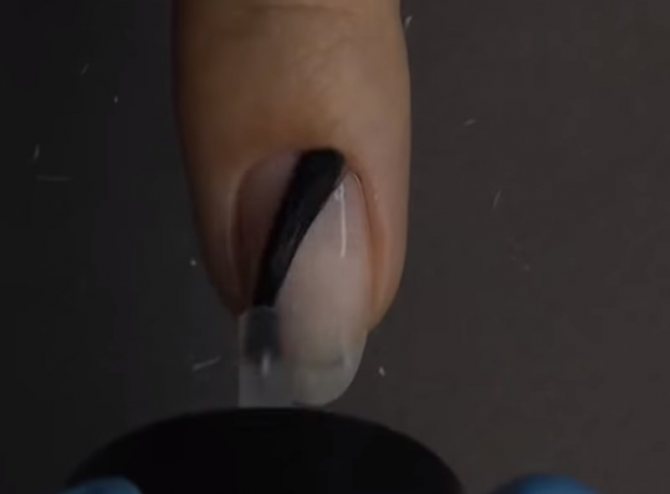
- After the previous product has evaporated, the nails must be coated with a primer; it must dry within 1 minute.
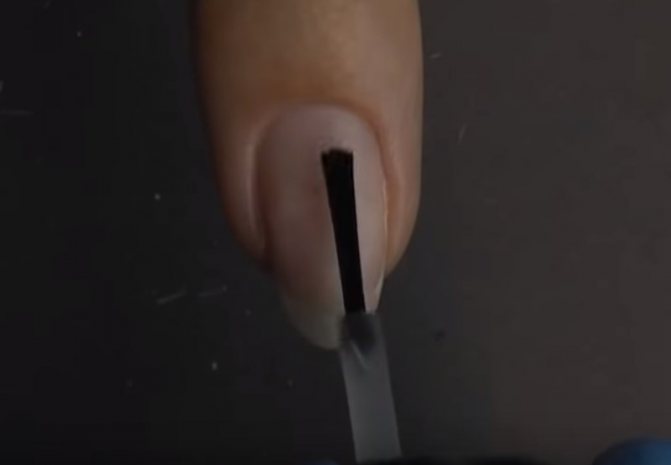
- Next, apply a self-leveling camouflage base in a fairly thick layer, but distributing it with a brush evenly over the entire plate.
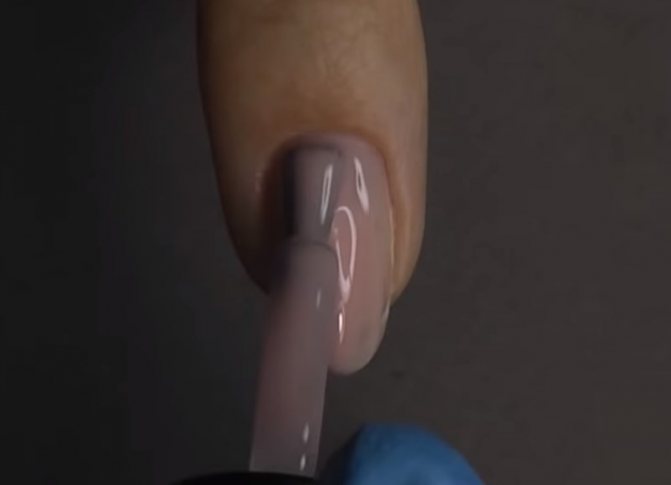
- After using it, you need to turn your hand over to better spread the product over the surface, and then dry it in the lamp for 1 minute.
- The dried base should be deprived of gloss by treating the nails with a buff.
- The dust formed as a result of the previous action is removed with a degreaser.
- Using a brush from a bottle of white gel polish, apply the coating to the free edge of the nail with vertical strokes, creating a “smile.”
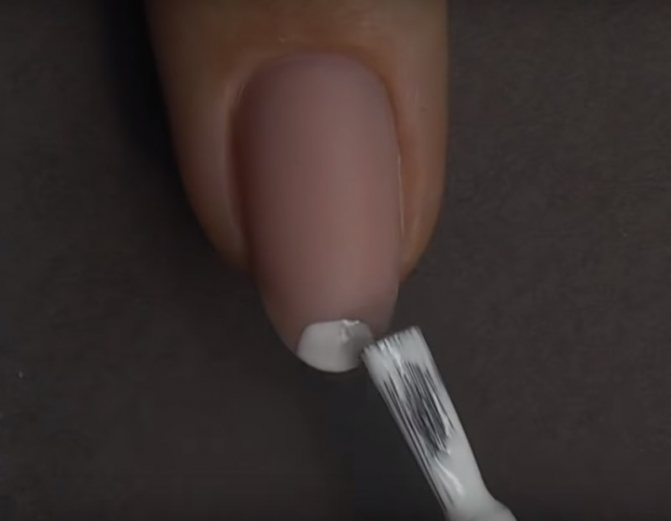
- Then, using a hair brush, distribute the product closer to the sides of the nail, making “antennae”; when finished, place the nail under a lamp to dry.
- The final stage is the application of a glossy topcoat without a sticky layer, which also needs to be dried in a lamp.
Watch this video for a master class on creating a classic manicure with gel polish:
Non-standard French: shellac design options and photos
Having studied the process of how a classic French manicure is made with shellac, you can safely begin the procedure for performing a non-standard French manicure. The technology for its implementation will be similar to the “classics” with minor deviations. Let's look at these variations in more detail.
- So, for example, colored French shellac is performed similarly to the scheme presented above, only instead of the classic white and pink shades of varnish, contrasting options are used. FIGURE10,12
- A French jacket with a pattern looks very original. In this case, before applying the finishing coat, I cover my nails with decor. The design on the nails can be done independently, or you can apply aqua or photo stickers on top of the French shellac.
- French manicure decorated with rhinestones and sparkles looks especially elegant. Moreover, this decor option is easier to implement than the picture version. In addition, rhinestones and sparkles can act as a kind of “patches” that will help hide manicure flaws.
- Alternative smiles look quite interesting, which is a real salvation for those who have not yet learned how to perform a clear classic version.
- Perhaps the most complex version of French manicure is a multi-textured French manicure. When one manicure combines a glossy and matte finish, or creates volume. In this case, it is necessary to especially carefully approach the final stage - the finishing coating, where the main accents are placed.
Well, to complete our review, there are a few more photos with French options made with shellac.
With a little practice, you will be able to perform the most popular manicure – French – on your own. The main thing is not to forget about the basic rules of French shellac: careful preparation of the nail plate, careful work with drawing the smile, and... a little imagination.
French gel polish for beginners
French gel polish for beginners should be done in this order:
- File your nails to give them shape.
- Using a buff, remove all the unevenness formed after using a nail file and remove the glossy layer from the surface of the nail plates.
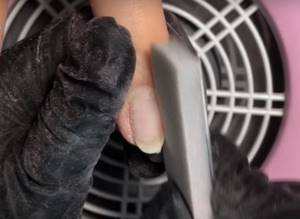
- Lift the cuticle using a metal pusher.
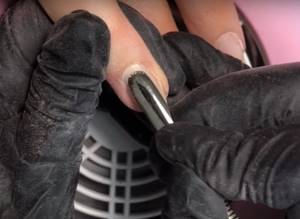
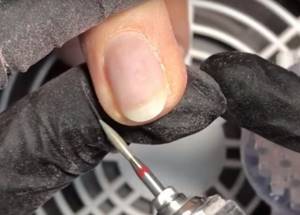
- Clean the sinuses of the nail with a flame cutter, remove the eponychium with it, and walk along the side ridges.
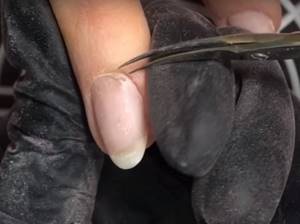
- Cut the cuticle with special scissors, being careful not to break it into pieces.
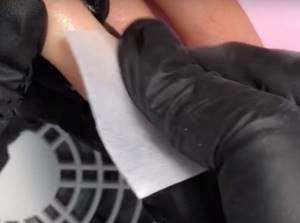
- Wipe nails with degreaser.
- Apply ultrabond to each of them, which will make the coating more durable.
- Paint your nails with the base, not forgetting to “seal” the ends with it, and then place them under a lamp to dry.
- After removing the sticky layer (if necessary), use a hair brush to paint the free edge of the nail with gel paint (you can paint French gel polish smoothly by starting from the middle and moving towards the sides).
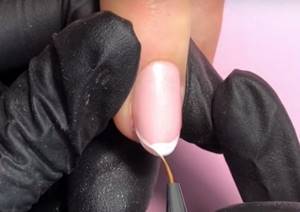
- If the line is not quite perfect, you can clean it up with a flat brush dipped in degreaser and wrung out.
- After drying the white paint on the nails, they are covered with a topcoat for shine, and the last time the hand is placed in the lamp.
Watch this video for a master class on French manicure with gel polish for beginners:
Openwork French
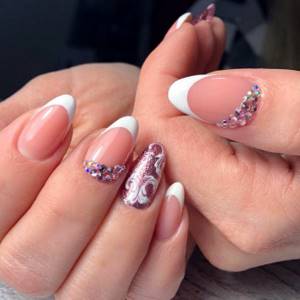
Marigolds with openwork monograms and patterns look incredibly delicate. Drawings of this type can be placed on any part of the nail plate and, at the request of the young lady, decorate all nails or highlight only accent fingers. The designs are applied to the plate using a thin brush or stamping technique. Very impressive are images of this nature, decorated on a glossy surface with white acrylic powder, which harmoniously complements the snow-white tip of the nail. Also, the smile line itself is often decorated with monograms and patterns.
With stencil
It’s even easier to do French gel polish with a stencil:
- On nails prepared with a file, buffer and degreaser, you need to apply a base coat, including the end parts.
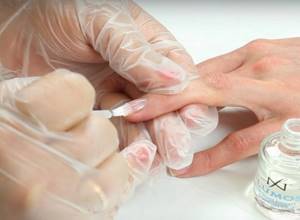
- After drying, use a translucent flesh-colored gel and polymerize it again in a lamp.
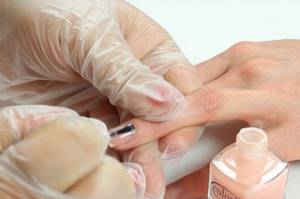
- The stencils are taken with tweezers and pasted onto the nails so that the free edge remains open and the plate below is protected.
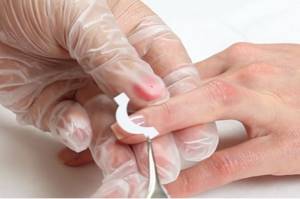
- Each one is carefully straightened and pressed using an orange stick, especially at the side rollers.
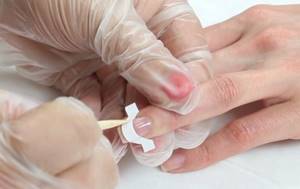
- White varnish is applied to the ends with vertical strokes, which should also be dried in a lamp.
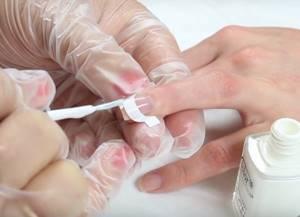
- After drying, the strips are removed and a top coat is applied, and finally the next layer must be polymerized.
Watch this video for a master class on French manicure with a stencil:
To make your manicure last longer
Extended gel nails, in addition to the nail architecture, have a stress zone. This is the part that is most susceptible to damage. Visually, the place is located between the tip of the bed and the beginning of the free edge. This is a transition zone when we lay the material joint to joint. Most often, this area has a small seal, invisible to the eye, through which the manicure lasts much longer without chips or cracks.
In order to extend the durability of the French manicure, all girls ask the masters to make the smile line slightly higher than the free edge. This will help, but only if the nail bed has an elongated shape, and not round like a button.
If you can’t draw the perfect smile line, you can resort to gel paint, which will correct the edge, and a layer of finish on top for fixing will help smooth the surface of the nail.
Easy option
It’s easy to paint French gel polish if you use one of the following methods:
- Start the lines from the sides of the nail to the middle, bringing them together. The liner brush or the one that comes in the bottle with the product is held at a slight angle. The “whiskers” should be at the same level. If the side rollers are dirty, remove the varnish with an orange stick. This method can also be used with a hair brush.
- Start applying the gel from the middle of the plate using vertical strokes. As you paint, you need to move the tool to the growth point in one direction, then in the other. For this method, they also use a “native” gel polish brush or liner. Inaccuracies are corrected with a hair.
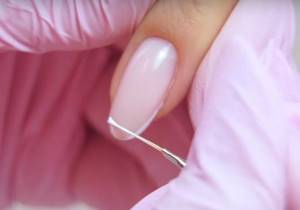
- On almond-shaped nails, the free edge of the nail is divided into 3 zones. You should start drawing from the growth point, that is, from the “antennae,” making a straight line to the first third. The same technique is used on the other side of the plate. When the “antennae” is ready, mark the width of the “smile” in the middle, then paint over the free space, rounding the previously drawn straight lines.
Top 6. Lunail Mystical Agate 61
Rating (2021): 4.67
20 reviews from resources were taken into account: Yandex.Market, Ozon, Wildberries
Easy removal Removing gel polish is no less important than applying it. Lunail is one of those rare polishes that can be dissolved in 10 minutes.
- Characteristics
Average price: 390 rub.
- Country Russia
- Volume: 10 ml
- Curing in LED lamp and UV lamp: 120 s, 30 s
- Texture: liquid
- Effect: glossy
- Application: 1-2 layers
An original line consisting of only two colors. The manufacturer certainly didn’t skimp on the quality of the varnish. The texture lies smoothly and does not spread. Color – snow-white, without impurities. The liquid consistency allows you to experiment with different types of manicure. For example, you can make a French jacket, decorate the white base with drawings or decor, make a translucent layer or a dense white shade. By the way, even with a thin application the color is quite rich. And the varnish is easy to remove. Unfortunately, the line did not manage to become popular. However, the craftsmen who tried Lunail in practice highly appreciated its quality. It was especially liked by lovers of liquid textures and not too saturated white color.
Advantages and disadvantages
- Removable by dissolving in 10 minutes
- Minimum unpleasant odor
- Rich color when applied thinly
- Wide soft brush
- Liquid texture
- Few reviews
How to paint French gel polish with decor
You can paint French gel polish using decor like this:
- After a hygienic manicure, wipe the nails with a degreaser, cover with a base and dry under a lamp for 2 minutes.
- Then each is painted with a primary color.
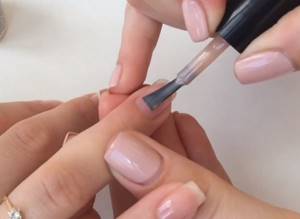
- After drying, make a “smile” on the free edges of the nails of the middle, index and little fingers, and when finished, place the hand back into the lamp.
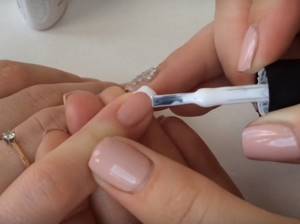
- On the ring finger, dots draw 7 diamonds in 3 rows from the base of the nail to the end, using white gel polish or gel paint.
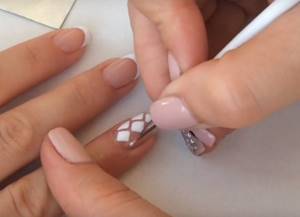
- Unevenness is corrected with a thin brush soaked in degreaser.
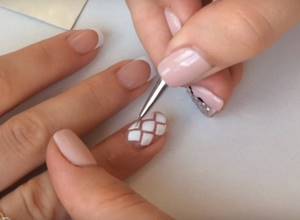
- For volume, you can apply another layer of white varnish to the diamonds.
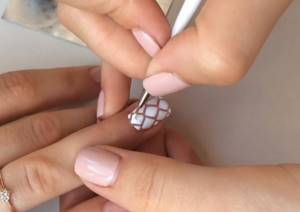
- After drying, all nails are coated with the finish, and the hand is again placed in the lamp.
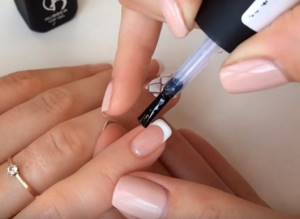
- Then you need to remove the sticky layer using a cloth moistened with degreaser.
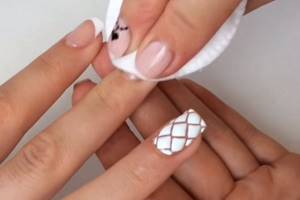
- Dots are placed between the white diamonds on the ring finger with extension gel; they will act as glue.
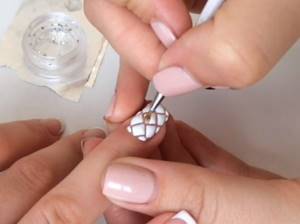
- Using the sharp tip of an orange stick, small rhinestones are attached to them, and this nail is dried for the last time in a lamp.
A hand-drawn design consisting of several small elements should be dried after completing each one. If you take the entire image first, it may become blurry if you move awkwardly.
Watch this video for a master class on French manicure with decor:
Benefits of manicure
French manicure has a number of convincing advantages that only strengthen its popularity among clients of nail salons. After completing the procedure, your nails remain quite strong and retain some flexibility, which allows you to confidently withstand average mechanical loads. French is universally suitable for any shape and looks great on natural and extended nails. The time between corrections depends entirely on the natural growth rate of the young lady’s nails. When performing a manicure, in addition to the classic version, the master can design an art jacket or beautifully complement the design with decor or a pattern.
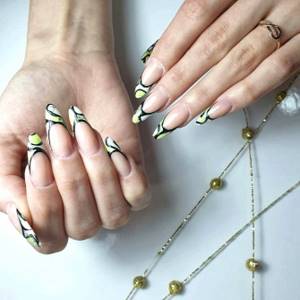
How to design a nail
Design on a French jacket is done not only by hand, with a brush, but also with the help of:
- Stamping. These are dies with a soft silicone base and accompanying plates with extruded patterns. Gel polish or paint is applied to the latter. The silicone stamp pad is then pressed onto this plate to transfer the design onto it. The next step is to imprint it on the nail, which has already been processed, covered with a camouflage base and dried. When the stamping is on the nail plate, this finger is placed in the lamp.
- Sliders. These are decals that are applied to nails that are already covered with a base, flower bed and top coat with a sticky layer. The slider is cut along the width of the nail plate and placed on a cotton pad moistened with water. This removes the dense substrate. And the transparent picture itself is fixed on the nail and straightened out. The section of the slider sticking out at the free edge must be cut off. Finally, a glossy top coat is applied over it and dried in a lamp.
- Fimo. These are polymer particles that look like fruit and berry slices. They are also glued to a sticky layer of the finishing coat, another top coat is placed on top and dried in a lamp.
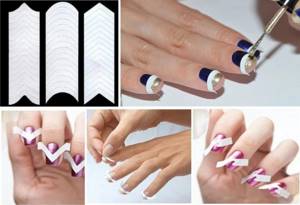
With stripes
Very often, fashionistas resort to using special stripes, knowing how to make the perfect French jacket. They will help you get the job done very quickly. In addition, the strips will be indispensable for those who are beginners or are simply too lazy to use brushes to draw a detailed smile.
How to make a French jacket evenly? Let's talk in detail about creating decor with stripes:
- first you need to apply a colorless base or primer that will seal and protect the nail plate;
- the strip must be applied to the nail to try it on before further work;
- it's time to remove the protective film and attach the strip no more than 5 mm from the edge;
- the remaining part of the nail must be painted over with white or milky varnish;
- Once the polish is completely dry, all that remains is to remove the strip and cover the nail with a glossy topcoat.
French manicure with gel polish at home with glitter
French manicure with gel polish at home will turn out very bright if you use glitter:
- The first stages do not differ from those described earlier: hygienic manicure, treatment with a buff, degreaser, then covering with a basic flower bed or camouflage, drying in a lamp.
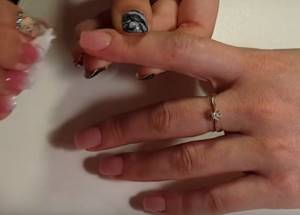
- Then a transparent gel or base is applied to the edge of the plate; there is no need to polymerize it.
- Using a wide flat brush, take larger confetti and place them on the free edge of the nails in different places.
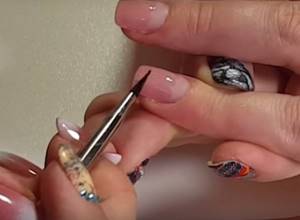
- Finer glitter is applied with a fan tool, and your hand must be placed in the lamp to dry the liquid and fix the shiny decor.
- Next, you need to apply the top gloss coating and dry it again.
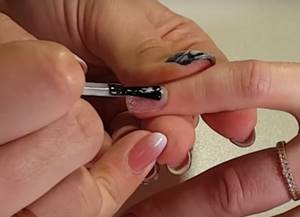
- They go over the ends of the nails with a file to remove any protruding particles of glitter.
- All that remains is to apply a second layer of topcoat and dry again.
Watch this video for a master class on French manicure with glitter:
Multi-colored French
The laid-out French technique allows you to create a manicure using a variety of colors. The smile line can be made in one of the shades of a cold, warm or neutral palette. The tip of the nail can be monochrome, multi-colored, shiny, with streaks and tints. Floral arrangements, abstract compositions, a smile lined with sequins or kamifubuki, plain designs on a transparent base and many other ideas look simply incredibly chic.
Ideal French manicure with gel polish for short nails
French manicure with gel polish is also done on short nails, but the “smile” should be very narrow. What the process looks like:
- First, they tidy up the skin around the nail plate, clean out the sinuses, cut off the cuticle, and polish it. For this purpose, it is more convenient to use the device, but a classic manicure is also possible.
- Then the auxiliary products are applied in the following order: degreaser, acid-free primer, 2 layers of leveling base coat. The last product needs to be dried.
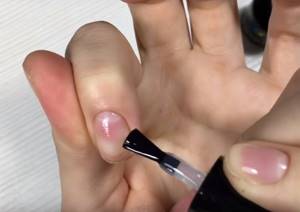
- The next step is to apply the flower bed. For the entire plate, use a brush from a bottle or liner. But closer to the edge, where there will later be a border with white varnish, the camouflage color is applied with a thin hair-type instrument. Thus, there should be a step there. That is, there is less colored polish on the very edge of the nail than on the rest of the nail.
- A little white varnish is placed on a flat lid. And with a thin brush they take the product from it to apply to the edges of the nails. You should start moving from the center of the plate to the growth points. To correct coating defects, you can change the direction of the brush, but it should be held at an angle.
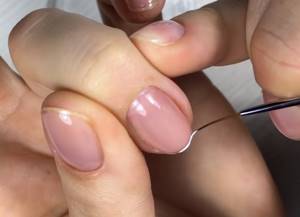
- Once the white gel has dried, the finishing coat is applied. After treating each finger, the hand is turned over with the palm facing up to level the product. At the end, the fingers are once again placed in the lamp to dry the top.
Watch this video for a master class on creating a French manicure for short nails:
#3 How to make French shellac
Classic French shellac is done without stripes or clear transitions - this manicure turns out light and elegant. It should be noted that its time is spring-summer, when makeup colors become lighter than in the cold season.
A French manicure with shellac is performed in the same way as the options described above, so we will look at how to make yourself an original winter pattern:
- All points, until the moment of applying varnish over the edge, are completely repeated from gel polish. When the outline is applied, you need to carefully draw the selected pattern with a brush. Let's take the bow design as an example;
- Variations of shades can be any, but with white and pink, bright red, blue and gold look most beautiful. If you want a more strict version, the pattern can even be drawn in black;
- The bow is drawn as two triangles, with sharp tails extending from the center of contact. They shouldn't be wide. You can make them slightly curved;
- First, a white tip is drawn, then the nail is dried in a lamp. Next the bow is painted over;
- All that remains is to dry the last layer of varnish and fixative and wipe the plate with a degreaser.
Similarly, you can make an autumn design, where instead of a bow there will be a leaf. For New Year's ideas, you can take a pattern of a Christmas tree, a ball, etc.
French gel polish step by step for yourself
French gel polish is done step by step by yourself in the following sequence:
- The length is shortened with a milling cutter.
- You need to use a file to give it a more accurate shape.
- Use a pusher to push back the cuticle, clean out the sinuses and treat the side ridges.
- Cut off excess with scissors.
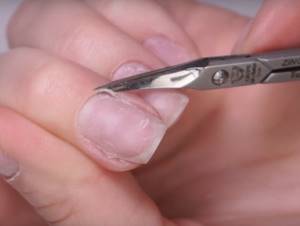
- Wipe the plates and the skin around them with a degreasing cloth.
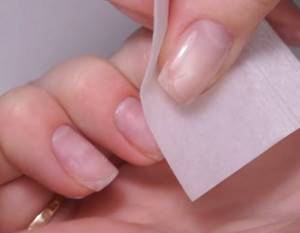
- French gel polish on natural nails requires the application of a leveling rubber base, which is then dried.
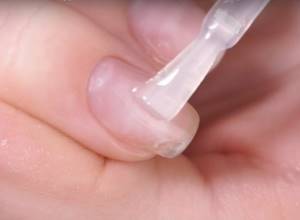
- The next stage is the use of a nude flower bed; it is distributed with a brush from the bottle itself.
- To apply the base product more evenly, you will need to work with a hair, after which your hand is also placed in the lamp.
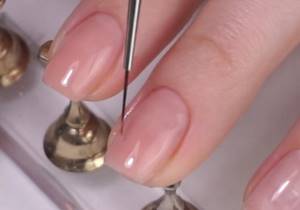
- French gel paint on gel polish is done faster and lasts longer, so they are mixed on the palette.
- Using a hair brush, draw white lines on the free edge, starting from the middle and moving horizontally to the side parts.
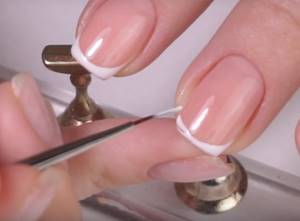
- After drying again, you need to cover your nails with topcoat and put your hand in the lamp one last time.
- Next, remove the sticky layer, if any, and lightly file the ends to get rid of streaks.
Watch this video on how to do a French manicure for yourself:
Features of the French jacket
Today there are many different trends and styles of nail plate coating. But French manicure remains in demand. It has the following features:
- versatility;
- variety of execution options;
- elegance;
- beauty;
- unique design;
- modesty;
- discreet;
- elegance.
French is suitable for women of any age and field of employment. It can be worn by those who occupy leadership positions, university students or older ladies. Most women like it for its simplicity of execution, which is filled with the depth of style.
A manicure made using the French technique is an imperishable classic that amazes with its variety of design solutions every year. French happens:
- everyday;
- festive;
- with drawings;
- geometric shapes;
- with applied flowers;
- different colors;
- matte.
Each master brings his own style to the coating. The design becomes unique, which conveys individuality.
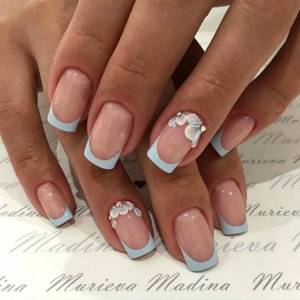
Individual French design
Secrets of a beautiful French manicure
In order for the French to look good, to look like the work of a highly skilled craftsman, it is important to follow several rules:
- Having collected white varnish on the brush, you need to shake off the excess amount. It’s more convenient to dip it not into a bottle, but to use a palette.
- When drawing the details of a French jacket, you need to make movements not only with a brush, but also turn your finger in the desired direction. The hand being manicured should be relaxed.
- The “smile” line should be deep. That is, it should be an arc, not a straight line across the nail. This rule applies to any length. The “antennae” should be thin and end at the growing points, not at the cuticle. It is more convenient to do them with a hair brush.
- The “smile” should not be too wide, it looks unnatural. If you need to hide the overgrown part of the nail so that the manicure looks presentable longer, it is better to use a dense camouflage base.
- The “smile” on all nails should be the same thickness. They must be compared during the process in order to achieve the desired effect and correct the error before drying.
- The “smile” should be symmetrical. It’s not difficult to see the nuance if you turn your hand away from you. This rule is also useful when creating the shape of your nails.
- The “smile” line should follow the outline of the cuticle and become its mirror image. But you shouldn’t make it U-shaped.
We recommend reading about what you need to know when choosing a gel polish lamp. From the article you will learn why you need a lamp for gel polish, how it works, and how to choose a lamp for drying gel polish. And here is more information about how to remove shellac at home.
The French jacket has been popular for many years, because it is appropriate with any clothing, everyday and on holidays. It is important that all design details are done carefully and symmetry is maintained. And for this you need a high-quality hygienic manicure, suitable brushes, base, varnish and a little effort.
How to make a laid out French jacket
The creation process takes a long time, but the result is worth it. You need to be as attentive to details as possible, read the instructions on how to do it, and not immediately start applying powder to your nails.
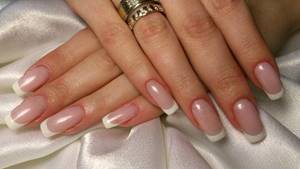
Top 2. Nail Passion Classic Suite, 1002 Snow Queen
Rating (2021): 4.80
20 reviews from resources were taken into account: Yandex.Market, IRecommend, Imkosmetik, Esthetic-nails
Best value for money White gel polish from Nail Passion is recognized by many masters as the best. Despite the long drying time and not the easiest application, the color and coverage are perfect.
The most natural color Finding a beautiful white gel polish is difficult. But it is even more difficult to find a natural white color that is not too bright and shiny. Nail Passion 1002 looks very natural and is suitable for daily manicure to suit any style.
- Characteristics
Average price: 350 rub.
- Country Russia
- Volume: 10 ml
- Curing in LED lamp and UV lamp: 30 s, 180 s
- Texture: medium
- Effect: glossy
- Application: 2-3 layers
One of the best natural shades of white. The not too dense pigment allows you to apply gel polish in different variations. For example, for a natural, not too bright white shade, it is recommended to apply 2 layers. For a nude effect or a French effect, one is enough. And for an intense color you will have to paint three layers. In general, the white shade in this line looks natural on nails; it does not have a shiny glossy effect or glow-in-the-dark pigment. The consistency is medium, the brush has a convenient shape and universal hardness. Even a beginner can handle creating a manicure. Only after application you will have to wait longer than usual. In practice, white gel polish takes longer to dry than other colors in the line.
Advantages and disadvantages
- Certified product
- Beautiful natural white color
- The brush opens well under the cuticle
- Medium consistency
- Takes a long time to dry
- Thickens quickly if not stored correctly
See also:
- 10 Longest Lasting Nail Polishes
French shellac nail design: Top 7 best bases
To date, it has been announced that there are 36 shades of the color palette of adapted resin of natural origin, of course, it is impossible to use everything for French, but we simply must tell you about the most popular bases used in French shellac nail design. So, the Top 7 most popular shades of French shellac base.
- “Nenlezhe” (No. 2) – has a translucent soft pink tint.
- “Beau” (No. 13) is also a soft pink tone, but with a matte effect.
- "Moser of Pearl" (No. 20) is a transparent base with small glitter.
- “Clearly Pink” (No. 23) is an almost colorless tone.
- “Zilionare” (No. 27) is a transparent base with a mica effect.
- “VIP Silver Status” (No. 35) – translucent silver color.
- “VIP Gold Status” (No. 36) – translucent golden tone.
Of course, many people have the question, what about the top part of the jacket, what to put there, how to apply shellac? In the palette of natural coatings, there are two main white colors for French design.
- “Cream Puff” (No. 1) – boiling white dense matte color.
- “Studio White” (No. 26) - this pigment is also densely matte, but less saturated in color than No. 1.
All of the shades listed can also be used as a stand-alone coating.
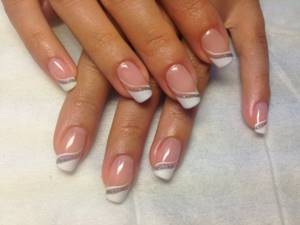
Top 3. Roxy Nail Collection №002W Ultra white
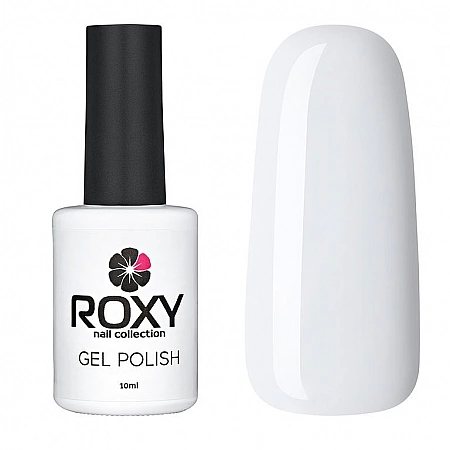
Rating (2021): 4.77
25 reviews from resources were taken into account: Otzovik, IRecommend, Esthetic-nails, Wildberries
Easy application A soft, moderately wide brush, medium texture and rich pigment make the gel polish very easy to apply. Therefore, it can be safely recommended to beginners.
Odorless The pungent odor of gel polishes is not only unpleasant, but also dangerous to health. For regular work, it is very important that it be minimal. Roxy Nail has practically no sharp varnish smell.
- Characteristics
Average price: 400 rub.
- Country Russia
- Volume: 10 ml
- Curing in LED lamp and UV lamp: 30 s, 120 s
- Texture: medium
- Effect: light glossy
- Application: 1-2 layers
Gel polish with optimal characteristics. Many masters believe that it has no flaws. The white color fits perfectly on the nails, the pigmentation density is much higher than average. A brush of medium length and width with soft bristles and a straight cut makes application as easy as possible. Even beginners can handle this gel polish. The slightly oily texture is self-leveling and does not streak or smudge. Drying takes as long as indicated in the characteristics. Another feature of the varnish is the minimum of unpleasant pungent odor. The consumption of the jar is quite economical, considering that two thin or one medium layer is enough. When worn, the gel polish is durable and not prone to deformation.
Advantages and disadvantages
- Optimal length, width and softness of the cyst
- No pungent odor
- Easy to apply
- Dries well
- Not always on sale
- May leak under the cuticle
See also:
- 20 best gel polishes from AliExpress
