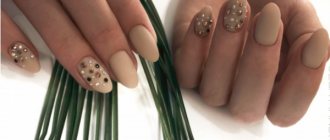
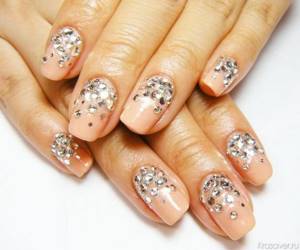
Shiny crystals of different shapes and sizes provide endless possibilities for experimenting with nail designs for both pros and beginners.
The rapid development of the nail industry dictates its own rules to rhinestone manufacturers. The choice is huge - crystals, crystal chips, Pixie crystals, edge, broths, and every season it prepares its own new items for nail art fashionistas.
How to choose, lay out, and how to attach rhinestones on nails - we answer all the questions in order.
What are rhinestones, what are shiny stones for nails made from?
The highly refractive glass composition invented in the 18th century marked the beginning of a new era of decoration. The French jeweler G. Strass succeeded in this, whose name became a household name for rhinestones of all shapes and sizes.
At the end of the 19th century, D. Swarovski invented a cutting machine, and the production of shiny stones rose to a new level in quality and volume. Swarovski crystals are sold to stores and boutiques all over the world.
Nail stones are made from classic glass, crystal and acrylic.
The latter are a budget option with not always smooth edges. They are convenient for beginners to practice on. Plastic pebbles wear off within a few days and lose their color and shine.
Glass and crystal rhinestones are an ideal solution for nail decoration. The shine lasts at least 7-10 days. Then it also begins to fade.
Glue
Simple household glue “Moment” or “Monolith” has good fastening characteristics. It is not the best alternative to a specialized composition, but it can be used successfully. Due to the fact that you apply the rhinestone on several layers of varnish, the likelihood that harmful substances will penetrate from the glue into the nail plate is very small. But even if this happens, the small area of the adhesive drop will not allow it to cause significant harm. If you are thinking about how to beautifully stick rhinestones on your nails, as in the photo, then you need to choose transparent glue, which can be marked with the inscription “Crystal”.
I love all kinds of nail decorations, stickers, rhinestones, adhesive ribbons, etc. I don’t always wear colored polish, and I often don’t have enough time to paint on my nails. And if I paint my nails a bright color for a long time, they begin to fade and break. And a good foundation doesn’t save you. That's why I do it this way. First, a standard caring manicure, and then I apply some kind of medicinal varnish. It can be transparent, or it can have a slight tint. And if you leave it like that, the manicure looks a little boring. This is where all kinds of decorations come to my aid.
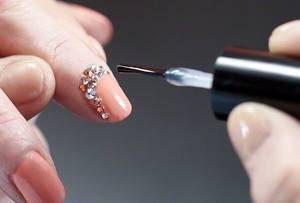
So, how to glue rhinestones on your nails at home. I tried two ways. The first is for glue, the second is for varnish.
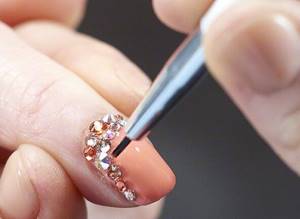
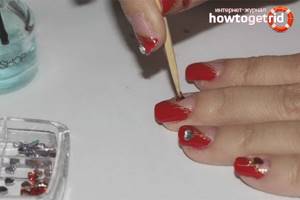
I also apply it to the nail plate in two ways. I have special thin tweezers for these purposes - this is option number one. Well, the second option is to take a regular orange manicure stick. You can, of course, simply apply rhinestones with your finger, especially when they are large, but it doesn’t always work out evenly. Therefore, I use tweezers for large rhinestones, and a stick for small ones.
They stick well when two layers of varnish or one thick one are applied and the varnish has not yet had time to dry. If you glue rhinestones immediately after application, they may move out of place.
We applied it, dried it and covered it with another layer so that the rhinestones would stick better.
If I use the glue from the kit to glue rhinestones to my nails, I get the following picture. Firstly, tweezers are required here, since the slightest touch of glue with your finger and the rhinestone will remain on your finger, and not on the nail. But even when the rhinestone gets on the nail plate covered with protective varnish, it sticks very poorly. Maybe, of course, I came across not very good glue and everything will be different for you. If you know what glue to use to glue the rhinestones so that they stick well, write in the comments. I would appreciate that.
Increasingly, nail art is turning to original compositions using shiny stones - rhinestones. They are made from glass, crystal, zirconium, acrylic, plastic, and attached to nails with glue, as well as on polish, gel polish (or shellac).
Marking rhinestones for nails by shine and visual effects
This is a professional type of marking used by manufacturers:
- Rhinestones can be transparent or colored. The transparent ones are called Crystal, and the colored ones are called Color. Both types give a traditional shine from the numerous reflections of light refracted by the edges.
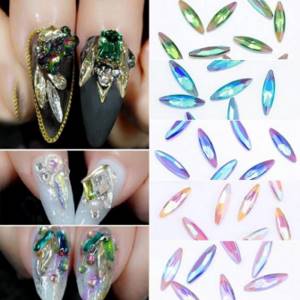
- CrystalAB – marking rhinestones with a holographic, “gasoline”, chameleon-like surface that plays in the light with all the shades of the rainbow. This group is distinguished by a colored coating that changes shade depending on the viewing angle. There are two types of AB group markings - colored and colorless rhinestones. ColourAB – color chameleons. CrystalAB are transparent chameleons.
Preparation
- First you need to remove the dead skin particles around the nails - the cuticle. To do this correctly, make a bath from a decoction of medicinal herbs (brew 40 grams of any plant in 1 liter of boiling water, let it brew, strain). Lower your fingers and wait 20 minutes. After the period has expired, stretch the skin so that the edge of the cuticle is clearly visible. Remove dead particles with nail clippers, moving from both sides.
- Sterilize your hands with antiseptic or hydrogen peroxide (can be replaced with Chlorhexidine). Remove the old varnish layer and give the plate the same length and shape. Rhinestones look very beautiful on oval and square nails with soft corners. When processing the free edge, keep the file perpendicular to the plate, otherwise the nails will begin to peel. For these purposes, it is better to use a thin glass file of low abrasiveness.
- For better adhesion of the rhinestones to the surface of the plate, polish your nails with a buff. Firstly, you will make it easier to apply the varnish, and secondly, you will get rid of unsightly “waves”. In addition, any coating lasts longer if the nail plate is pre-polished. Cover the surface with healing varnish-strengthener in 1 layer, let it dry.
Types and sizes of rhinestones for nail design
Based on the material, rhinestones are divided into plastic, glass and porcelain.
Shape : round, oval, drop, rectangular, oval, elongated oval. There are figured rhinestones in the form of flowers, stars, crescents, and hearts.
by type , each of which also varies in size and shade:
- Faceted classic rhinestones with different numbers of edges, like diamonds.
- Conical, single or double sided. Used for laying on artificial material, extended nails.
- Pixie crystals are also called crystal chips or broken glass. They vary in size from 1 to 1.8 mm.
- Broths are uncut round crystals made of metal and plastic (caviar manicure).
- Smooth hemispheres - with a cat's eye or pearl effect.
- Charms - snowflakes, crowns, bows, having a complex compositional shape.
- Shinju pearls are shaped like raw sea stones. Can be transparent or in different shades.
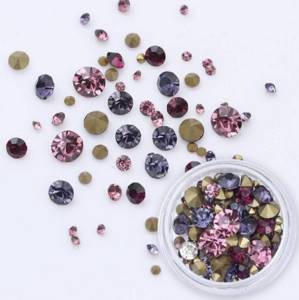
The size of the pebbles varies from 0.8 to 8.8 mm. Each is marked with letters and a number, for example ss4, ss8. For different manufacturers, the markings with the actual size in mm may differ slightly, so it is better to focus on the table supplied by the manufacturer, where the stones are photographed against the background of a tip in the actual size of the nail.
Table with sizes of rhinestones in the photo:
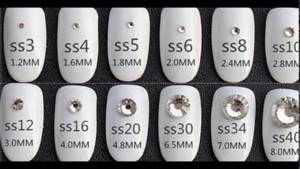
The most popular sizes used by craftsmen are from 1 to 3 mm.
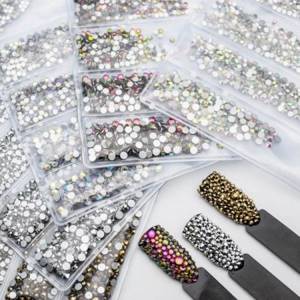
Where to buy rhinestones for nails
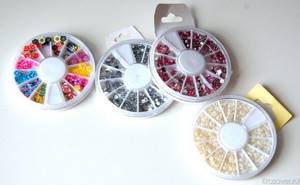
In specialized stores for nail artists online and offline. Materials for nail design differ from crystals for clothing. Rhinestones are sold in sets, in round or rectangular shapes. The most popular manufacturers of expensive brands are Swarovski (Austria), Asfour (Egypt), Patrisa Nail (Germany) and Preciosa (Czech Republic). Their rhinestones are made of crystal, with a wide choice of shades.
Other manufacturers on the market: Severina, Lianail, TNL, NelTes, RioProfi (Russia), Konad, IM, RuNail (Russia), Bluesky.
Design materials
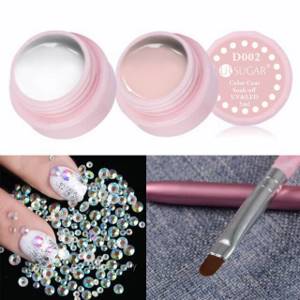
In addition to a selection of crystals of different shapes, shades and sizes, you will need a box or pencil case for storing and sorting them. For laying out, different craftsmen use both professional and improvised tools. Professional - pencil with wax core. Accessories - drops, orange sticks, toothpicks, thin brushes. For larger crystals, you can use tweezers.
For fixation, a rubber base, gel polish, top with a glossy or matte surface, gel or gel-jelly for extensions, acrylic, biogel, epoxy glue for crystals (two-component), acrylic powder mixed with a top or gel are used for large elements.
Types of topcoats: how to choose a topcoat, review of the 10 best brands
How and how to lay out a design with rhinestones: three mounting options
To perfectly fix the decor, it is best to use a plastic, flexible base with high adhesive properties. It should be thick, not spread during the process, not crumble or crack after hardening. The ideal option is rubber bases or thick gels.
Mount to base, top or epoxy glue
Liquid material is applied to the finished smooth surface of the nail with a brush, design elements are laid out, and dried in a lamp. In the case of glue: it dries in air for up to 5 minutes, but you won’t be able to move such a pattern while creating the design later.
When laying out, a light edge should form around the crystal. The stone should not sink in the adhesive, otherwise it will lose its shine. After hardening, you can additionally carefully walk between the stones with a brush dipped in a topcoat without a sticky layer. Due to the absence of a dispersion layer of topcoat, dust will not get clogged between the stones, and the bright shine will remain for the entire period of wear.
Gel mount, gel jelly
Thanks to their thick, viscous texture, extension gels hold medium-sized stones better. They are convenient for laying out not one, but several elements, a composition that occupies more than half or a third of the nail. They do not blur and hold their shape well. Even so, it is better to additionally secure the gaps between crystals or pearls with a brush and topcoat.
Gel mount mixed with acrylic powder
The composition turns out dense and viscous, like plasticine. Recommended for fixing large elements. After drying, it is not as flexible and elastic as a base or gel, but it does its job perfectly. To knead, pour a pinch of powder onto a sheet of paper, put gel on a brush and mix until smooth.
View this post on Instagram
Posted by Manicure | Novoaltaysk (@zlodeeva_nails_studio)
How to put rhinestones on a nail - step-by-step instructions
Let's consider the process of laying crystals on the finished layer of gel polish. When fixing large elements that occupy more than a third of the nail, it is better to walk over the area with a buff to strengthen the adhesion of the materials.
If the nail is completely lined with crystals, it is better to make a silver base; it will not stand out against the background of the stones.
When working with round beads, it is recommended to “drown” them into the fixing material to half their height, no more.

Stage 1
Apply base and gel polish in two layers. Dry each one in the lamp as usual. Seal the polish with topcoat. After drying, remove the sticky layer.
Stage 2
Using a brush or toothpick, apply droplets of gel, topcoat or glue to the places where the crystals will be located. Use a top with a thick texture.
Stage 3
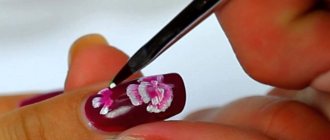
Use a pencil, magnet, toothpick or orange stick to grab the crystals by the top.
Stage 4
Place the stones at the desired points in the design and gently press them into the adhesive material.
Stage 5
Step by step, lay out a composition from a selection of stones or broken glass/Pixie crystals/pearls.
Stage 6
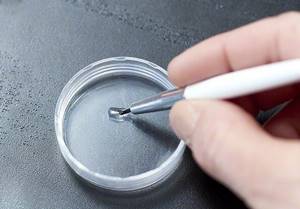
Take a drop of top coat into a small container and blot a thin short brush with it.
Stage 7
Fill all areas around and between the crystals with a thin layer of topcoat. The liquid should not get on the top of the stones and edges, so as not to remove the shine.
Stage 8
Apply the top coat to the rest of the nail, dry it in the lamp for the full time. Remove the sticky layer.
What is a sticky layer and means for removing it
Using household glue
It’s not always possible to have a special glue on hand intended for manicure, so fashionistas are trying to replace it with household options. It is worthwhile to figure out whether such actions are permissible.
Super glue
The use of super glue is acceptable, but working with it is accompanied by difficulties. This adhesive is not able to fill large irregularities. It is used only for fixing flat elements.
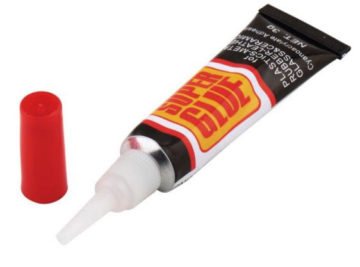
It dries very quickly and requires maximum care. Correcting the error is problematic.
Glue moment
It is not recommended to use Moment glue. It does not harm the plates and is able to provide proper adhesion, but there is a risk of damaging the decorative elements themselves, especially plastic decorations.
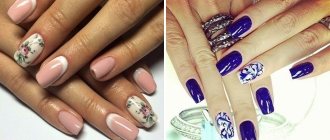
Nail designs with rhinestones, crystals and crystal chips Pixie
Ideas for placing stones vary depending on the shape, size, color, complementary elements and the background itself. In general, masters divide display styles into several directions.
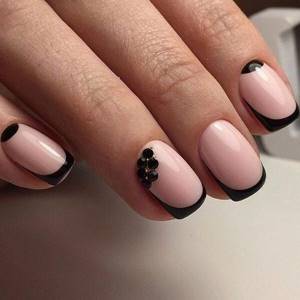
Linear composition
It can be positioned both horizontally and vertically along the perimeter of the nail. When positioned vertically, the nail plate visually lengthens. When laying out this design, it is convenient to trim the line with a toothpick or an orange stick, like a ruler.
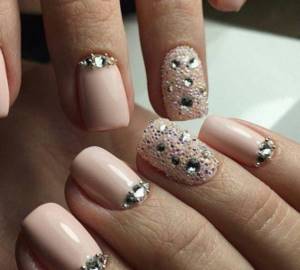
Full nail coverage
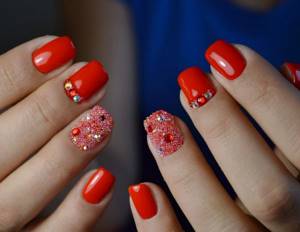
When fully covered, you can lightly buff the surface of the varnish to improve adhesion. When laying out rhinestones, crystals or bouillons, it is important to distribute them evenly and slightly press them into the adhesive composition. But not immersing more than halfway.
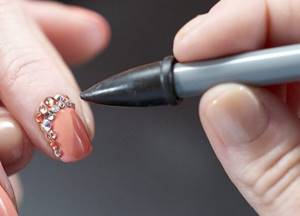
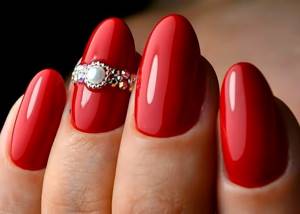
Rhinestones at the base of the nail, moon manicure

This option is one of the most popular and practical, since the stones are removed from the open edge and do not catch things as much. The designs at the base of the nail look original with a neat layout of the lunar line with pearls or broths.
Exquisite moon manicure: instructions, ideas, spring trends and tips
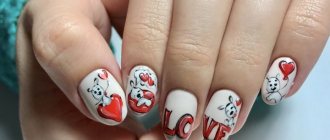
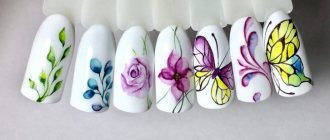
Crystals as an addition to artistic painting and drawing
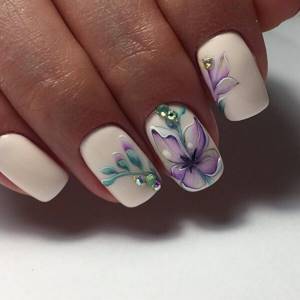
The beautifully drawn design can be further enhanced by the sparkle of the crystals. This can be a dotted inlay, or a design entirely made with stones and decorated into a composition using paints.
Painting on nails: materials, step-by-step instructions, design ideas
Drawing lined with rhinestones
View this post on Instagram
Posted by Nail, Nailart, Nail Design (@manikurchik_video)
The design can not only be partially decorated, but also completely laid out using pebbles or pearls. The combination of crystals and beads of different sizes emphasizes the voluminous texture and introduces elements of the play of light into the composition.
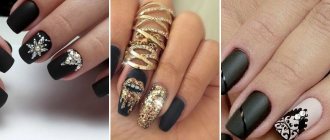
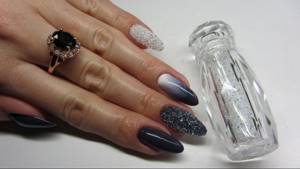
Gel polish and artificial stones
An original and complex nail design with rhinestones installed on the surface of the varnish can really impress anyone, because it looks rich, stylish, brilliant and bright. A girl who knows exactly how to glue rhinestones onto gel polish will never fail to be noticed; she is always in the center of events, well-groomed and luxurious.
When planning to decorate your nails with rhinestones, be sure to clearly think through the entire look, jewelry, clothing, and even make-up from the beginning. The entire impression of your image depends on how organically all this will be combined. Experienced designers recommend completely abandoning bright jewelry and sparkling accessories if you decide to decorate your nails with rhinestones.
However, many do not even want to bother with such a procedure as gluing such decorations, because they do not stick well, on occasion they immediately fall off, and in everyday life with such a manicure it is not very convenient. That is why we will figure out how to properly glue rhinestones onto gel polish in order to remain flawless in any situation and become special on special and important occasions.
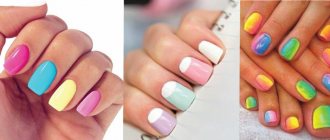
Design ideas with rhinestones for short nails
How to lay out pebbles on your nails if the length does not allow you to use large elements and designs? Masters suggest several design options for short nails:
- Vertical displays of small crystals
- Design of small drawings at the base of the nail
- Drawing a thin line of lunar manicure with broths
- Full inlay of one fingernail with pixie crystals or broken glass
- Pointed use of rhinestones, one for each finger in a minimalist style
Technology
- It is imperative to wait for the varnish to dry completely, otherwise the final design will be blurry and the rhinestones will not last long.
- When the first layer has dried, begin applying the second. You can use either colored or clear varnish. It all depends on personal preference.
- The second layer is applied one by one to each finger according to the following scheme: paint, attach rhinestones, move on to processing the next finger, repeat the previous manipulations.
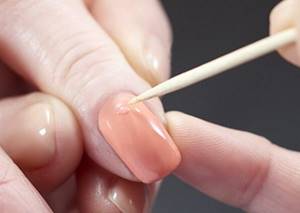
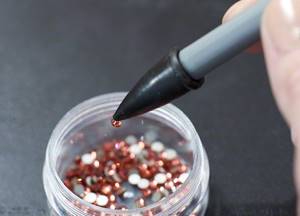
- Start the procedure with your little finger: apply varnish, take a needle and dip it into the colorless composition so that a small drop forms at the tip. Pull out the needle, bring it to the outside of the rhinestone and hook it, the element will hang on the needle.
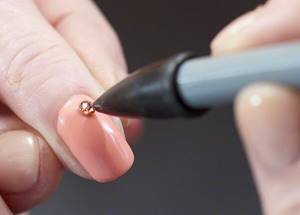
- Bring it to the nail, apply it to the desired place, press. Since the varnish dries in a short time, you need to act just as quickly. Repeat the steps with each subsequent rhinestone, then move on to the other finger.
- When all nail designs are complete, leave to dry for 10-20 minutes. After this period, cover the plate of each nail with a fixative so that the rhinestones last a long time.
In the case of extended nails, it is better to cover the nails with a special gel or adhesive base intended for attaching decorative elements. Removing rhinestones is quite problematic using a liquid that contains acetone. Soak 10 cosmetic swabs in it, secure on each nail with cling film or foil, wait 5-10 minutes. You should not glue rhinestones in large quantities on each nail, such a manicure looks vulgar. Select 1 finger on your hand, which will receive special attention, and decorate all other nails more modestly. When you apply the second coat of varnish, wait half a minute until it partially dries. This is necessary so that the pattern does not smear if your hand suddenly trembles. You can purchase special glue for decorative elements at a nail art store. In this case, the composition is applied to the inside of the rhinestone, then attached to the dried nail plate. A pattern of rhinestones looks beautiful on long nails. Pebbles can be attached to the free edge, imitating a French manicure. There is also an option when rhinestones are attached to the dividing line in the middle of the nail. Use rhinestones that suit your nail length. For example, on a short nail plate, elements of the smallest diameter look beautiful and laconic. Ladies with long nails are recommended to stick larger rhinestones. When choosing the color of rhinestones, give preference to one main shade and two or three additional ones
Do not overload your nails with a lot of bright colors, maintain contrast. An important feature of nail design using rhinestones is that they look beautiful only separately from other elements. For this reason, craftsmen do not recommend gluing stones in combination with sparkles, sequins, and foil. Do not handle the stones until they are completely dry.
If you smear the pattern, you will have to redo the entire pattern. The needle used to attach the rhinestones can be replaced with a toothpick.