Rating: 5/5 (8)

The life of a modern representative of the fair sex consists of a constant search for an original, new and unforgettable image. A manicure is at first glance an insignificant, but in reality a very important detail that can highlight your beauty, add the finishing touch to your look and complete your look . Ordinary standard varnishes are almost a thing of the past, as the modern nail industry has offered us a more effective and durable product - gel polish.
Gel polish is an undeniable favorite in nail care - keeping your hands well-groomed and tidy has become much easier and simpler, and its unique strength allows you to maintain the original attractive and fresh appearance of your manicure for up to three to five weeks . In addition, the gel polish has a multifaceted palette of color shades, which allows you to create absolutely any fashionable design on your nails. Also, which is important, various decorations in the form of rhinestones, beads, patterns, and so on are glued to the gel polish very firmly and for a long time.
Manicure with gel polish gives your nails a neat appearance, strengthens them, prevents delamination and, most importantly, has high durability. At one time, I couldn’t get enough of the appearance of such a unique product, and today I decided to share my knowledge about it with beginners. I propose to jointly consider all the pros and cons, as well as analyze in detail the basics of manicure done with gel polish, including training lessons on video.
Advantages
- incredible durability and preservation of original attractiveness;
- prevents fragility and delamination, and protects against similar misfortunes in the future;
- strengthens the nail plate due to its thick gel coating;
- protects nails from negative external influences;
- gives fingers a neat and tidy appearance;
- refreshes the entire image;
- Thanks to the huge selection of colors, you can create your own unique design on your nails;
- makes it possible to do your own painting at home;
- The technique of applying gel polish is simple even for beginners;
- If the rules are followed, the manicure will have a unique shine that lasts up to 2-4 weeks.
Flaws
- high cost of truly high-quality cosmetics;
- gel polishes create a dense film, due to which the nails lose their own protective coating and do not “breathe” at all ;
- not suitable for nails with a weak and thin structure - the manicure lasts three to six days;
- A manicure done with gel polish is difficult to remove and takes quite a long time;
- Coating with gel polish requires full compliance with the rules , otherwise the varnish may “peel off” on the same day.
Combination with other types of design solutions
Each type of fashionable manicure is suitable for one or another type of clothing. The use of bright acid tones requires coordination with the color scheme of the main clothing or accessories. A classic French coat and light nude gel polish will protect you from a fashion failure, as it can be combined with any option in your wardrobe.
We invited you to consider the most relevant nail art ideas this season. Do you like them, or do you prefer not to follow fashion, but to use the coating, regardless of its modernity? Share with us in the comments what is important to you in the nail industry.
Author of the publication
Tips from the professionals
- It is necessary to use high-quality varnishes from trusted and well-known manufacturers.
- To prevent your manicure from becoming covered in bubbles, it is important to apply the gel polish in thin layers.
- To prevent the gel polish from peeling off, when applying it, you must step back from the cuticle by one millimeter .
- If you are using white gel polish, keep it under the lamp for one and a half minutes, not two - this way you will avoid a yellowing tint.
- To get the perfect, truly desired manicure, it is better to apply several thin layers of gel polish than one thick one.
- If you want to make a design on your nail, apply it to the top coat before drying.
- Attach rhinestones or stones to the nail immediately after applying the colored layer of gel polish, then be sure to dry .
Before you start applying gel polish, you need to get your nails in order - they should be in perfect condition. To get a flawless manicure that will give others a good opinion of you, it is important to take seriously the choice of nail shape and careful removal of cuticles and hangnails. Otherwise, your efforts may turn against you, since the manicure will look sloppy and sloppy.
Let's get to the main point
The preparatory work is over and we begin to create beauty on our hands.
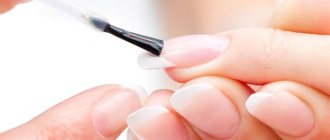
First, let's apply the base. The base layer strengthens or vitaminizes the nails (depending on which one you use). In addition, it provides an even coating.
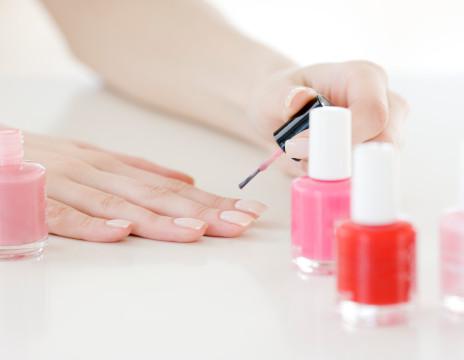
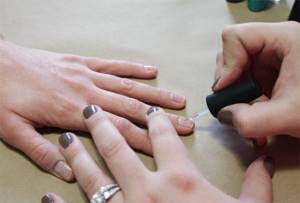
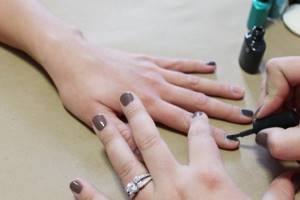
We begin to apply varnish. It's better to paint the nails of your dominant hand first. And that's why. If you are right-handed, then painting your right hand will be awkward. As a rule, in this case the layer turns out to be thick, and the color, accordingly, is more saturated. Starting with your dominant hand, you can adjust the layer thickness with your second. Thus, the manicure on both hands will not be different.
It is advisable to start painting your nails from the little finger. This way you won't smear the polish on the rest of your nails.
Finally, you must apply a sealing layer to your nails. In this case, the manicure will please you longer. And don't forget to apply cream and moisturizing cuticle oil to your hands.
Doing a classic manicure
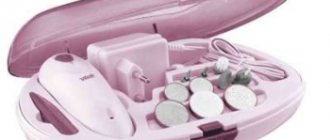
Required Tools
- manicure set;
- buff;
- non-acetone nail polish remover;
- ultraviolet lamp - used to dry the varnish (I recommend purchasing a 36 W lamp - the varnish hardens in 2-3 minutes or an LED lamp - it is expensive, but the varnish hardens in 7-10 seconds);
- degreaser (can be replaced with boric alcohol );
- primer;
- pigmented varnish – used as a base coat;
- cotton pads or cotton wool (can be replaced with wet wipes);
- gel polish – top coat ;
- fixer – transparent or colorless gel polish.
Nail preparation process
- polish remover to remove old polish from nails . The liquid should not contain acetone - it negatively affects the nail surface and in the future will make it brittle and peeling.
- We wash our hands with scented soap or gel, then wipe our hands dry.
- Pour hot water into a bath or small ceramic bowl and dip your fingers in it - this will allow us to painlessly remove the cuticles. In addition, I recommend adding a few drops of iodine or a pinch of sea salt to the liquid - this will help strengthen the nail plate and make nail treatment more comfortable.
- After about seven to ten minutes, we pull our hands out of the water and pat them a little with a towel.
- Using nail scissors with rounded ends or cosmetic clippers, carefully remove cuticles and hangnails. If the cuticle becomes rough again, dip your fingers in warm water again.
- Using a buff, remove the glossy layer from the nails and remove any remaining dust with a damp cloth. This action makes the nail plate more durable.
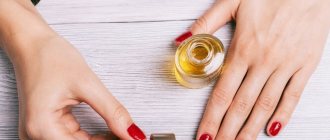
- After completely treating the nail plates, massage in a couple of drops of essential oil , paying special attention to the areas that have been cleaned. The oil protects the skin on the hands from infection from the outside after treating the fingers.
- After the oil is completely absorbed, use a nail file to adjust the length of the nails and give them the desired shape.
Step by step simple techniques for beginners
There are many techniques with which you can create designs on nails of any level of complexity.
Dot patterns
To create simple and laconic dot patterns, you will need available materials and a special tool for manicure - dots.
The drawing technique is the same in most cases:
- You should prepare a palette - a piece of foil or cardboard, and apply a few drops of varnish to it.
- Dip the working end of the dots into the varnish and carefully draw the necessary elements with a drip motion.
- To create curls or straight lines, it is recommended to smoothly draw the elements without lifting the tool from the surface of the nail plate.
- After applying the drops, you can stretch them so that you get the intended pattern.
- After the drawing is ready, you need to secure the coating with a special varnish.
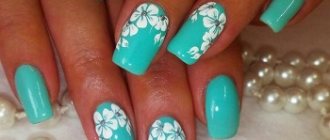
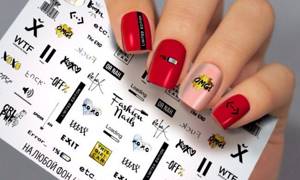
Decorating nails with stickers
Manicure with stickers, despite the simplicity of its implementation, is also a popular trend in nail design.
Design procedure:
- First you need to remove excess cuticle skin and shape the plate.
- Then treat your nails with an antiseptic and degreaser.
- The next stage is applying the base. For stickers, a light background is preferable, then the design will not merge.
- After the background has dried, you need to cut out the design you like from the sticker palette.
- Place the cut out design in water. This is best done with tweezers. Then carefully separate the film and backing and place the sticker on the nail plate.
To increase the durability of nail art, it is better to apply gel polish. However, you should proceed with caution and test it for compatibility with the stickers. If this is not done, it may happen that the gel polish will corrode the glue and paper, and the drawing will be severely damaged.
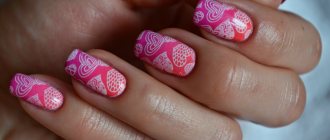
Hearts using a toothpick
Nail design for beginners step by step (photos are shown for visual viewing of the application technique) is provided in the instructions so that you can quickly draw a heart and decorate it. Inexperienced artists are advised to start drawing a heart using a toothpick.
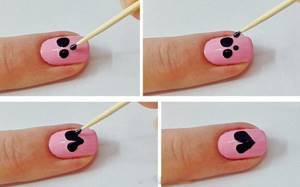
Work process:
- Soak the tip of a toothpick in gel polish and place a dot where the top of the heart is.
- In the same way, make a second point next to the first.
- From the points you need to draw down the strip to form an angle.
- Fix the resulting pattern with a special varnish and wait until the nails are completely dry.
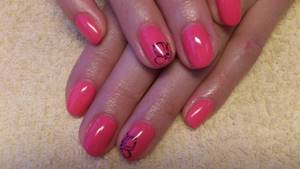
Soft pink and bright red colors are perfect for this design. To give a festive look, you can use varnishes in white and golden shades. Sparkles will add glamor to this nail art.
Nail art geometry using tape
To create a geometric print using gel polish and tape, you need to follow several steps:
- Preparation : hygiene procedures for the skin of the hands; warm baths with herbal supplements; polishing the nail surface; degreasing.
- Covering the nail with a base . The base helps protect nails from harmful impurities of gel polish, and also prevents delamination of the plates and strengthens them. The applied base should be thoroughly dried in an LED lamp, this will only take a minute. A UV lamp is also suitable for drying the base.
- Applying the background . You can use gel polish of any color as a background. After application, it should be dried thoroughly.
- Creative stage . Using narrow tape, a pattern is created from various lines.
- Applying a transparent topcoat when the drawing is ready.
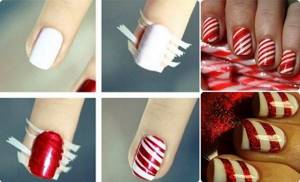
Using this algorithm, you can create an original individual design. To get a flawless manicure, you should not violate the procedure, especially for novice masters.
Drawings using stencils
Special stencils are used to apply patterns, both simple and complex, to the nail plate.
To correctly apply this technique and create an interesting design, you must adhere to certain rules:
- Remove or trim the cuticle using the usual method.
- You need to file your nails to the desired shape and required length.
- It is recommended to treat the surface of the plates with a buff and degrease with a special product.
- Cover the nail plate with a colorless base coat.
- If adhesive templates are used, then it is necessary to apply a thin and uniform layer of gel polish.
Particular attention must be paid to ensuring that the stencil fits fairly tightly to the nail plate. This procedure is necessary to ensure that the paint does not leak over the edges and spoil the pattern. The empty space should be painted from the middle to the edges.
A self-leveling topcoat can be used to smooth out the underlying design. To remove the stencil from the nail plate, it is recommended to use tweezers. To do this, you need to grab a corner of the template as close to the nail as possible and carefully remove it.
Design Broken glass
The reflection of light on the material and the transfusion of rays allows you to create an imitation of broken glass:
- It is necessary to prepare your nails - give them the desired shape, remove the cuticle and remove the shine with a buff.
- Prepare pieces from a special film of different sizes and shapes.
- Degrease your nails and cover them with a base product, dry in a lamp.
- Coat your nails twice with gel polish, and dry each layer in a lamp. A good basis for this manicure would be a combination of glossy and matte textures.
- The place where the pieces of film will be placed must be covered with topcoat. The layer should be very thin. Then, using an orange stick dipped in the top, you can lay out the previously prepared pieces in any shape. Dry the result in a lamp.
- After this procedure, fix the design in two layers with topcoat, dry it in a lamp and remove the stickiness.
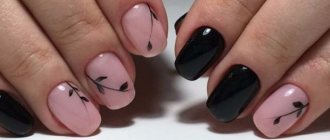
Abstraction
The main advantage of abstraction is its versatility, be it a formal event, a business meeting or everyday life. This design looks original in combination with foil.
Making such a manicure design is quite simple, if you consider the rules:
- Prepare your nails, then coat them with an acid-free primer and wait until it is completely absorbed.
- Distribute the base layer and polymerize it under the lamp.
- Choose a varnish of calm tones with good pigmentation and medium fluidity.
- Wait until the color layer polymerizes, after which you can begin the decorating process.
- Using a brush, apply gel polish or acrylic paint to the nail plate with chaotic movements.
- Seal with a glossy or matte topcoat.
Painting Watermelon with a brush
Watermelon manicure design looks great on nails, regardless of their length.
Following the instructions, you can do a manicure yourself:
- Paint your nails with bright red polish and wait until it dries completely.
- Use a brush to apply a stripe of light green color, and on top of deep green.
- Draw a couple of dark lines on the dark stripe, which will resemble stripes of watermelon rind.
- Use black varnish and a thin brush to paint a few dots – watermelon seeds.
- After waiting for complete drying, apply white varnish to small dots on the seeds. This is necessary to create volume in the drawing.
- After the varnish has completely dried, the resulting pattern must be secured with a transparent product.
Gradient
The technique of applying a catchy gradient is simple and suitable for beginners.
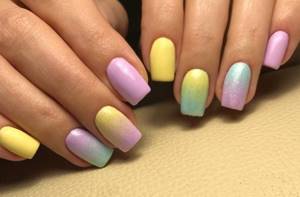
To get a smooth transition of colors, you should follow the instructions:
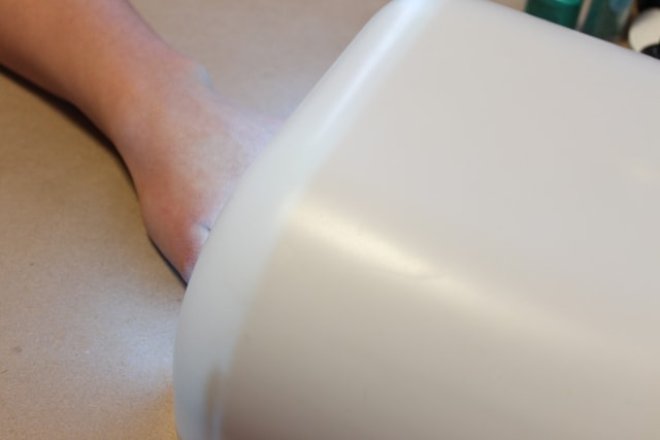
- Apply even stripes of different shades of gel polish onto a sponge or sponge, let it absorb a little. For a neat transition of colors, it is recommended to use the most loose sponges.
- Place the sponge firmly on the nail plate and hold until one color transitions to another.
- Apply a transparent sealer to a well-dried coating.
Lunar manicure with gel polish, acrylic
Moon manicure looks good on both long and short nails.
Step by step application process:
- Apply base varnish to previously prepared nails.
- Apply the template so that it extends beyond the base of the nail plate, resulting in a crescent moon.
- Cover the unpainted part of the nail with a different shade of varnish.
- The manicure should be secured with colorless varnish, applying a thin layer.
- Apply the second coat of varnish after the first has dried, otherwise bubbles may form.
Gel polish application process
Under no circumstances touch the nail surface after drying under the lamp: oil from the skin remains on the nail, which can make the coating brittle, and then your manicure will only last for a few days.
- We degrease the nail surface and wait until the product is completely absorbed. This is done in order to remove any excess residue from the nails.
- Apply a thin layer of primer. It is necessary to increase the service life of our manicure.
- After this, cover the nail with a thin layer of base coat and dry it under the lamp for 2 minutes. Now the main color will lie as evenly as possible.

- After drying, apply a thin layer of colored gel polish (top coat) with a brush and dry the nails again under the lamp.
- Apply a second thin layer of gel polish in the same way and dry it under the lamp. Remember: the thinner the applied layer, the more natural your manicure will look. In addition, when using gel polish in a manicure, you can apply several layers, but each of them must be dried under a lamp after application.
- To consolidate our spectacular result, we apply transparent gel polish , which will extend the life of our manicure up to five weeks and keep it looking fresh.
- We dry the final result under the lamp for a couple of minutes.
- Now we blot the napkin with boric alcohol or a degreasing compound and remove the sticky layer that forms as a result of drying under the lamp.
Pros of using the gel
Now that you know how to use gel nail polish and even watched the video, you can talk about why you should choose this particular coating. The rather high cost of this varnish is compensated by its durability, both on nails and just in the bottle. And its use is quite multifaceted.
Gel polish manicure lessons are very popular, as many fashionistas have already realized that such a coating can solve a number of nail problems. It mechanically strengthens the plate and protects it from damage. Even very brittle nails will remain intact under it. In addition, delamination, cracks, chips and other unpleasant features characteristic of weak nails are effectively prevented.
Gel polish on nails
As the video tutorial on gel polish shows, the procedure is radically different from extensions using tips. As the nail grows, only the unpainted gap between the border of the coating and the cuticle is visible. There is no other boundary between your nail and the gel, and the one we have described does not catch the eye of an outside observer at all.
If you understand well how to properly coat your nails with gel polish and prepare them for this, then your nails will be at minimal risk. At least, significantly less than with extensions, since the own plate is not cut off. It is only slightly polished with a buff. The color range of this coating is quite varied, but, of course, narrower than that of conventional varnishes. However, it is constantly expanding by manufacturers.
Gel polish removal process
Under no circumstances should you remove gel polish from the nail surface without first softening it - scratches and snags will remain, which will greatly spoil the appearance of your nails. To speed up the process, you can use a buff - it will help remove remnants of gel polish and remove the dispersed layer.

- From a napkin or cotton pad cut into pieces, the size of which should be slightly larger than the shape of the nail.

- Wet the resulting piece with nail polish remover and spread on the nail surface. The gel will soften and begin to peel off.

- Every finger wrap it in foil and go about our business for about fifteen to twenty minutes.
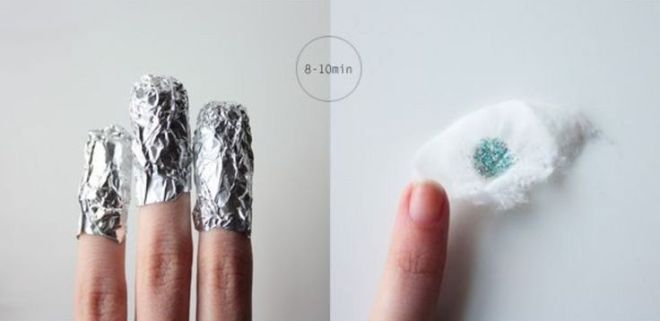
- Unroll the foil and remove the cotton pieces.
- Using an orange stick or cotton pads, remove the remaining gel polish . Repeat the softening procedure if necessary.
- Polish the nails thoroughly with a nail file.
- Using scented soap, wash your hands thoroughly.
- After all of the above, apply your favorite moisturizer .
Training on how to create a manicure and apply gel polish through video tutorials
Visual perception plays a very important role in our daily lives, helping in learning and making it possible to convey important information quickly and clearly. First we look, then we process what we see and in a matter of minutes we understand what needs to be done.
In the modern world, most women perceive visual information much better than huge canvases with many letters. Therefore, I suggest you watch a few video tutorials on how to create a manicure with gel polish . I tried to make for you a selection of the most useful video materials, which at one time helped me a lot in becoming a professional in the field of creating gel polish manicure.
Videos for beginners
Video tutorial No. 1 “Full review: starter kit for gel polish. Part 1"
Video tutorial No. 2 “Full review: starter kit for gel polish. Part 2"
Video lesson No. 3 “Removing the old coating and making a new one”
Video tutorial No. 4 “Gel polish manicure at home with a detailed discussion of all sorts of subtleties”
Video tutorial No. 5 “How to apply/remove gel polish”
Video master class from professional cosmetologists
Video No. 1 “Step-by-step instructions for applying gel polish”
Video No. 2 “Three effective ways to remove gel polish”
Video No. 3 “Removing gel polish with a cutter + hardware manicure. Part 1"
Video No. 4 “Complicated repair, extension and straightening of nails. Part 2"
Video No. 5 “Gel polish correction. Combined manicure for beginners with one cutter. Part 1"
Video No. 6 “Applying gel polish under the cuticle: leveling + strengthening + highlights. Part 2"