Careful treatment of manicure tools is a conscious necessity on which the health of the master and clients depends. A frivolous attitude to this rule can provoke unpleasant consequences - from inflammation, fungi and mycoses to infection with very dangerous infections such as hepatitis C and HIV.
Do not underestimate the risks, because manicure accessories, along with particles of nails and skin, contain numerous microorganisms, bacteria and viruses. The slightest scratch or wound is enough for them to penetrate the body. Therefore, when it comes to disinfection and sterilization of instruments, it is better to be neat and even perfectionists.
Briefly about the main thing
You need to treat manicure accessories not only in the salon, but also at home. Even if these are personal instruments, they must be kept clean and sterile. This is especially important when performing trim manicures, in which microtrauma is inevitable. But in other cases you should not neglect caution.
When performing a home manicure, you need to disinfect the accessories used after each use. If they are used by one person, you can limit yourself to mechanical cleaning and disinfection. To do this, just wash the accessories with soapy water, rinse with clean water, dry and treat with an antiseptic. But for all accessories for non-individual use, sterilization is also necessary.
Types of cutters according to rigidity - colored notches
The cutters are hard, medium, soft and very soft. Depending on this, they are recommended for working with leather, gel polish, acrylic and gel nail extensions. The degree of softness/hardness is marked with a colored ring. What does each color of the notch mean:
Black . Rigid cutters used exclusively for processing extended nails.
Green . Rigid cutters designed for removing acrylic, acrylic, gel, gel polish. In pedicures, green tips can be used gently to remove rough skin. Not suitable for clients with sensitive skin or hyperhidrosis.
Blue . Indicates medium hardness. The attachments are designed for working with leather. Not for the nail plate. Also, in some cases, they can be used to remove soft artificial coatings - gel polish and acrylic.
Red . The color marks the soft cutters, which can be used for both the skin and the nail plate. There are diamond cutters with two red serrations, which means increased softness.
Yellow . Soft cutters recommended for working on natural nails and sensitive, thin skin.
White . The softest attachments for sensitive skin and fine work on the nail plate.
Stages of disinfection of manicure instruments
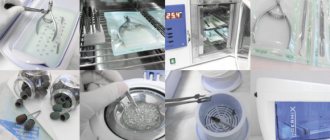
In beauty salons, the processing of manicure tools always includes 4 stages:
- Disinfection – immediately after use, accessories are placed in a bath with a disinfecting solution, an ultrasonic bath or a UV box. To eliminate the risk of infection, the technician takes the devices with tweezers or hands wearing protective gloves.
- Mechanical cleaning. Disinfected products are washed with ordinary soapy water, rinsed with water and dried.
- Sterilization. It is performed in an autoclave, dry-heat oven or glasperlene sterilizer. At this stage, even persistent microorganisms, spores of bacteria and viruses are destroyed.
- Storage. Carried out in craft bags and UV chambers until the next use of accessories, but no more than 30 days.
SanPiN requirements
Disinfection and sterilization of a manicurist's working tools is regulated by sanitary and epidemiological rules and regulations (SanPiN). They apply to beauty salons and services provided at home. Failure to properly sterilize is considered a violation of the law, and a salon owner who does not follow safety rules may face unpleasant consequences, ranging from fines to being banned from operating.
The SanPiN requirements clearly state that instruments intended for reusable use must be washed, then disinfected and sterilized. A separate employee must monitor the process, but more often the masters themselves do this. In order for the disinfection and subsequent sterilization procedure to proceed without violations, it is necessary to keep a log and carefully monitor the cleanliness of accessories. It is important to use high-quality and modern equipment.
Disinfection rules
Disinfecting manicure and pedicure instruments means cleaning their surface from germs, bacteria and infectious agents. For these purposes, disinfectants, antiseptics, ultrasonic baths, boiling and other means are used. It is important to understand that boiling is a method of disinfection, but not sterilization. Sterility is achieved at temperatures up to 180 °C.
The most convenient and reliable method of disinfecting manicure accessories is soaking them in a disinfectant solution of special chemicals. Among them, the following have proven themselves to be excellent:
- Disinfectant concentrate MultiDez Teflex is a highly effective product with excellent cleaning ability without foaming, powerful antimicrobial and sporicidal effects. After use, it leaves a barely noticeable film on the surface, which provides a residual antimicrobial effect. The product is suitable for use in ultrasonic cleaners. Does not cause corrosion of metals.
For disinfection, a 2% and 2.5% solution of this drug is used, and for sterilization - 4% and 5%. The holding time for instruments is 30 minutes for less concentrated solutions and 15 minutes for more saturated solutions.
- Kon from Rio Profi is an antiseptic that kills fungi, bacteria and viruses. Suitable for use in ultrasonic cleaners. Used in the form of 5%, 8% and 10% solution. The holding time for disinfected items is at least 20 minutes. Disinfects objects from bacteria, viruses, fungi, including candidiasis and tuberculosis.
- “Alaminol” from Irisk Professional is an antiseptic preparation for disinfection and cleaning of instruments before sterilization. Used in the form of 5%, 8% and 10% solution. To treat accessories in ultrasonic baths, an 8% solution is used. Effectively kills bacteria, fungi, viruses. Suitable for disinfecting objects made of metal, glass, plastic.
- "InstrumDez" from PharmCosmetic/Livsi is an antiseptic drug used for disinfection and sterilization of manicure and pedicure accessories. Has a detrimental effect on microorganisms. Does not cause corrosion of metal devices. Diluted in proportions 1:20. The duration of processing of disinfected items is at least half an hour. After treatment, products require a 3-minute rinse with running water.
- "Optimax Prof" from Irisk Professional is a universal disinfectant with a powerful effect against pathogenic microorganisms and infectious agents. Manicure accessories are disinfected by immersion in a 1%, 2% or 3% solution of this drug for an hour.
After disinfection using the soaking method, instruments should be removed from the disinfecting container with tweezers or gloved hands to prevent harmful effects of chemicals on the skin.
How to sterilize milling attachments at home
A regular oven will help. It is used according to the principle of a dry-heat oven:
- cutters are cleaned, disinfected and washed in running water and soap;
- the oven heats up to 180-200 degrees;
- Place food foil on a baking sheet and sterilizable cutters on top;
- sterilize the attachments for 20 minutes, after which the oven must be turned off and opened;
- After another 20 minutes, the instruments can be removed one at a time and sealed.
Before sterilizing manicure cutters, the oven must be thoroughly cleaned of grease, dirt and food debris, and then also of detergents. Otherwise, the abrasive surface will absorb kitchen dirt.
Basics of sterilizing cosmetic instruments
With proper sterilization of manicure instruments, harmful microorganisms are completely destroyed, including fungal spores and persistent infections such as hepatitis C. The treated surface becomes perfectly clean, and the items become absolutely safe for use. As a result, the risk of infection through manicure and pedicure accessories is reduced to zero.
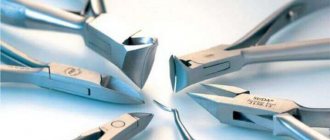
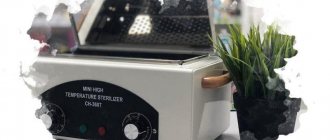
In a professional environment, special equipment is used for such processing - sterilizers. They are used to disinfect nippers, scissors, cutters, pushers, files and other reusable accessories.
Depending on the type of device used, the procedure lasts 40–60 minutes. Sterility is achieved through high temperature. To treat cosmetics that cannot be heated to 180°C, radiation and disinfectant solutions are used.
Dry heat cabinet
Dry heaters work on the principle of an oven and kill pathogenic microflora with dry hot air circulating in the space of the working chamber. Heat-resistant accessories are placed in a tray and sterilized for 60 minutes at 180 °C. This is a standard processing mode, but you can set other parameters on the control panel - set a timer from 5 to 90 minutes and select a temperature from 50 to 200 °C.
Depending on the model of equipment used, the tools are placed in the dry-heat chamber in craft bags or without them, simply laid out on a wire rack inside the cabinet. Upon completion of processing you need:
- carefully open the cover of the device;
- remove the tray;
- place it on a previously prepared surface;
- wait for the accessories to cool completely.
A dry-heat oven is considered the most effective equipment for destroying microorganisms, viruses and infectious agents. It does not cause corrosion to metal objects and can be used to disinfect any heat-resistant accessories.
Autoclave
Disinfection of cosmetic accessories in an autoclave occurs using hot steam under pressure. Pathogenic microflora is destroyed due to a temperature of 110–140 ° C and due to the rupture of the membranes by pressure. The treatment lasts only 20–30 minutes. Exposure to hot steam is suitable for silicone and glass accessories that are not prone to corrosion.
Glasperlene Ball Sterilizer
This equipment is used for quick disinfection of manicure and pedicure accessories immediately before procedures. Sterilization is carried out using the high-temperature treatment method. Metal parts of cosmetic accessories are immersed for 20–30 seconds in small balls preheated to 160–180 °C.
Under the influence of high temperature, pathogenic microorganisms are destroyed, and the instruments become safe for use. At the same time, they do not become dull, because... high temperature exposure is short-term.
Glasperlene sterilizers are widely used both in beauty salons and at home. They are suitable for disinfecting scissors, tweezers, nippers and other miniature instruments. Only their working part is immersed in the heated balls, and the handles remain outside and are not sterilized.
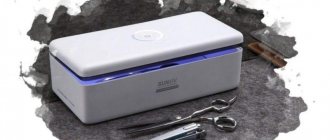
Quartz devices
Quartz treatment is successfully used to disinfect files and other manicure and pedicure instruments. A device for quartz treatment disinfects accessories in 15 minutes and is especially convenient for craftsmen working at home. The tools are placed in the box, and after closing the lid, the device starts working. You can open it 10–15 minutes after the completion of the treatment session.
Ultrasonic devices
Treatment with high-frequency ultrasonic waves allows you to clean tools from grease, dust and other contaminants. The action of ultrasonic devices is absolutely harmless, but at the same time provides effective cleaning and disinfection. Burs, cutters and other cosmetic accessories are placed in the reservoir for 5-30 minutes. For enhanced cleaning, detergent is added to the water.
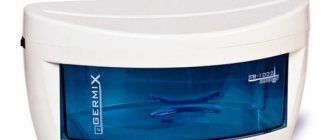
Ultraviolet cameras
Such devices are used for the safe storage of cosmetic accessories that have been disinfected. Ultraviolet light kills germs and bacteria, ensuring hygiene standards are maintained.
This equipment is intended for complex use in combination with other sterilization devices. By providing protection against microscopic particles of dust, viruses and bacteria getting on the surface, UV cameras prolong the achieved sterility effect. If during normal storage in a craft bag sterility is maintained for 3 days, then under the conditions of an ultraviolet chamber the instruments remain sterile for up to 30 days.
The operating principle of the UV camera is based on the irradiating effect of a bactericidal lamp. It is absolutely safe for people and tools, including allowing you to store manicure and pedicure accessories made of metal, wood and plastic. Professional cosmetologists and manicurists value UV cameras for their mobility, compactness and ease of use.
How are nail files processed at home?
It would seem, why disinfect manicure tools at home if only one person uses them? This is because the salons have a lot of traffic and therefore it’s impossible without it. But this is a misconception, because even on homemade nail files, microbes accumulate over time.
Disinfection is carried out with antiseptics or special ready-made solutions. But there is an option to make the solution yourself:
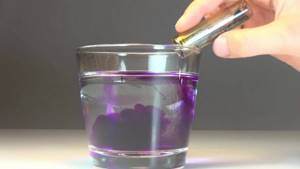
- 100 g of alcohol and 10 g of boric acid salt are poured into a small container.
- Then the container must be covered with a lid.
- The solution must be stirred periodically until a cloudy liquid is obtained.
- After this, add 30 g of potassium permanganate.
- The solution should turn out pink with a purple tint.
- The files are placed in this solution and placed in a steam bath.
- It is necessary to hold the instruments for no more than fifteen minutes, and the temperature should not exceed 50°C.
There is another simple way to sterilize - the oven. Files are processed as follows:
- First, manicure tools should be disinfected.
- After this they need to be washed.
- Then all the files are thoroughly wiped with napkins.
- The next step is to lay out the tools on an open surface; it is advisable to use foil. Moreover, this must be done in such a way that they do not come into contact with each other.
- Sterilization takes place at a temperature of 180 to 200 degrees.
- After fifteen minutes the oven is turned off.
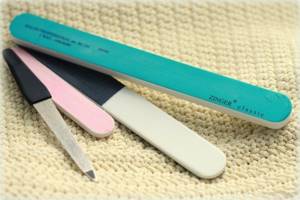
It should also be understood that this processing method is not suitable for all instruments. Instead of the oven, you can simply boil all the files for about fifteen or twenty minutes.
Methods of disinfection and sterilization of instruments
Depending on the conditions of use of manicure devices, their processing can be minimal, standard or professional. Minimal processing is only permissible at home, while professional processing provides an almost medical level of sterility.
Minimum program - for disinfection at home
This method allows you to save on the purchase of professional sterilizers. In terms of effectiveness, it is inferior to standard and professional treatment, but is considered acceptable for use at home. It is performed according to the following algorithm:
- Disinfection of manicure instruments - performed immediately after the manicure procedure to prevent particles of biomaterials from spreading in space. You need to pour water into a container or box for disinfection and add a special disinfectant, for example, Kon, InstrumDez or Rionol. Cosmetics are immersed in the prepared solution and left for 15–30 minutes.
The solution is made according to the instructions - the amount of the drug recommended by the manufacturer is added to the water using a measuring cup or a disposable syringe. When diluting the concentrate, you need to wear protective gloves and a medical mask to protect your skin and respiratory organs.
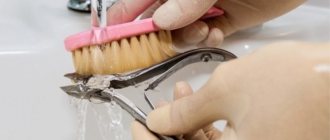
- Cleaning. The devices are washed individually using a brush and detergent under running water until all visible dirt is removed, and then wiped with disposable napkins or dried on a wire rack.
- Sterilization. Disinfected and cleaned manicure accessories are placed in sterilization bags, placed in the oven and kept in the oven for 15 minutes at 180°C. This value must not be exceeded so that the devices do not lose their strength.
- Storage. Treated accessories are stored in closed craft bags until further use. The storage duration can be up to 30 days.
Standard processing
This method is used in beauty salons that do not have an autoclave or dry-heat oven. Its peculiarity lies in the use of a glasperlene (ball) sterilizer and a change in the order of steps: the devices are first sent for storage in a UV chamber, and are sterilized only before direct use.
The algorithm for standard processing of cosmetic accessories looks like this:
- Disinfection and cleaning in an ultrasonic cleaner - 2 procedures at once. The sink bowl is filled with water and disinfectant so that after immersing manicure accessories in it, the MAX level is not exceeded. In this case, the accessories to be cleaned must be completely immersed in water. Small items are placed in a special basket and then in a bowl. After closing the lid, the sink is connected to the power supply, the cleaning time is set to 15 minutes, and disinfection treatment occurs.
Note: In the absence of an ultrasonic cleaner, accessories are disinfected in a disinfection box, followed by rinsing with a washing solution and a brush under running water.
- Washing, drying and checking. At the end of the cleaning session, items are removed from the ultrasonic cleaner, washed and dried. After drying, they are carefully inspected for dirt, chips or scratches.
- Storage in a UV chamber or airtight box until use.
- Sterilization. Before use, the accessories are removed from the UV chamber, and their metal working part is placed in a preheated glasperlene sterilizer. The high temperature treatment process lasts 20 seconds. This time is enough to remove microorganism spores, and the instrument does not have time to experience negative temperature effects.
Maximum program – 100% sterility
Disinfection and sterilization of manicure instruments using this method ensures almost surgical sterility and allows 100% compliance with sanitary and hygienic requirements. The main difference between this method and previous options is the use of a dry-heat oven. Otherwise the technologies are similar:
- Disinfection + pre-sterilization cleaning in an ultrasonic cleaner, as in the standard method.
- Washing, drying and inspection.
- Sterilization. Accessories are placed in craft bags, sealed and processed in a dry-heat oven for 60 minutes at 180 °C. The temperature regime is maintained automatically. There is no need to set a higher temperature so as not to damage the instruments. When the set time has elapsed, a beep will sound and the power will be turned off.
- Storage. Disinfected accessories are stored in closed craft bags until further use. It is advisable to store them in a UV chamber, but they can also be kept in sealed boxes. The maximum level of sterility in such conditions is maintained for up to 30 days.
Boiling
This is one of the popular methods for disinfecting manicure tools at home. This method was also used by asclepiads - ancient doctors used them for medical devices. Tools must be washed in advance with soapy water to remove any remaining skin, nails, and dirt. They are then placed in boiling distilled water and disinfected for about 20 minutes.
Then you need to remove it with tongs and place it on a prepared towel. The devices should dry naturally without cooling with cold water. A sharp change in temperature can ruin even reliable metal.
Boiling water disinfects tools, but not all metals can withstand this disinfection. Regular procedures affect the quality of tools: scissors become dull and small elements become deformed.
Typical mistakes in disinfecting instruments
Mistake #1 – neglecting to use gloves and disinfect hands and all surfaces. For a safe manicure, it is necessary to disinfect not only the tools used, but the workplace and hands. All surfaces that you come into contact with must be perfectly clean.
Therefore, it is important to work with gloves and thoroughly disinfect hands and all surfaces. Disinfectant sprays, liquid antiseptics, gels, hand sanitizers and surface disinfectants are excellent for these purposes. You should always disinfect your hands and surfaces, even if you are only doing a manicure for yourself.
Mistake No. 2 – use only alcohol or boiling to treat tools. Such disinfection is permissible only for instruments for individual use. If cosmetic accessories are used to work with other people, more thorough protection against bacteria and viruses is necessary. This can only be achieved by sterilization at high temperatures - up to 180 °C.
Mistake No. 3 – incorrect choice of equipment for sterilization. It is best to sterilize scissors, tweezers, pushers, cutters, cutters and other metal tools in a dry-heat oven to ensure that all harmful microorganisms and their spores are destroyed. The heating temperature should not exceed 180 °C, so as not to dull the tools. The same treatment applies to ceramic and corundum cutters.
Instead of dry heat, you can use a glasperlene ball sterilizer, but with its help only the working parts of the instruments are processed. Disinfection with hot steam (110–140 °C) and pressure in an autoclave is suitable for treating cosmetics made of silicone and glass.
For accessories that cannot withstand high-temperature treatment, chemical sterilization with powerful reagents is performed. Files and polishing buffs made of plastic materials are disinfected with a disinfectant and stored in a UV chamber.
Mistake #4 – improper storage of tools. To keep sterilized instruments clean, they should be stored in craft bags or airtight boxes. The shelf life of sterile supplies in them can be up to 3 days. Sterility can be maintained for up to 30 days by storing in a UV chamber.
Common Questions

How often to change beads in a Glasperlene sterilizer
Replacement is carried out once a year or as the balls deteriorate. A signal that the contents need to be changed is when the color of the balls changes from transparent to yellow or becomes cloudy.
How much do sterilizer balls cost?
The price directly depends on the manufacturer and packaging volume. On average, 300 gr. balls cost from 150 to 400 rubles.
How many balls should I put in the device?
For stable operation, it is required to fill the container at least 2/3 of the way, leaving at least 1.5 cm from the edge of the bowl.
Safety cutters
The conditions for safe use of a cutter are compliance with the basic rules of work.
Such criteria include:
- incline;
- pressure intensity;
- position angle;
- aggressiveness of the instrument.
99% of attachments will be dangerous if mishandled.
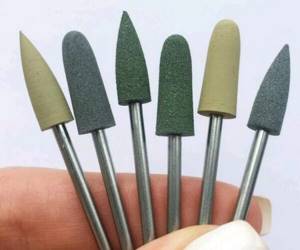
The first category of safe cutters is Silicone Carbide Grinders. They consist of a mixture of silicone with carbide chips, giving it the desired shape for manipulation in manicure. They are convenient for cleaning ridges and pterygium from the nail plate.
Silicone carbide grinders come in different shades, which are responsible for marking the abrasive. Possible colors are green, gray, brown.
- The softest ones are green. Only polish the skin: fine grinding and polishing of the nail plate.
- Gray is a more functional sander. Removes small burrs and dry areas.
- Brown is the most functional, as it polishes both the cut and the skin, and removes pterygium from the nail plate. It is the brown silicone carbide grinder that can be called a safe attachment. It has a soft and elastic surface with small abrasive inclusions, which removes only soft tissues, and cannot damage the nail or strong skin.
The second category of safe ones is Corundum stones . Used to polish the skin and clean off the pterygium. They are considered safe, but do not forget that this is a stone. Its difference is that the surface does not consist of bulges, but of small pores and depressions that capture and clean the skin. If the pressure and position in relation to the work surface are incorrect, it is still capable of making cuts.
Safe cutter “Oney Clean” - without abrasive, with blades. It can be used to remove pterygium from the nail plate without scratching it, and also lift the stuck cuticle. Like any rotary tool, it requires careful operation. If you grip incorrectly and apply intense pressure, you can make cuts with it.
