Ways to Create Pineapple Nail Designs
There are several ways to create a fruit manicure. Below we will show you step by step how you can create a pineapple on your nails.
- 1
StickersWith them, the designs on your nails will be ready in just a couple of minutes. This is the easiest way to create nail art. All you need to do is apply a base varnish, which will serve as the background for the design. When the polish is dry, you can transfer the stickers or sliders to your nails, then all that remains is to cover them with top coat. In general, you can do without this: there are stickers with designs on the entire nail, which you just need to adjust to their shape, cutting off the excess.
- 2
StencilsYou can buy ready-made stencils or make them yourself - print out small drawings of a pineapple and cut out along the contour. They are easy to work with - you apply them to the nail plate, apply varnish on top, and then remove the stencil. The drawing is ready! All that remains is to complement it with decor, if necessary.
- 3
Hand paintedOn the one hand, this is the most difficult option: artistic abilities are needed. On the other hand, the result will turn out exactly the way you want.
Other design ideas
There are many options for manicure with pineapples. Both artistic painting and schematic images are popular, which will come in very handy for those who do not know how to draw well.
You can resort to using a stamp, which works on the principle of printing. Just dip it in the varnish of the desired color and apply it to the nail - you will get a ready-made drawing with fruits.
If you still draw pineapples by hand, they will look beautiful on a white background and framed in gold or with yellow-green rhinestones. Drawn green leaves will be a beautiful addition.
You can depict the fruit not as a whole, but in cross-section, as a slice. On the other nail you can draw a ponytail. A voluminous pineapple made using acrylic technique looks beautiful, but only a specialist can make this option.
To perform a manicure in pastel colors, choose light colors; pineapples are also painted dimly. This option is suitable for those who, due to strict work constraints, cannot afford flashy colors.
You can make a voluminous manicure at home with this fruit. To do this, you need to take yellow varnish and apply a thick layer, or better yet several layers, onto the foil. Let it dry. Then cut it into even squares with a blade or pocket knife.
Cover your nails with green varnish, and place the squares on a non-dried layer of varnish or let the varnish dry and stick. Then cover with top.
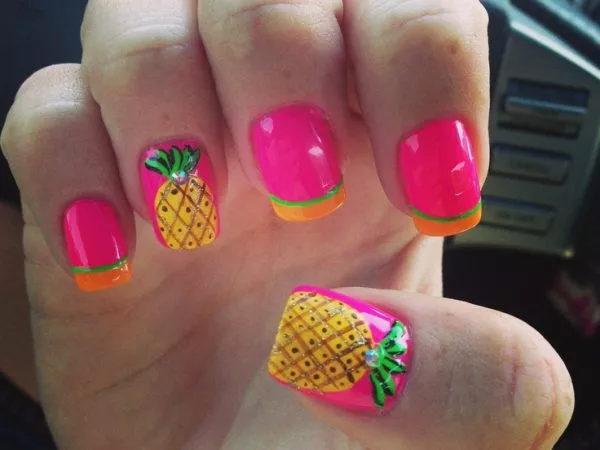
A manicure with this exotic fruit can highlight any look and add zest to it. It will suit every girl and will lift her spirits with its bright colors in any weather.
Creation technique
Those who are going to do such a manicure in a salon should first decide on the technique. Some of them can be done at home, but it is better to entrust your nails to a professional, because he is the one who knows how to correctly achieve a beautiful result.
The most popular techniques in which you can do a manicure with an exotic fruit:
- using gel polish;
- using rhinestones;
- artistic painting;
- stamping - applying a pattern according to the type of printing.
Another option for those who are hesitant to use a brush is sliders. These are stickers, the design of which can be transferred to the nail using water. It works on the principle of a transferable sticker - a couple of seconds and you're done. The coating must be secured with colorless varnish. Especially relevant for short nails.
Using gel polish
Gel polish differs from regular polish in its durability and beautiful, uniform shine. A manicure done using this technique will last for 2 weeks.
For this you will need the following materials:
- manicure set;
- buff;
- cuticle softener;
- primer;
- degreaser;
- top coating;
- remover;
- gel polish of the selected color.
We create a drawing with gel polish step by step:
- do a manicure, cut the cuticle;
- polish the nails with a buff;
- degrease;
- apply primer;
- then we use the base coat: place each finger under a UV lamp for 2 minutes;
- Apply the desired color, dry with a lamp for 3-4 minutes:
- at this stage you can start painting the pineapple with varnish; you can use regular varnish;
- outline the part of the nail on which the fruit will be located (the entire nail plate or half of it): fill its middle with yellow, and draw an oblique cell with black, decorate the pineapple with a green tail - the drawing is ready;
- Apply the top coat to the drawing and hold it under the lamp for 2 minutes.
Rhinestone design
The pineapple manicure design is suitable for coating with both gel polish and regular polish. The list of necessary materials for these processes is almost the same.
Materials for manicure with rhinestones for regular polish:
- clear nail polish;
- colored varnish;
- rhinestones;
- glue;
- thin brush;
- dots;
- finishing coating;
- cotton buds.
To make a drawing with rhinestones, you need to follow these steps step by step:
- cover your nails with colorless varnish;
- apply colored varnish in 2 layers;
- to depict a pineapple - to do this, use a thin brush to make an oval outline, draw an oblique cell in it, and add foliage;
- using a thin brush, drop a little special glue into pre-designated areas;
- lay out rhinestones using dots or tweezers - you can fill the entire pineapple with rhinestones, thus creating a voluminous convex pattern, or decorate with stones in several places;
- cover with top.
Execution Features
Fruits add freshness to the whole look. A pineapple manicure design is suitable for young, energetic girls who want to emphasize their individuality. They can decorate all their nails or individual fingers with these fruits.
Finger selection
The pineapple can be drawn as an accent on one or more fingers. This option is more sophisticated and suitable for women of any age. Moreover, it is not necessary that the nails on the fingers of both hands be painted symmetrically.
On the right hand, you can draw a pineapple on the ring and middle fingers, and on the left - on the index and middle fingers. The combination can be selected to suit every taste and in any order. The remaining nails can be covered with one color, or a variation of the French, moon or other manicure can be done.
You can draw one fruit on the entire nail or several small ones on one finger. It can be covered with rhinestones or sparkles, or it can be completely matte - all these options will look beautiful in their own way.
Pineapple on nails is not only a summer option, it can be done at any time of the year. It will go well with casual, sport-chic and even classic clothing styles. This design is suitable for going to any holiday. It will look harmonious at beach parties.
Color spectrum
The manicure design does not provide for any specific colors. They can be very diverse. The main requirement is that the color should not be dull. The drawing should be done in bright colors; pastels are used less often.
For those who are not good at drawing, but want to make such an image at home, there are convenient ways. You can use stamps or draw a pineapple schematically. This option can look very interesting.
A manicure done in the following colors looks best:
- yellow;
- green;
- orange;
- black or brown.
The drawing looks very laconic on a white background, but you can experiment with color and make the image on pastel colors or on a red background. To prevent the drawing from getting lost in the background, it is outlined in black.
Cheerful nail art with bright bananas
There are many manicure styles and design options: strict, classic, festive and playful. Each of them is appropriate to its own case. The New Year is approaching, the hostess of which will be the Fire Monkey, which means it’s time to get a manicure with bananas! The mistress of the year will definitely like it and bring you good luck! If you don’t know how to draw these tropical fruits on your nails, then we will tell you everything and offer you to look at several photos from which you will get many interesting ideas.
How to draw bananas on your nails?
This is basic nail art that even a child can draw. To apply a pattern from today's MK you will need varnish in blue, yellow, black colors, a thin brush and a transparent top coat. Let's take a closer look at the application technique.
- Prepare your nails for manicure - remove the old coating, treat the cuticles, give them the ideal shape.
- Cover your nail plates with blue polish. Once dry, apply a second coat to make the color denser and richer.
- Now you can start painting bananas on your nails. Using a thin brush, paint bananas with yellow varnish - stripes, slightly narrowed and curved towards the edges.
- To give the drawing clarity, frame it with thin, abrupt black strokes.
- Cover your manicure with a clear sealer.
As you can see, drawing bananas is very simple. By spending just 10-15 minutes, you will create a stunning, bright and very trendy manicure that will definitely bring you good luck in the coming year! You can see the result of the steps described above in the photo.
Juicy manicure ideas with bananas
If you don't like blue paints, then you can experiment a little with colors and patterns. There are no strict rules in manicure with bananas, which means that your imagination is not limited in any way. You can draw whatever comes to your mind! And we will give you a little inspiration by inviting you to look at some interesting photos.
Is blue a color that doesn't suit you or doesn't match the shade of your dress? It's okay - try doing a manicure in pink shades, and leave the design exactly the same! Yellow and pink go well together, but the pattern looks more delicate and feminine.
If you cover your nails with a pale pink polish and make the design slightly more complex, you can get a very fun nail art. Opened bananas look more playful and cheerful.
A brighter version of the manicure can be obtained if the background is made saturated yellow, and instead of single bananas, whole bunches are drawn. In this case, you will need varnishes of only two colors - yellow and black. It is in black that the drawing is applied using a thin brush.
Do you want to make your nail art more discreet and stylish? Then add a pea print to your design, and apply a banana design to only one nail. The manicure will look very trendy and fashionable!
These are not all the options for juicy fruit manicure. It can be whatever you want - all you need is a few bubbles of varnish and a little imagination. If desired, you can decorate your nails with rhinestones, change the color scheme, use special stickers and glitter. And on New Year's Eve, you can add a little luxury to your look by painting bananas with shining gold varnish! The main thing is not to be afraid of experiments!
How to draw it yourself?
Salon manicure is always performed neatly, aesthetically and stylishly.
And to please yourself, you can draw a pineapple at home without any artistic skill. In this case, you need to take care of purchasing 2-3 varnishes, a thin brush for painting, a base, a gel top and a fixative. The yellow tropical fruit is in harmony with blue, red, pink, mint backgrounds, as well as white, black, beige and gray. The intensity and brightness of the color can be any.
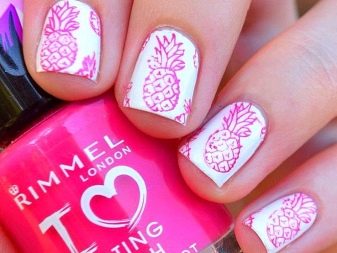
The nail design process should begin with preparing tools and performing a hygienic manicure. Then the manicure is performed step by step.
- A transparent base is applied. It is used to cover the surface of the nails to reduce the harmful effects of varnish and add durability to the manicure.
- The desired background is applied.
- Using a thin brush, one or more yellow ovals are drawn on each nail, which will be the basis of the fruit. You should try to draw them as evenly as possible, and you can use a template or stencil.
- On future fruits, a mesh appears, simulating the texture of the fruit. For this, black or brown varnish is usually used.
- The leafy top of the yellow fruit is shown in green. The contours can also be highlighted with brown or black varnish.
- A gel topcoat and fixative are applied to ensure that the manicure lasts for a long time.
Manicure options with pineapple for long nails: photo ideas
Laconic manicure with pineapples
When deciding to get a manicure with drawings, many are afraid that the result will be childishly frivolous and naive, and not elegant. To prevent this from happening, follow the principle of less is more. Let only one nail on each hand be decorated with a neat design (in our case, with a pineapple), and the others have a monochromatic coating. For example, “On Style” from Essie.
Two-color manicure with pineapples
Another idea for those who appreciate minimalism in manicure is to limit yourself to just two colors. In the case of a pineapple design, it would be most reasonable to choose a yellow shade as the background, and make the design, for example, in black. It will be convenient for them to outline the contours of the fruit, as well as display all the small details in its design.
Pineapples on the tips of your nails
Pineapple designs can be used to create an accent on the tips of your nails, just like in a French manicure. Only more “live” and more interesting. Draw the top or whole half of a pineapple on the tips so that it reaches the middle of the nails and add leaves to it to complete the design.
Graphic pineapple
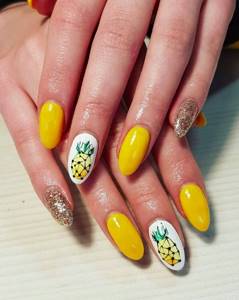
Draw pineapples in a graphic manner and turn your design into real art with these drawings. It is not necessary that there are “masterpieces” on every nail. Even one or two will be enough. They can be supplemented with coatings that match the color of the design on other nails.
What designs do you choose for your summer manicure? Share your opinion!
Yellow manicure trends
Shades of yellow are very diverse. You can use different color options: bright yellow, pale yellow, corn, lemon, orange yellow, saffron, mustard or gold.
You can perform a yellow manicure using various techniques, use glossy or matte finishes and additional decorative elements: rubbing, glitter, rhinestones, foil and manicure sand.
Winter manicure will look great using the sweater technique. This design is reminiscent of intricate knitted patterns with its texture. In addition, the sunny design will bring a warm summer atmosphere.
A huge variety of shades allows you to choose the right option for every fashionista, using interesting rich and deep solid colors or choosing spectacular contrasting combinations.
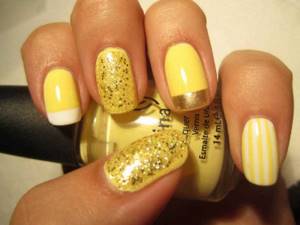
Application methods
Each nail artist has a certain level of skill and techniques for applying designs to the nail plate. The choice of technology depends on the wishes of the client or on the unlimited imagination of the specialist. To create a manicure with pineapples, there are some ways to apply designs on nails.
- The reverse stamping method makes it possible to transfer a finished slider onto the nail. To do this, the surface of the nail plate is covered with varnish of the selected shade. A silicone seal purchased in a specialized store is coated with varnish of a different shade and pressed onto the nail. Finally, the drawing must be secured with clear varnish.
- Nail design using ready-made stickers is called photo design and does not require special skills or a lot of time when creating a manicure.
- Artistic painting is where the true soul of the master is revealed. The technique is considered the most difficult, as it requires attention and certain skills. To paint a pineapple, you need to purchase a thin brush. The design is applied with acrylic varnish or paste-like products for more voluminous images.
How to do a manicure with rhinestones yourself at home?
Choose photos as an example, stock up on the necessary tools and time - voluminous designs with regular varnish take a long time to dry.
To replicate the trendy design, remove the old coating and prep your nails. Manicure, file and sand the plate with a soft buff.
To implement your idea, follow these 5 steps.
- Degrease the surface, apply base, color and finishing layers. Dry the varnish.
- Take a suitable decorative element with tweezers or a special pencil. Apply glue or clear varnish to the substrate. Place the crystal on the nail, repeating the location from the example photo.
- Using a thin brush, apply glue or varnish around the stone, creating a semblance of a border. With such fastening, the design will last longer.
- If necessary, mask large drops of glue or defects with broth in the same color as the coating.
- Let the design dry completely. If drying in a lamp, try to dry the design on several sides. Otherwise, damp gel polish will remain under the rhinestones.
After drying, run your fingers over the layout. If it sticks, gently sand it with a soft buff.
Important: attach rhinestones from large to small. The technique will help create a unified composition, without any out-of-the-way elements.
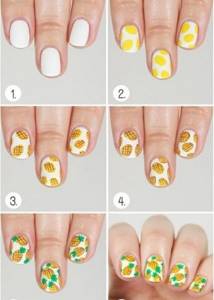
We do it step by step
If you decide to experiment at home and make a pineapple design, we recommend that you pay attention to the following step-by-step instructions. To get started you will need the following materials:
To get started you will need the following materials:
- White, lemon or yellow, brown and green varnishes, transparent coating;
- Thin and medium brushes;
- Nail polish remover.
So, the master class itself:
- Cover all your nails with white, this will be the main color on which our fruits will be placed in the future. Let the varnish dry. You can also choose pink or cream as the main color, the main thing is that it matches harmoniously with the pineapples.
- If your yellow polish doesn't have a very wide brush, use it to paint small circles on your nails, or use a separate brush. This way you will get the shapes of future pineapples.
- Once the yellow spots are dry, use a thin brush to paint them with brown varnish, making a kind of mesh.
- Draw green tails for the fruits.
- Wait until the design is completely dry and cover everything with a clear sealer. If you wish, you can diversify the decor with small rhinestones.
An unusual solution could be a pineapple made entirely of bright yellow rhinestones; it will not only attract attention, but will also look really chic. This design is best done with gel polishes; with regular ones it’s unlikely to last long.
Another pineapple manicure idea is shown in the video below.
Expert advice
It is very important to know that if you want to make a pineapple design on your nails, but you don’t have the time or desire to experiment, feel free to sign up for a beauty salon, where they can easily make your fruit dreams come true. And if your soul requires creativity, then stock up on patience, varnishes and, for example, acrylic paints, which are most often used for painting on nails. They are absolutely safe to use and do not affect the nail plate in any way.
If you are designing with pineapples at home and have experience working with gel polishes, then it is best to give preference to them, because they are easy to paint with acrylic paints, which are very convenient for painting.
If you decide to paint a simple fruit composition using regular varnishes, then be sure to choose fresh options and thoroughly wipe the brush after each new color. You will have to paint at an accelerated pace, because ordinary varnishes dry very quickly.
Don't be afraid to experiment with colors. An excellent solution would be to make two nails white and paint pineapples on them, and cover the others with bright yellow polish. This design will look very juicy.
Sources
- https://wlooks.ru/lak/dlya-nogtej/manikyur-s-ananasami/
- https://VseLady.club/krasota/nogti/dizajn/s-ananasom.html
- https://vplate.ru/manikyur/dizajn/s-ananasami/
- https://HomeManicure.ru/nail-drawings/manikyur-s-ananasami.html
Beautiful ideas
A summer manicure with pineapples and bananas looks stylish and aesthetically pleasing – a white French manicure on a transparent background. On one finger of the hand there are pineapples, and on the finger of the other hand there are bananas. The drawings are made in a delicate yellow color. The nails of the little fingers can be done in a yellow jacket. This style is suitable for a business look and for an evening cocktail dress.
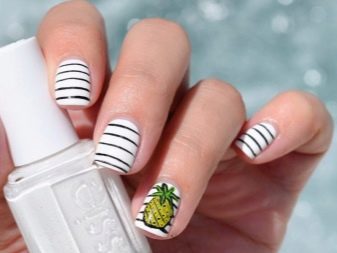
It is worth noting that horizontal stripes in manicure are in fashion now, and their combination with yellow tropical fruits gives a special style that goes well with jeans and short tops, as well as long summer dresses.
To learn how to design nails with pineapples, watch the following video.
Summer option
Pineapple looks interesting on nails in company with other fruits, for example, banana. They are united by their exoticism and have not lost their popularity for a long time.
Materials:
- varnish base;
- white, light yellow, yellow, black or brown varnish.
To make a summer manicure with banana and pineapple, you need:
- cover your nails with a base;
- for pineapple, apply yellow varnish in 2 layers;
- Using a thin brush with brown varnish, draw a mesh and put a dot in each diamond;
- duplicate the lines with white varnish;
- paint over the leaves on the edge of the nail with green;
- finish with top;
- on a light yellow background, draw a sketch of a banana with black varnish with a thin brush;
- paint the banana a brighter yellow;
- cover with top.
The design can be placed on nails that are next to each other: draw a pineapple on the ring finger, and bananas on the middle finger. The remaining fingers can be covered with one color or done with a moon manicure. In addition to banana, you can add lemons, cut oranges, watermelon, strawberries, etc.
It is best to stick to one style when it comes to manicure. If fruits on one nail are drawn graphically, then they should also be depicted on the other fingers.
When is a pineapple manicure appropriate?
Recently, there have been fewer and fewer prejudices regarding issues of style and beauty. Therefore, you can even wear a manicure with a bold nail design anywhere and with anything - even with a trouser suit to the office
True, if unity of style is important to you in your images, you will still have to think in advance whether it is worth deciding on such a nail design
Manicure with pineapples is a typical summer manicure. Drawings with juicy pineapples in nail art are perfect for a beach holiday. At the same time, it is not necessary to make such a design solely for the sake of a trip to the sea. In the city in the summer, this manicure will also look appropriate.
Much depends on how exactly you do the pineapple manicure. If it contains bright neon shades and glitter, then such a nail design will come in handy when creating a look for a party.
And a pastel manicure with pineapple designs, small and neat, can easily become part of a casual look.
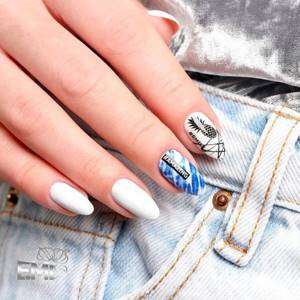
In the second case, choose a neutral shade as the background, such as Essie's Perfect Fit.
nail design ideas with photos and videos
Fruit combinations on marigolds
A manicure with bananas will look unusual on your nails. Yellow goes well with black, blue, mint and white. Brightness largely depends on your taste preferences. Neon shade of varnish or delicate, pastel – the choice is yours.
Intense color still rules this season's summer manicure. However, before you make a nail design in this color, you need to think carefully, will this range of colors suit your look? But if you are not afraid to experiment, then you should definitely try to draw a summer picture with delicious fruits.
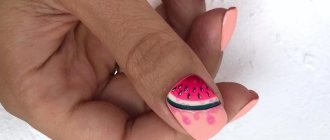
Strawberry, watermelon, pineapple, banana, apple and much more will help decorate your nail plate, keeping you in high spirits every day.
If you want a more luxurious design, use pastel shades for your designs or give preference to fruit drawn on one nail, for example, on the ring finger. Pastel and light shades are ideal: milky, coffee, beige, pale pink, which give the manicure naturalness and grace (see photo).
Types of banana nail art
Bananas are a juicy, bright yellow color that everyone, without exception, associates with summer. You can draw bananas on nails on one nail, or decorate each finger with this image. Bananas go well with stripes and polka dots; you can decorate some nails with golden studs. A simultaneous combination of fruit and moon manicure will look especially fashionable and original. You can also try experimenting with a gradient (there are many photos of similar ideas on the Internet).
The fruity design is perfect for summer. So feel free to decorate yourself with strawberries, watermelons or lemons. It doesn't matter if you are deprived of artistic talent. It’s easy to create a fruit pattern yourself using special stickers with a slider design, which are sold in specialized stores. In addition, they are very easy to stick on your nails yourself.
Bananas and funny monkeys
Performance:
- coat the nails with white base varnish;
- Paint the thumb and middle finger in a beige tone. We will draw monkeys on these nails;
- Using brown varnish and using a thin brush, we will paint the outline of the monkey’s faces as in the photo;
- draw black dots instead of eyes;
- on the remaining nail plates you need to draw bananas;
- Draw an image of fruit in yellow, outlining it with a thin black outline;
- We fix it on top with a fixative varnish.
fimo bananas
Another manicure option with fimo bananas. This fruity manicure will look great on long nails. Fimo is a special plastic for modeling. Craftsmen create plates with different patterns from it - a banana slice, lemon slices, flowers. To ensure that the fimo plates hold tightly, they are coated with a transparent varnish on top.
We will need:
- pink varnish;
- dots with olive and light green paint;
- base coating;
- fimo banana slices;
- pink beads.
https://www.youtube.com/watch?v=https://www.youtube.com/watch?v=ea0LCQMf2EA
Performance:
- all nail plates must be covered with a layer of base varnish;
- cover the tips of the nails with pink varnish;
- add a little topcoat and add fimo bananas;
- draw leaves using dots;
- add pink beads;
- secure the design with a top coat.
You can see what banana fimo sticks for 3D manicure look like in both photos and videos. You can purchase them in specialized stores for manicurists.
As you can see, nail design made from fruits is a fun idea for original girls. Therefore, those who want to take a break from traditional polishes are recommended to try juicy and delicious fruit nail art this season.
nailgid.com
Orange manicure: 134 ideas for any season
In spring and summer you want even more bright colors, and in autumn and winter you especially feel their lack. Therefore, an orange manicure will be the ideal solution at any time of the year! We look at different nail design options in this material.
it will take 9 minutes to read
Text: Victoria Volkova
- Orange manicure 2019: fashion trends
- What colors goes with orange on nails?
- Bright orange manicure ideas
- Subtle orange manicure
- Orange manicure with black
- Orange French
- Options for orange matte manicure
- Orange manicure with rhinestones or sparkles
- Manicure with orange gradient
- Beautiful orange manicure with rubbing
Orange manicure 2019: fashion trends
The most fashionable manicure options for the coming year go perfectly with orange polish. Here are five major new items from the world of trends that are worth taking note.
Nails coated with orange varnish can be complemented with any “metallic” detail: a bead, large glitter or a pattern.
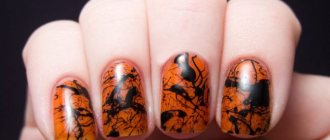
Black graphic patterns, as seen on the Kith show, are one of the top trends for 2022. Adapt the trend to your needs and make the base not transparent, but bright orange!
Nails decorated with “pearls”, “diamonds” and “gold pendants” are at the peak of popularity. Look how beautifully such “jewelry” combines with orange polish!
If you choose one, the most fashionable shade of orange, then in 2019 it will definitely be peach. And this is only to our advantage: with this, both into the feast and into the world!
Nails with a zebra, leopard or snake finish are an important fashion trend. Create this nail design in orange.
Read more about fashionable manicure 2019 here.
