The inventors of shellac, perhaps, could not even imagine that the triumphant procession of gel polish on women’s nails would take place all over the world.
A lot has been said about this breakthrough in the nail industry. But is everything as rosy as shellac manufacturers promise us? Let's figure it out.
You can easily coat your nails with shellac at home if you have all the necessary tools and materials. Many people are interested in the answer to the question of how long it takes to make shellac. Judge for yourself.
The technology, of course, differs from coating nails with regular varnish, but it is not that complicated.
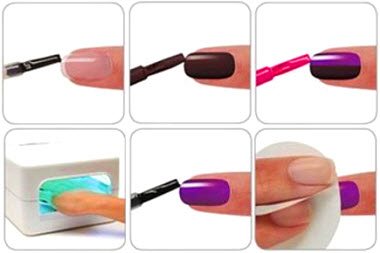
- Before applying colored shellac, you need to degrease your nails and apply a base coat, which must be dried in an ultraviolet lamp for shellac.
- Next, several layers of colored varnish are gradually applied, each layer is also polymerized in a lamp.
- The last layer is a topcoat that protects the colored varnish and gives it shine and durability. On average, these manipulations take from 40 minutes to 1 hour. Even the busiest woman can easily allocate this time. In addition, you can do shellac at home at any time, even at night, but you still need to get to a beauty salon.
To the question of how long it takes to make shellac, the answer will not be so clear.
How long does it take to make shellac at home and how long does it last?
The inventors of shellac, perhaps, could not even imagine that the triumphant procession of gel polish on women’s nails would take place all over the world. A lot has been said about this breakthrough in the nail industry.
But is everything as rosy as shellac manufacturers promise us? Let's figure it out.
You can easily coat your nails with shellac at home if you have all the necessary tools and materials. Many people are interested in the answer to the question of how long it takes to make shellac. Judge for yourself.
The technology, of course, differs from coating nails with regular varnish, but it is not that complicated.
- Before applying colored shellac, you need to degrease your nails and apply a base coat, which must be dried in an ultraviolet lamp for shellac.
- Next, several layers of colored varnish are gradually applied, each layer is also polymerized in a lamp.
- The last layer is a topcoat that protects the colored varnish and gives it shine and durability. On average, these manipulations take from 40 minutes to 1 hour. Even the busiest woman can easily allocate this time. In addition, you can do shellac at home at any time, even at night, but you still need to get to a beauty salon.
To the question of how long it takes to make shellac, the answer will not be so clear.
Most popular questions
When choosing a particular product, women are always concerned about certain points. Let's answer the most popular questions asked by girls who decide to purchase a shellac kit.
- How long does shellac last on nails? Beautiful nails will delight you for at least 14 days. The coating does not crack, and the color does not fade in the sun. The manicure lasts about 2 weeks, even if you did shellac at home and not in a salon from a specialist. The only thing is very important to understand: how long shellac lasts is greatly influenced by adherence to technology. Our step-by-step instructions will help you paint your nails correctly, following all the stages and features of the procedure.
- How to make shellac at home, how difficult is it? The permanent coating hardens only under the influence of UV rays, so before immersing your fingers in the lamp, you can correct any defects. This step-by-step video will help you master shellac at home for beginners, so you can create a beautiful design the first time.
- Is shellac harmful for nails? The original CND coating does not spoil the nails, but on the contrary, strengthens them . Why might shellac not be suitable in some cases? This happens extremely rarely and is associated with individual intolerance to the components, resulting in isolated cases of an allergy to shellac. But the isolated nature of negative manifestations clearly indicates that excessive importance is attached to conversations about the benefits and harms of shellac. Therefore, answering the question whether shellac is harmful, we can say with confidence: “No!”
- How long does the entire shellac nail polishing procedure take? For the first time, DIY shellac is usually done in about an hour. In the future, you will learn how to properly cover your nails, and 30 minutes will be enough for you to complete a manicure.
- How to remove shellac, is it difficult to do? The procedure is quite simple. Under the influence of a special product, shellac quickly peels off, after which it is easily removed from the nails with an orange stick.
- Is it possible to be allergic to shellac? The varnishes contain no dibutyl phthalate, toluene or formaldehyde. Shellac coating can be used without fear, since the original product is hypoallergenic and even odorless. As we noted above, in extremely rare cases, an allergy to shellac was recorded, which was associated with individual intolerance to the components.
- Is it possible to do shellac during pregnancy? As you already understand, high-quality coating is hypoallergenic and safe. Therefore, shellac during pregnancy is an excellent option for decorating nails, especially given the long service life of the coating. If you ask your doctor whether pregnant women can paint their nails at all, then with a high degree of probability the specialist will recommend shellac during pregnancy, and not dangerous formaldehyde varnishes.
- Why doesn't shellac last? The most common reason, of course, is a violation of technology and simply incorrect work with the coating. If you have carefully studied the step-by-step guide, followed all the rules, but cannot properly cover your nails with shellac, pay attention to two reasons why shellac does not stick to your nails. The first is the expired varnish, and the second is a banal counterfeit of the original product. Unfortunately, such cases are not uncommon, especially with the sale of varnishes that have 1-2 months left before the end of their service life.
- How to restore nails after shellac? First of all, you need to understand that the permanent coating, which stays on the nails for several weeks, does not allow the plates to breathe as usual. But this does not mean that the coating itself is harmful. The process of restoring nails after shellac includes several days of rest without decorative manicure, as well as additional care in the form of nourishing masks. You can also try restoring your nail plates using Brazilian or Japanese manicure procedures.
- How often can you do shellac? One of the most controversial questions because the answer to it is very individual. It all depends on the condition and health of your nails and the reaction of the plates to the coating. Those who are doing well wait only 2-3 days before doing shellac again. Other girls can take breaks from 1 week to 1 month. Therefore, in the question of how often to apply the coating, you need to focus on your own nails: are they peeling or thinning, or, conversely, do they look healthy and strong after shellac?
- Should I buy a shellac kit for personal use at home? The cost of the kit may seem too high to you. Believe me, a shellac manicure in a beauty salon will cost you much more, if we talk about 5 or more sessions. In addition, at home you can create your own nail designs, turning your ideas into reality.
It is worth noting
Manufacturers promise weeks of cloudless life with perfect manicure, bright nail color and long-lasting finish. True, they make a reservation. Shellac does not withstand constant water treatments, exposure to detergents, or impacts, for example, on a keyboard.
It turns out that for the average woman, who is responsible for washing dishes, cleaning the apartment and shopping for groceries, shellac becomes something unattainable. But every representative of the fair sex wants to have beautiful and well-groomed nails for a long time.
Rubber gloves save the situation. They will help extend the life of shellac on your nails. Plus, the skin of your hands will be less susceptible to household chemicals and dehydrated. At first it will be inconvenient to do household chores wearing gloves. But believe me, you just need to get used to it.
How long shellac lasts depends only on you. But the optimal time would be
How long to dry the shellac base: sequence of all procedures

As noted above, applying shellac begins with preparing the nail plate .
Remove cuticles in a way convenient for you. Use a file to give your nails the desired length and shape.
An important step is degreasing the nails . This can be done with regular nail polish remover, alcohol or a special degreaser. In any case, you cannot skip this stage, since the durability of the coating directly depends on degreasing.
The main recommendation here is that you should not apply oil to your nails before the procedure. Fat impairs the adhesion of the material to the nail.
Next you should apply the base coat . Here we need a lamp for drying shellac. Opinions differ on how long to dry the shellac base. Everything depends, first of all, on the power of the lamp. The manufacturer strongly recommends drying shellac in 36 W lamps. However, even in lamps of lower power, gel polish polymerizes perfectly, but this will take more time. In fact, it doesn’t matter how long the shellac base was dried. This coating will still remain tacky for better adhesion between the polish and the nail. In lamps with a power of 36 W, 10 seconds will be enough.
Composition of the product
How often can you get a gel polish manicure? Is its composition harmful? In fact, experts say that high-quality gel polish is absolutely harmless. It should usually include the following components:
- A photoinitiator is a substance that protects the nail plate from exposure to ultraviolet rays when drying gel polish. This component is considered completely non-toxic and harmless.
- A film former is a substance that creates a film on the surface of the nails and is responsible for long-lasting manicure wear. How often do corrections need to be made? Everything is very individual, but in most cases the period can reach up to a month.
- Various pigments that determine the color and saturation of the varnish. The more there are, the better.
- Thinners are substances responsible for good adhesion of gel polish to the nail plate.
- Additional fillers - for example, glitter of different sizes and so on.
It is worth noting
The base coat should be as thin as possible and cover the entire nail. Learn to seal even the tip of your nail. This will improve the durability of the coating.
Tinted shellac is applied to the base coat in one or several layers . Each layer must be polymerized in a lamp for 2 minutes.

The final stage is applying the finishing or top coat .
It also dries for 2 minutes. Afterwards, you need to remove the sticky layer using a cloth soaked in alcohol. Finally, treat your nails with cuticle oil. Strictly following the step-by-step instructions will ensure an ideal result and the promised durability of shellac.
Shellac is absolutely harmless, but you still need to give your nails a rest at least every three manicures.
Don't forget about caring procedures, massages, baths.
Finally, I would like to note that short, monochromatic nails have been in fashion for several seasons. This is a very good time to master the procedure for applying shellac at home. Moreover, the above recommendations prove how simple it is. Be on trend and let shellac last a long time!
Source of the article: https://nogtipro.com/shellak/skolko-delaetsja-shellak/
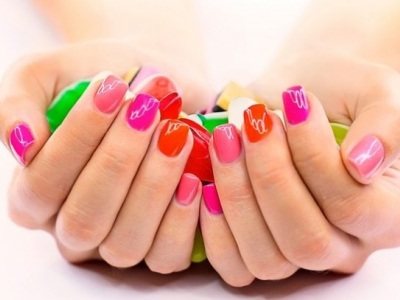
What does shellac look like on nails?
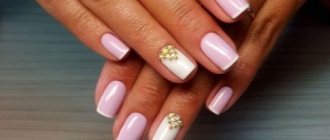
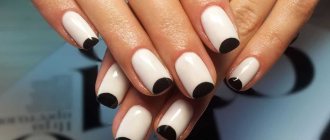
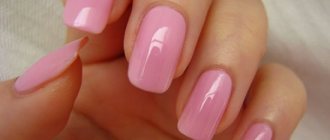
Since shellac manicure lasts a long time, it is very important to come up with a design that you won’t get tired of even after 2 weeks of wear. This is especially true for women who like to experiment with their appearance. Many girls mistakenly believe that permanent nail art is only possible in a single color version. In the photo you can see how elegant and stylish monotonous shades look on nails.
In fact, when choosing shellac as a coating, you are not limited to any limits. Thanks to the rich color palette of varnishes, you have the opportunity to create a unique and vibrant design. How many patterns can be applied using a thin brush or stamping. Don't forget about decorating your nails with sparkles and rhinestones. Such a huge variety of options will allow you to bring your wildest ideas to life. Due to the fact that shellac lasts for a long time, you will have time to thoroughly enjoy the result of your efforts.
Are you interested in the possibility of a long-lasting manicure? Do you want to get interesting ideas and see beautiful compositions? Then be sure to check out the topic about shellac nail design, where we will present to your attention a collection of magnificent photos with shellac coating.
In conclusion, as per tradition, we invite you to watch useful video lessons that will help you consolidate your acquired knowledge. Visual master classes, presented in video format, will sort everything out and answer all your questions. In addition, you can choose a design of the complexity that suits you, depending on your experience and skill. Enjoy watching!
How long does it take to do a shellac manicure at home?
August 12, 2022.
Absolutely any woman without experience or training can do a shellac manicure at home the first time. It is enough to purchase the necessary accessories for the procedure and carefully watch video lessons or several master classes with photos in order to correctly apply gel polish on your nails. Shellac coating is easily applied in thin layers and dries quickly in the ultraviolet rays of a lamp, and a luxurious manicure retains all its decorative properties for several weeks. In order to calculate how long it takes on average to do a shellac manicure, it is important to take into account the condition of the nail plates for preliminary preparation for the procedure and the complexity of the design elements if the plain coating on the nails does not suit you. But even women with minimal experience in applying gel polish usually take 40-50 minutes to complete all stages of the home procedure.
If we briefly describe the sequence of all stages of manicure, then first, the remnants of the old coating with a special liquid are removed from the nail plates, the nails are given the desired shape, the nails are treated with an antiseptic and degreased. Then a base coat, layers of colored shellac and a top coat (finish coat) are applied. Each applied layer is dried in a UV lamp and after polymerization, the sticky layer is removed from the hardened coating with a cleaner.
No matter how much time you spend on shellac manicure, try to protect the decorative coating from strong impacts, exposure to household chemicals, and too frequent contact with hot water. In this case, the durable gel polish coating will stay on the nails for a long time and retain its dazzling shine for at least several weeks.
♦ TIME SPENT FOR EACH STAGE OF THE PROCEDURE
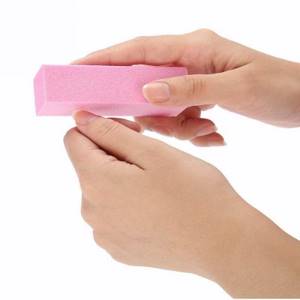
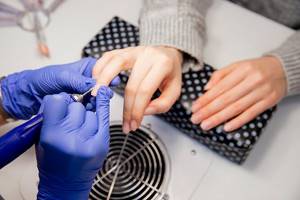
❶ Preparation. At the preparatory stage, we remove the remnants of the previous manicure, give the free edge of the nails the desired shape, polish the surface with a buff, treat the nails with an antiseptic and then with a degreaser (15-30 minutes);
❷ Apply a thin layer of base and seal the end (5-10 minutes);
❸ Polymerization of the base layer in a UV lamp (from 40 seconds to 1.5 minutes, depending on the power of the lamp);
❹ Applying colored gel polish in a thin layer (5-10 minutes);
❺ Polymerization in a UV lamp (1-1.5 minutes);
❻ Applying a second layer of colored gel polish and sealing the end of each nail (8-10 minutes);
❼ Drying in a UV lamp (1.5-2 minutes);
❽ Applying the finishing coat (5 minutes);
❾ Drying the top coat in a UV lamp (1.5-2 minutes);
❿ Removing the sticky (dispersion) layer with a cleaner (2 minutes).
♦ NEW NAIL DESIGNS

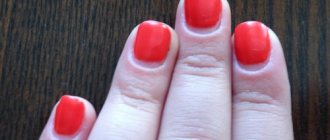
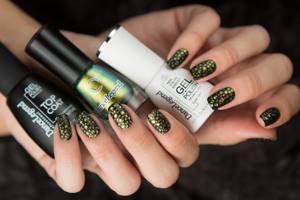
— in the photo: manicure done with gel polish from the shellac line
♦ VIDEO MATERIALS
Dear girls! We will be grateful if you share in the Comments your secrets, experiences and methods of performing a manicure using gel polish from the shellac line at home. If you want to post your photos and video materials on the topic on the site, please write a message to us by email: This e-mail address is being protected from spambots. You need JavaScript enabled to view it
Source of the article: https://bebi.lv/shellak/skolko-po-vremeni-delayetsya-shellak.html
How long does correction of extended nails take?
Nail extensions take 2 - 3 hours, depending on the complexity of the chosen design. Nail correction usually takes 1.5 - 2 hours.
Interesting materials:
How long does it take for a cat to get used to its owner? How long can a red-eared slider live without food? How long does it take to fly to the Sun on a rocket? How long does it take to fly to Jupiter? How long does it take to fly from Ukraine to New York? How long does it take for a moderator to check a name on VK? How long can solar and lunar eclipses last? How long does it take to freeze persimmons? How long can a tourniquet be applied? How long can information be stored on an SSD?
How long does it take to make shellac at home and how long does it last?
But is everything as rosy as shellac manufacturers promise us? Let's figure it out.
You can easily coat your nails with shellac at home if you have all the necessary tools and materials. Many people are interested in the answer to the question of how long it takes to make shellac. Judge for yourself.
The technology, of course, differs from coating nails with regular varnish, but it is not that complicated.
- Before applying colored shellac, you need to degrease your nails and apply a base coat, which must be dried in an ultraviolet lamp for shellac.
- Next, several layers of colored varnish are gradually applied, each layer is also polymerized in a lamp.
- The last layer is a topcoat that protects the colored varnish and gives it shine and durability. On average, these manipulations take from 40 minutes to 1 hour. Even the busiest woman can easily allocate this time. In addition, you can do shellac at home at any time, even at night, but you still need to get to a beauty salon.
To the question of how long it takes to make shellac, the answer will not be so clear.
What products and tools are needed for shellac?
To apply shellac at home, it is recommended to buy the same tools and materials that professionals use in the salon. Working with unprofessional products can result in the coating becoming unstable and unsightly. List of required tools and materials:
- A special set to do a preliminary hygienic manicure. Includes nail files, including hard 220–240 grit, manicure tongs, cuticle remover, spatula, orange stick, buff, pusher, brush for removing dust from nails.
- Primer is a nail degreasing agent.
- Shellac – base, color and top coat.
- Wipes that do not leave lint.
- A special product for removing the sticky layer.
- Products intended for disinfection.
- Ultraviolet lamp with a power of at least 36 W.
- Soaking liquid.
- Foil and sponges.
When choosing materials and tools, it is advisable to give preference to the most well-known and trusted manufacturers, so that the result does not become a disappointment.
If you are going to do a manicure followed by a nail design, you will need at least two or three color coats. Also select decorative elements in advance: sparkles, stones and other nail art details.
If the final decoration of the manicure is planned to be done with a pattern, consider the combination of colors.
It is better not to combine warm and cold tones, and a delicate, almost transparent coating should not be supplemented with thick varnish.
Stage 2. Preparing the nail plate for coating
Next, you need to prepare your nails for a manicure with gel polish. This stage is very important, since it determines how well the adhesion of the natural nail and the artificial coating will occur. To carry out proper preparation, we will need the following materials:
- buff;
- brush or brush for removing dust;
- lint-free wipes;
- 2 in 1 liquid: degreaser and sticky layer remover - this product removes natural deposits (grease and dust) from the surface of the nail plate, thereby preparing the plate for better adhesion to the artificial material;
- dehydrator (nail-prep) - deeply dries the nail plate and removes excess moisture from it. A dehydrator is a must for people with oily skin and prone to excessive sweating, since usually the structure of their nails is damp and oily, which impairs adhesion to artificial turf;
- primer - translated as “primer”. There are acid-free and acidic primers.
The acid-free primer acts as double-sided tape and ensures strong adhesion of the natural nail to the artificial nail.
The acid primer lifts the keratin scales of the nail plate for better adhesion to the artificial material. Since the acid primer contains aggressive components, you must be careful not to get it on the skin and cause a burn. It is recommended to use it before extensions for girls with wet or oily nail texture.
What do we do at this stage?
- We treat the surface of the nail plate with a buff to lift the scales of the nail plate and improve adhesion.
- Remove dust with a special brush.
- Apply degreaser to a lint-free cloth and wipe your nails. If you want to make the process as comfortable as possible, we recommend using liquids without chemical fragrances, such as ParisNail liquids. They have pleasant aromas and 100% rid the nail plates of germs, grease and dirt, thus guaranteeing long-lasting wear of the coating.
- If you have oily skin, then to improve adhesion, apply a dehydrator to the entire surface of the nail and air dry for a minute.
- Then you need to apply primer to the free edge of the nail. The free edge is one of the most vulnerable places, and thanks to the primer, the adhesion between the nail plate and the artificial material improves, which contributes to longer wear of the coating. We also air dry the primer for one minute.
Top 6 myths about shellac
At the stage of introduction to the masses, this or that technology from the industry acquires a huge number of illogical, and sometimes very plausible myths. Applying shellac is probably a record holder in this regard. They didn’t invent anything, as long as they didn’t scare them. Today you can hardly meet a girl who has not tried this manicure technique on herself. And even now there are myths that require debunking:
- Applying shellac spoils your nails, they begin to flake and break.
This only happens if you do your manicure incorrectly, missing some steps. And if the coating is removed without preliminary softening, simply tearing it off along with the top layer of the plate, then the nails, of course, deteriorate.
- Shellac cannot be removed efficiently and safely at home on your own.
It is not true. The procedure for removing shellac is simple; you need to use a sufficient amount of nail polish remover and have 15 minutes of free time. This will be discussed further.
Preparing nails for shellac application
In order for the shellac coating to adhere well to the nails and last as long as possible, it is necessary to first prepare the plates. A hygienic manicure with gel polish consists of the usual procedures and a number of specific actions.
Cuticle treatment. The procedure is carried out in various ways, depending on how much the cuticle has grown. Before removing it, you need to make a softening bath, which will allow you to easily remove the skin. If it has not grown much, then just push it away with an orange stick. For heavily overgrown cuticles, it is better to use special oil or nail clippers.
Nail treatment. At this stage, it is necessary to give the nail plates an even shape and treat the surface with a buff for better adhesion to the coating. Using a special nail file, the surface is polished, which helps remove excess shine from the nails. Finally, you should clean your hands from dust using a brush.
Next, the nail plate is treated with a degreaser. This is an extremely important step in preparation for applying shellac. It is especially good to go over the sides of the nails with a degreaser.
After this, you should not touch your nails, otherwise the gel polish will have poor adhesion to the base. In extreme cases, the degreaser can be replaced with alcohol wipes, but this most often does not have a positive effect on the quality of the coating.
Types of manicure

There are several types of manicure: classic, European, hardware, hot and SPA manicure. But how to distinguish one type from another? In fact, it is not so difficult, because each has its own characteristics:
- Classic manicure is a fairly common type. In this case, the masters remove the cuticle and give the nails their shape. This manicure is also called “wet” due to the fact that during this procedure they often take a bath with warm or moderately hot water.
- European - this method of manicure is considered one of the most gentle and gentle. For the reason that masters do not use scissors to remove cuticles.
- Hardware manicure – this type is somewhat reminiscent of the European one. In this case, scissors are also not used. Cuticles are removed using a special device.
- Hot manicure - it is performed using special tools that steam the cuticle and also help restore and strengthen the nails.
- SPA manicure – this type consists of two stages: cleansing and moisturizing. The first stage involves nail preparation and peeling. Then they are moisturized and nourished with special products.
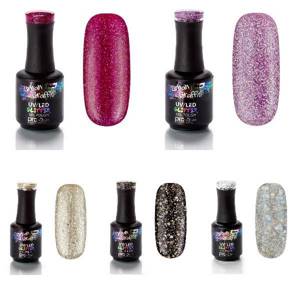
What is shellac?
Shellac is a new unique coating - a hybrid of nail polish and nail gel. The cosmetic product received its name in honor of the resin of the same name, which is famous for its durable properties. This product dries instantly as it polymerizes in the rays of an ultraviolet lamp.
For the first time, shellac was “released” in 12 shades, and as soon as it received the first approval, the palette expanded significantly.
This coating method is perfect for those with flaky, thin nails who, for whatever reason, do not want to extend acrylic or gel nails.
Benefits of shellac:
- Provides reliable, long-lasting coating on nails (4-5 weeks).
- Does not scratch and remains smooth until the very end of wear.
- Creates brighter colors than regular polishes.
- Strengthens the nail plate.
- Gives shine and does not fade.
- The composition is absolutely harmless.
- Can be applied at home.
The benefits and harms of shellac
Everyone knows the saying: forewarned is forearmed! We suggest studying the benefits and harms of shellac point by point and assess how much your nails need it.
The benefits of shellac
- Persistence. Having done a shellac manicure, you can forget about it for almost a month, which saves a lot of time and money.
- Accuracy. Since shellac hardens instantly in the lamp, damage to the coating is virtually impossible.
- Compound. Shellac does not contain formaldehyde, therefore it is considered a harmless cosmetic product.
- Strengthening. Let us make a reservation that this point is very conditional. Shellac will not strengthen your own nails, but it will help prevent brittleness and splitting while you wear the coating. It is not for nothing that the name is derived from the word Shell, which means “shell”.
- Availability. Shellac can be applied to your nails in almost any salon or done at home.
- Wide selection of shades. The shellac palette is constantly being replenished, which cannot but please fans of this coating.
The harm of shellac
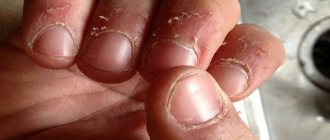
- Dehydration of the nail plate. After removing shellac, you may notice that your nails look dull and dry. They may even begin to break or peel. Manicurists advise periodically taking a break from using shellac.
- Application technique. If you are going to do a shellac manicure in a salon, the master must be fluent in the technique of working with it. It's not easy to master at home. You may not be able to apply shellac perfectly the first time.
- As they grow out, nails with shellac look untidy. Remove and renew the coating in a timely manner.
- If you have flexible and thin nails, shellac may peel off. There is also a risk of damaging the nail plate.
- Shellac is absolutely not suitable for nails affected by fungus.
- Shellac can give your nails a yellowish tint. Choose high-quality, proven shellac brands.

Shellac at home: step-by-step instructions
For beginners, following the instructions step by step will help you learn how to apply one color of shellac; when it works out well, the skill is established, you can try other designs.
Manicure with shellac is good both in one color and with various patterns.
Step-by-step instructions for applying shellac:
- Apply a base coat to protect the nail plate. In this case, you should follow the rules for applying the base so that the layer is not too thick: first the edges of the nail are painted, then the middle and the tip of the nail is sealed with the final touch. This way the layers will stick better. Moreover, this rule also applies to the application of other coatings. After applying the base, dry the nails in a UV lamp for 1 minute. The UV lamp should ideally have a power of 36 W, so you can dry all the nails in one go, which will significantly save time.
- The main coating is applied according to the same rules as the base one, only you no longer need to paint the ends. Try to keep the layer of shellac as thin as possible. Recommendation from the masters: before applying shellac, roll the bottle in your palms several times to better distribute the pigment.
- Next, dry the color layer in a lamp, the drying time will be 1-2 minutes. If the gel polish coating swells during drying, everything applied will have to be removed and the whole process will have to start all over again, with thorough degreasing.
- Apply a second coat of base to create a brighter, more saturated color. However, if you require a translucent effect for your manicure, then this step is not necessary. The second layer should be slightly thicker than the first.
- Dry the new layer in a UV lamp for 2 minutes.
- The last thickest layer is applied with a finishing or top coat. The layer also takes 2 minutes to dry.
The sticky layer formed on the coating is removed with a lint-free cloth and a professional product. It is not recommended to use alcohol for this; it can deprive the shellac coating of its shine and gloss.
Secrets of using shellac at home
To get beautiful shellac-coated nails at home, you need to consider some secrets available to professionals:
- To obtain the best coverage, it is recommended to apply the gel polish very thinly, but do not paint over the cuticle, otherwise the manicure will not look neat.
- To distribute the glitter evenly and beautifully on the nails, you need to mix them with a small amount of shellac, mix everything thoroughly and only then apply the glitter to the nail plate with a second layer.
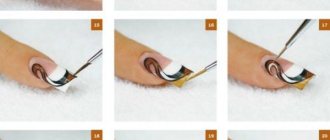
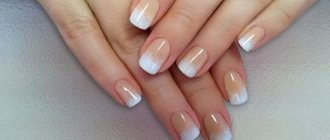
- For French manicure, it is not advisable to use a stencil, since after drying it cannot be removed, and when removed from a wet coating, the border will spread.
- When using shellac for nail extensions, there is no need to file off the entire nail plate, just sand it a little.
Shellac

SHELLAC. Shellac is a product for manicure and pedicure that combines the properties of modeling gel and nail polish. It's almost as long lasting as gel but doesn't damage your nails as much as it does.
WHAT IS SHELLAC MANICURE
The name “shellac” comes from the Shellac product produced by the CND/Creative brand. Other brands, in fact, do not produce shellac, but gel polishes with similar properties.
SHELLAC, GEL AND VARNISH: WHAT IS THE DIFFERENCE
The varnish does not last too long, it deteriorates easily, chips, and becomes dull. The gel requires filing, which injures the nail plate, and is inconvenient to remove at home.
Why is shellac better?
HOW TO DO A SHELLAC MANICURE
Having understood what shellac is, we move on to the application process itself. Each layer of shellac is polymerized in a UV or LED lamp. Shellac can be single-phase (nails are covered with one layer of colored varnish and dried), two-phase (first the base is applied, and then the colored varnish) and three-phase (the base coat is applied, then the colored varnish, and then the top coat).
The procedure for applying shellac is as follows:
1. Preparation of nails. They are filed and shaped. 2. Degreasing. If you don't do this carefully enough, the shellac will stick worse. 3. Sanding. Optional step. The nails are sanded so that villi appear on their surface and the shellac adheres to the nail plate more tightly. But often degreasing is sufficient for this purpose. 4. Applying base/color/top or all three, in turn. Each layer is fixed in a lamp. The fastening time varies from 25 to 120 seconds for each hand. Some masters attach each layer separately to each finger for 10-15 seconds. During the final coat, the edges of the nail are sealed (that is, the polish is applied along the edge) so that the manicure lasts longer. 5. Removing the sticky (dispersion) layer. It is removed using a cotton pad. Some types of gel polishes do not have a sticky layer, so this step is optional. 6. Applying oil to the cuticle and cream to the skin of the hands. What many people think is just part of the ritual is actually a necessity: the skin dries out in the lamp, it needs additional hydration.
The procedure for removing shellac goes like this: apply a special liquid containing acetone to the nails, wrap each finger in foil for 10-15 minutes, and then remove the exfoliated shellac mechanically using an orange stick or manicure tools.
IS IT HARMFUL TO DO SHELLAC?
Manufacturers of gel polishes unanimously assure that shellac and its analogues themselves do not spoil nails: they do not contain toluene, dibutylphthalan, formaldehyde or its resins. On the contrary, shellac is an opportunity to grow your nails; under the coating they do not flake or crack.
However, removing nail polish using aggressive means and then mechanically removing the residue does not bring any benefit to your nails. And under dark and bright shades, the nail may turn yellow.
In addition, the process of drying varnish, which occurs under a lamp, is of concern to scientists: they warn that drying devices can cause a carcinogenic effect. However, the connection between them and skin cancer has not yet been confirmed.
DO YOU NEED TO TAKE BREAKS?
When people didn’t know what shellac was and when it first appeared, it was positioned as a coating that could be worn constantly, without any interruptions. But in practice, many shellac users have become convinced of their necessity: polishing and removing the coating can greatly thin the nail. This is especially true for those with thin and brittle nails.
SHELLAC: CONTRAINDICATIONS
There is only one direct contraindication for shellac: fungal nail diseases. Pregnancy is not a contraindication for shellac.
IS IT POSSIBLE TO MAKE SHELLAC AT HOME
Yes. To do this, you will need a UV lamp with a power of at least 36 W or an LED lamp, a manicure kit (cuticle tweezers or an orange stick to move it away, a file to shape it, a buff for polishing), means for degreasing the nail and removing shellac and the coating itself – alone or in a set with a base and top.
Common Mistakes
The coating will last longer if you take into account a number of common mistakes and do not repeat them.
Another useful article: What accessories to choose for a blue dress
Material peeling
To prevent shellac from chipping, flaking, or wrinkling, follow 4 rules:
- Prepare your nail plate carefully. Insufficient degreasing, neglect of the dehydration procedure, and the use of improvised means lead to shellac peeling.
- Know your limits. Do you want bright nails? Apply several thin layers of coating, rather than one thick one. It is unlikely that it will be possible to dry it sufficiently, which means that it will quickly wrinkle, sagging will form and chips will occur.
- Don't feel sorry for the top. Unlike shellac, you can apply it in a thick layer.
- Stick to drying times strictly. If you realize that you only have an hour to create a manicure, it is better to refuse shellac coating. Reducing the drying time leads to delamination of the material.
If you carefully followed all the rules and strictly followed the instructions, but the varnish still chipped, then the reason is in the characteristics of your body. You may have peeling nails. A nail file and vitamins will solve the problem.
You may be interested in: What to wear with a burgundy dress: choosing clothes and accessories
Neglecting the cuticle
Often, removing cuticles is long, tedious and sometimes even painful. But without this you won’t get a lasting manicure. Imagine, the nail is constantly growing, but the cuticle remains in place. By grabbing it when painting, you doom the coating to peeling off.
Carefully look at the composition of cuticle softeners. Give preference to bases based on fruit acids, avoiding alkaline ones. They do not leave a specific coating, which means they minimize the risk of coating damage.
Use of low-quality materials
It is difficult for beginners to decide which product is of high quality. I would like to buy inexpensive shellac and quickly start creating beautiful nails. This approach is wrong; you won’t be able to save money on cheap coatings. They damage the nail plate and are consumed 2 times faster.
Drawing on shellac
After applying the gel polish and drying it will leave a slightly sticky layer on the nails. If you are planning a drawing, there is no need to remove this layer, since it can provide the correct smooth brush strokes.
Take a kolinsky brush and a manicure dot with a tip. To get beautiful swirls and patterns, apply dots using dots. Then use a brush to pull the varnish away from the point in the direction you want.
Do not forget that shellac has a fairly liquid consistency; practical skills are required for the strokes to be clear and look beautiful.
Therefore, it’s a good idea to first practice drawing a design on plastic tips. Dry the completed drawing in a UV lamp and apply a finishing coat, then dry it for the last time.
What harm is possible?
How often should you get a gel polish manicure? Experts recommend taking breaks at intervals of two weeks to a month. In fact, the gel can become harmful only if the master is careless about his work and neglects the rules.
- If you apply gel polish frequently, the nail plate may dry out and begin to peel.
- A low-quality gel may adhere poorly to the nail, which will lead to its rapid destruction.
- In addition, gel polish can cause allergies, so it is better to do a test first.
How to remove gel polish?
Gel polishes stay on the nails for quite a long time, due to which it is not so easy to remove. In order to remove gel polish you will need: foil, gel polish remover, cotton pads and orange sticks or a pusher.
The first thing you need to do is cut the cotton pad into four parts, this will make it much more convenient to remove the gel polish. Then the cotton pad should be soaked properly in gel polish remover, put it on the nail and wrap the whole thing in foil. The foil will help the cotton pad stick better for as long as necessary. Soak your nails in the product for at least 10 minutes, this will help the gel polish to completely soften and subsequently be easier to remove.
After the required time has passed, the foil must be removed and the remnants of the soaked gel polish removed using a pusher.
This method of removing gel polish is quite effective, but not very safe for the body, because all the harmful substances contained in the nail polish remover will penetrate into your body within 10 minutes and thereby harm it.
As you can see, doing a shellac manicure at home is not at all difficult; in order to get a beautiful design, you don’t have to go to a salon. Now you know how to do a manicure with shellac at home and get a perfect and long-lasting coating that will last at least a week.
Adviсe
- Since the method is relatively new and not so simple compared to conventional varnishes , it is important to know some of the nuances of the technique of applying and wearing shellac. To ensure that the polish lasts for a long time and does not spoil your nails, follow these simple rules.
- Use only fresh varnishes , otherwise the old product will be applied in a thick, dense layer, creating air “pockets” that lead to rapid peeling.
- Use base, finish and color coatings from only one company. The same applies to the lamp.
- If you are doing a manicure , planning to immediately apply gel polish, do it “dry”. If you keep your nails in water before applying gel polish, the moisture will evaporate, which will lead to peeling.
- Don’t be lazy and apply colored varnish in 2-3 layers , but thinner ones. This will help avoid streaks and blurs.
- Carefully paint the edge of the nail plate with the finishing agent.
- Do not overuse shellac and take a break of 2-3 weeks.
- During the break , strengthen your nails using special baths and products, take vitamins (vitamins B, E and biotin are especially good).
- Don't be afraid to moisturize your nails with hand cream.
- Try not to come into contact with household chemicals , washing powders and alcohol-containing products (at least without gloves).
- Immediately after application , do not wash your hands with hot water and do not start general cleaning.
Diseases of the body
If your endocrine digestive or excretory system is affected, then extensions or coating with any composition are not recommended. If these systems are damaged, the nails may become brittle and thin and cannot withstand the weight of the coating.
Before you go for extensions, consider all these tips and tricks. Then, you won’t have to overpay the master and waste time. This is an expensive and time-consuming procedure, so it is better to take care in advance that the coating lasts as long as possible.
Manicure that is now in fashion
Designers and stylists attach great importance to manicure; they build on past trends and create something that will be relevant in the coming year or season. They are the ones who tell us what will be fashionable not only in clothes and hairstyles, but even in such little things as nail design.
What kind of manicure is in fashion? At the moment, a simple, neat and laconic manicure is relevant, suitable for both everyday life and holidays. Monochromatic coating is gaining popularity. But you have to be careful with bright red and black manicure, which is not always suitable for an everyday look.
Not a season is complete without a practical and already traditional French and lunar manicure. They are always relevant. These two types go well together and allow you to create original variations.
How is this a combined manicure?
Combined manicure is a fashion trend that usually combines two techniques and is complemented by SPA care. The main goal is beautiful, well-groomed hands and attractive nail design. Quite often, craftsmen combine hardware and edged, Brazilian, unedged European techniques. There are plenty of combination options.
Interesting materials:
How much do teachers earn in New Zealand? How much do teachers earn in different countries of the world? How much do they earn in a bank in Moscow? How much do they earn at DNS in Moscow? How much do they earn in Yandex taxi comfort? How much do they earn at Oriflame? How much do they earn in telegram? How much do acrobats earn in the circus? How much do Yandex Taxi drivers earn in Moscow? How much do ambulance drivers earn in Moscow?
Reviews
Zhenya: I tried to make shellac immediately after it appeared in our stores. I love new cosmetics)) At first I went to the salon two or three times. I wore it for about a month, and the varnish withstood all the tests and in the end remained just as shiny.
After such a successful experience, I purchased equipment for myself and decided to make it myself. Well, I want to say, it didn’t work out right away. First, after three days, a couple of nails peeled off at once, I was already upset that I bought a lamp. But I read the instructions and advice, realized my mistakes and the next time it turned out just right) I’ve been practicing home application for 4 years now and have collected a considerable collection of varnishes).
Alina: I don’t really like it, I prefer to build it up. I tried shellac, everything was fine, but my nails were in bad condition after it. I spent a long time restoring it with baths and oils. But this is probably not for me, because I have always had thin and brittle nails.
Karina: And my nails grow very quickly) I just applied shellac, and in a week they have already grown so much that half of the nail is free, and half is with gel polish) I wear it like that, removing it after a week.
Julia: I’m very pleased that gel polish exists! If it weren't for him, I would have to get artificial nails, and I don't really like it... I don't have much free time to get my nails done at the salon every week, so shellac is perfect for me, which only needs to be reapplied once a month!
Precautionary measures
To avoid disappointment with this innovative coating, follow some precautions:
- Buy only certified products that have a registered trademark.
- When applying, be sure to “seal” the edge of the nail so that the polish lasts longer.
- At home, do the procedure in a well-ventilated area so as not to inhale fumes from the varnish.
- During pregnancy, approach this procedure with caution and do not overuse shellac.
Source of the article: https://mindal-nails.ru/lak/skolko-po-vremeni-delayut-shellak.html